Si es ingeniero de producto o profesional de adquisiciones y trabaja en el desarrollo de productos, ya sea para piezas de automóviles, dispositivos médicos, or industrial tools—prototype CNC machining is your go-to solution for turning design ideas into physical, modelos comprobables. A diferencia del mecanizado manual, CNC (Control numérico por computadora) utiliza código preprogramado para cortar y dar forma a materiales con una precisión inigualable, making it ideal for validating designs before mass production. Esta guía desglosa cada paso del proceso., key technical tips, ejemplos del mundo real, and data to help you get reliable prototypes efficiently.
1. What Is Prototype CNC Machining?
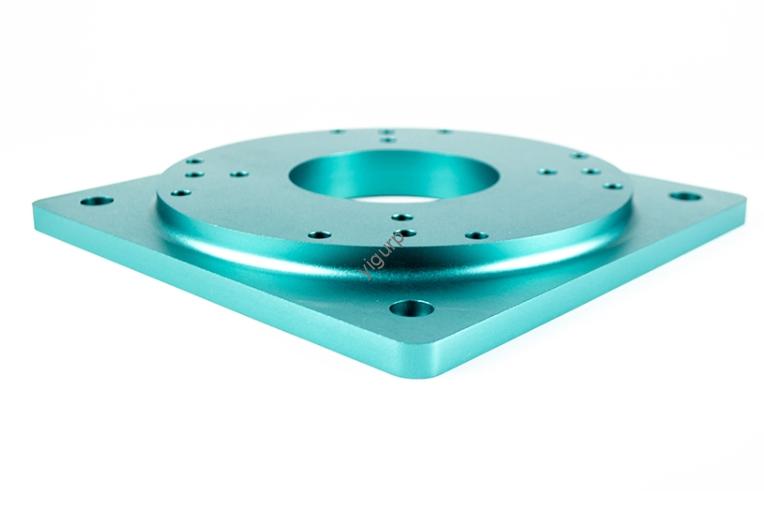
Primero, let’s clarify the basics: Prototype CNC machining is a manufacturing process that uses computer-controlled machine tools to create small-batch prototypes or low-volume parts. It works by following digital designs (3D models) cortar, esculpir, or mill raw materials—like aluminum alloys, plástica, or steel—into the exact shape of your product.
The core goal of this process is to:
- Test the form and fit of a design (p.ej., does a new gear fit with existing components?).
- Validate funcionalidad (p.ej., can a medical device part withstand repeated use?).
- Identify design flaws early (p.ej., weak spots in a bracket) to reduce costly changes later.
Why It Matters: A startup developing a portable power tool once used 3D printing for their first prototype. While the 3D-printed part looked right, it couldn’t handle the tool’s torque. Switching to prototype CNC machining with aluminum alloy gave them a functional prototype that revealed a need to strengthen the handle—saving them 3 months of rework in mass production.
2. Step-by-Step Prototype CNC Machining Process
The process has 5 etapas clave, each critical for ensuring your prototype meets design standards. Use the table in Stage 2.2 to match equipment to your project’s needs.
2.1 Diseño & Programación: Lay the Foundation
Before machining, you need a clear digital design and machine-readable code:
- 3Modelado D: Use CAD software (p.ej., SolidWorks, autocad) to create a detailed 3D model of your prototype. Include exact dimensions (p.ej., 100x50x5mm) y tolerancias (p.ej., ±0.05mm for precision parts).
- Programación CAM: Convert the 3D model to CNC code (código g) using CAM software (p.ej., cámara maestra, Fusión 360). This code tells the machine:
- El cutting path (where the tool moves).
- Velocidad (how fast the tool spins).
- Tasa de alimentación (how fast the tool moves through the material).
Para propina: Para piezas complejas (p.ej., a prototype with holes and slots), add “toolpath simulations” in your CAM software. This lets you spot errors (like a tool crashing into the material) before machining—saving time and material.
2.2 Equipment Selection: Choose the Right CNC Machine
Not all CNC machines work for every prototype. Pick one based on your part’s complexity and material:
| CNC Machine Type | Características clave | Mejor para |
| 3-Eje CNC | Se mueve a lo largo de X, Y, ejes Z; simple, rentable. | Basic prototypes (p.ej., flat brackets, recintos de plastico). |
| 4-Eje CNC | Adds rotation around one axis (A-axis); handles parts with curved features. | Parts like gears, carcasas cilíndricas. |
| 5-Eje CNC | Rotates around two axes (A y B); machines complex shapes from all angles. | Piezas de alta precisión (p.ej., componentes aeroespaciales, implantes medicos). |
2.3 Selección de materiales & Fixation
Choose a material that matches your final product (to test real-world performance) and secure it to the machine to avoid shifting.
2.3.1 Top Materials for Prototype CNC Machining
| Material | Propiedades clave | Mejor para |
| Aleación de aluminio (6061-T6) | Ligero (2.7 gramos/cm³), fácil de mecanizar, fuerte. | Piezas automotrices, carcasas de herramientas. |
| Plástico ABS | Bajo costo, resistente a impactos, good for low-stress parts. | Cajas electrónicas, consumer product prototypes. |
| Acero inoxidable (304) | Resistente a la corrosión, alta resistencia (515 Resistencia a la tracción MPa). | Dispositivos médicos, food-processing equipment. |
| policarbonato (ordenador personal) | Transparente, inastillable, a prueba de calor (hasta 135°C). | Visible parts (p.ej., cubiertas de pantalla, light fixtures). |
2.3.2 Material Fixation Tips
- Usar vacuum chucks for flat, thin materials (p.ej., 2mm PC sheets)—they hold the material evenly without leaving marks.
- Para materiales más gruesos (p.ej., 10mm aluminum blocks), usar soft-jaw clamps lined with rubber to prevent scratching.
2.4 Roughing & Refinamiento: Shape Your Prototype
These two stages turn raw material into a precise prototype:
| Stage | Tools Used | Key Parameters | Meta |
| Roughing | Large end mills (10-16mm de diámetro) | Cutting speed: 150-300 m/mi; Tasa de alimentación: 50-200 mm/min | Remove 70-90% of excess material quickly; leave 0.1-0.3mm for finishing. |
| Refinamiento | Small end mills (2-6mm de diámetro) | Cutting speed: 100-250 m/mi; Tasa de alimentación: 20-80 mm/min | Refine the part to meet exact dimensions and surface quality (Real academia de bellas artes 0.8-1.6 µm). |
Estudio de caso: A medical device company machining a stainless steel prototype skipped roughing and went straight to finishing. The small end mill took 4 hours to remove excess material and dulled halfway through—ruining the part. Adding roughing cut the total time to 1.5 hours and preserved the finishing tool.
2.5 Postprocesamiento & Inspección de calidad
Después del mecanizado, prepare the prototype for testing and verify its quality:
- Postprocesamiento:
- Desbarbado: Use a deburring tool or 400-grit sandpaper to remove sharp edges (prevents injury during testing).
- Cleaning: Wipe the part with isopropyl alcohol (para plásticos) or a degreaser (para metales) to remove cutting fluid.
- Tratamiento superficial (optional): Add anodization (para aluminio) o pintura (por estética) si es necesario.
- Inspección de calidad:
- Utilice un caliper to check dimensions (p.ej., diámetro del agujero, longitud).
- Utilice un coordinate measuring machine (MMC) for high-precision parts (ensures tolerance within ±0.01mm).
- Test functionality (p.ej., for a prototype hinge, check if it opens and closes smoothly 100 times).
3. Advantages of Prototype CNC Machining
Why choose this process over 3D printing or manual machining? Here are the top benefits, backed by data:
- Alta precisión & Repetibilidad: CNC machines achieve tolerances as tight as ±0.005mm—far better than manual machining (±0,1 mm). This means every prototype you make is identical, which is critical for testing consistency.
- Realistic Material Simulation: By using the same material as your final product (p.ej., aluminum for a car part), you get accurate feedback on how the part will perform in real use. 3impresión D, by contrast, often uses plastics that don’t match final material properties.
- Superior Surface Quality: Finishing stages produce smooth surfaces (Real academia de bellas artes 0.8 µm) that meet high aesthetic standards—important for consumer products or visible parts.
- Amplia gama de aplicaciones: As shown in the table below, it’s used across key industries:
| Industria | Common Prototype Uses |
| Automotor | Componentes del motor, paréntesis, partes interiores. |
| Médico | Surgical tool parts, implant prototypes, carcasas de dispositivos. |
| Diseño Industrial | Consumer product shells (p.ej., fundas de móvil), piezas de muebles. |
4. Limitaciones & How to Overcome Them
Mientras prototype CNC machining is powerful, it has challenges—here’s how to address them:
- Costo & Velocidad: Prototipos complejos (p.ej., 5-axis parts) can cost \(200-\)500 and take 3-5 días.
Solución: Para piezas simples, use 3-axis CNC (costos 30% less than 5-axis) and order small batches (1-5 regiones) to test designs before scaling.
- High Technical Requirements: Operating CNC machines and programming G-code needs skill.
Solución: Partner with a supplier (like Yigu Technology) that offers turnkey services—they handle design, programación, and machining for you.
- Material Limitations: Some materials (p.ej., soft rubbers) are hard to machine with CNC.
Solución: For flexible parts, combine CNC machining (for hard components) with 3D printing (for soft parts) to create hybrid prototypes.
Yigu Technology’s View on Prototype CNC Machining
En Yigu Tecnología, hemos apoyado 400+ clients in optimizing prototype CNC machining para automoción, médico, y proyectos industriales. We believe the biggest mistake teams make is overcomplicating designs—adding unnecessary features that increase cost and machining time. Our solution: A “design for CNC” review service—we help simplify your 3D model (p.ej., replacing complex curves with easier-to-machine shapes) without losing functionality. We also offer fast turnaround (2-3 days for 3-axis parts) and use high-precision CMM testing to ensure every prototype meets your specs. This cuts client R&D time by 25% on average.
Preguntas frecuentes
- How long does prototype CNC machining take?
It depends on complexity: A simple 3-axis plastic prototype (100x50x5mm) takes 1-2 días. A complex 5-axis stainless steel part takes 3-5 días (including design and inspection).
- Is prototype CNC machining more expensive than 3D printing?
Para pequeños, piezas simples (p.ej., a 50x50x5mm plastic bracket), 3D printing is cheaper (\(30-\)50 vs. \(80-\)120 for CNC). But for large, piezas de alta resistencia (p.ej., aluminum automotive components), CNC is more cost-effective—3D printing would require expensive high-performance resins, making it 2x pricier.
- Can prototype CNC machining make parts with internal features (p.ej., hollow channels)?
Yes—with 4-axis or 5-axis machines. Por ejemplo, we’ve machined aluminum prototype valves with internal flow channels (1mm de diámetro) using 5-axis CNC. Just ensure your 3D model clearly shows internal features, and use a supplier with experience in complex machining.