En el mundo de la fabricación., moldeo por inyección stands as a cornerstone for mass – produciendo alto – calidad, partes consistentes. Ya sea que esté fabricando pequeños componentes eléctricos o piezas automotrices duraderas, Comprender sus detalles técnicos puede ayudarle a reducir costos., evitar defectos, y elija el proceso adecuado para su proyecto. This guide breaks down the core technical aspects of injection molding—from how it works to special techniques and common challenges—with real – world examples to make complex concepts easy to grasp.
What Is Injection Molding? A Technical Breakdown
en su corazon, moldeo por inyección is a cyclic manufacturing process that turns molten materials (mostly plastics or elastomers) into solid parts using a custom mold. Here’s what makes it unique:
- It’s a alto – volume process: A single machine can produce hundreds of identical parts per hour, making it ideal for mass production (p.ej., 10,000+ plastic toy parts or automotive interior components).
- It relies on mold precision: The mold—usually made of steel or aluminum—dictates every detail of the final part, from shape to surface texture. Even a 0.1mm error in the mold can ruin thousands of parts.
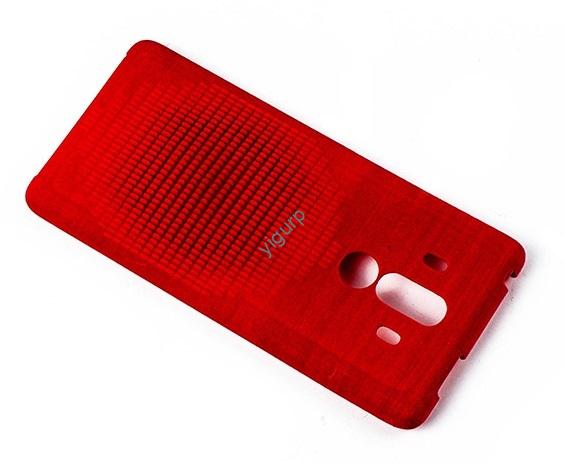
- It uses materiales termoplásticos: These materials melt when heated and harden when cooled, allowing them to be reused (a key eco – friendly feature). Common options include ABS (for phone cases), polipropileno (para contenedores de alimentos), and nylon (for durable gears).
Real – World Example
A consumer electronics brand uses injection molding to make 500,000 ABS phone cases monthly. By using a steel mold (which lasts 1 million+ cycles) and optimizing the process, they keep the cost per case under $0.50—far cheaper than 3D printing or machining.
The Technical Workflow of Injection Molding: 3 Key Stages
Injection molding follows a strict, repeatable sequence to ensure consistency. Each stage has technical parameters that must be controlled (p.ej., temperatura, presión) to avoid defects. Let’s break it down step by step:
Stage 1: Diseño de moldes & Fabricación
The mold is the most critical part of the process—bad mold design leads to bad parts. Here’s what goes into it:
- 3Modelado D: Engineers start with a detailed 3D CAD model of the part, following injection molding guidelines (p.ej., adding draft angles to help parts release from the mold).
- Selección de materiales: Molds are made of either acero (for high – volume production, lasts 100,000–1 million+ cycles) o aluminio (for low – volume runs, lasts 10,000–50,000 cycles, cheaper but less durable).
- Mecanizado CNC: The mold is cut into two halves using CNC mills or EDM (Mecanizado por descarga eléctrica) for precision—tolerances as tight as 0.005mm are common for high – end parts.
Common Mistake to Avoid: Skipping mold testing. Estados Unidos. toy company once rushed a mold into production without testing, conduciendo a 10,000 piezas defectuosas (with uneven walls) y un $50,000 loss. Testing the mold with a small batch first would have caught the issue.
Stage 2: Inyección & Enfriamiento
This is where the material turns into a part. Technical parameters here are make – o – break:
- Preparación de materiales: Raw plastic is fed into the machine as pellets. They’re heated in a barrel to 150–300°C (depending on the material—e.g., ABS melts at ~220°C, polypropylene at ~170°C) until molten.
- Presión de inyección: The molten plastic is pushed into the mold cavity at high pressure—1,000–25,000 psi (pounds per square inch). Higher pressure ensures the mold is fully filled, especially for complex parts.
- Tiempo de enfriamiento: The plastic cools and solidifies in the mold. Time varies by part thickness—e.g., a 2mm thick plastic spoon takes 10–15 seconds, while a 10mm thick automotive bracket takes 30–60 seconds. Cooling too fast causes warping; too slow wastes time.
Stage 3: Part Release & Postprocesamiento
Una vez enfriado, el molde se abre, and the part is ejected. Most parts need small fixes:
- Guarnición: Quitar el exceso de plástico (llamado "destello") from the mold’s parting line.
- Refinamiento: Surface treatments like sanding, cuadro, o enchapado (if the part needs a glossy or metallic look).
- Asamblea: For complex products (p.ej., a plastic toy), multiple injected parts are glued or snapped together.
Specialized Injection Molding Processes: When to Use Each
Standard injection molding works for most parts, but specialized processes solve unique problems—like combining two materials or making tiny components. Here’s a comparison of the most useful ones:
| Process Name | Cómo funciona | Key Technical Benefits | Aplicaciones ideales |
| Sobremoldeo | 1. Mold a base material (p.ej., hard plastic). 2. Inject a second material (p.ej., soft rubber) over it while the first is still warm. | Creates a strong bond between materials; no need for gluing. | cepillos de dientes (hard plastic handle + soft rubber grip), fundas de móvil (hard shell + soft edge). |
| Insertar moldura | 1. Place a pre – made insert (p.ej., metal screw) into the mold. 2. Inject plastic around it. | Adds strength (metal + plástico); eliminates assembly steps. | Plastic electrical connectors (with metal pins), bisagras para portátiles (plastic body + metal axle). |
| Metal Injection Molding (MIM) | 1. Mix fine metal powder (p.ej., acero inoxidable) with a polymer binder. 2. Inject into a mold, cool, then remove the binder (via heat or solvents) and sinter the metal. | Makes complex metal parts cheaper than machining; alta precisión. | herramientas medicas (tiny stainless steel components), watch gears. |
| Microinjection Molding | Uses specialized machines to inject tiny amounts of plastic (for parts weighing 0.1–1 gram). | Tolerances as tight as 0.001mm; perfect for miniaturized parts. | Microchips, hearing aid components, tiny sensors. |
| Gas – Assisted Injection Molding | Inject molten plastic, then push nitrogen gas into the mold—creates hollow sections inside the part. | Reduces material use (10–30% less plastic); prevents warping in thick parts. | Large plastic parts like chair armrests, automotive dashboards. |
Estudio de caso: Overmolding in Action
A baby product company wanted to make a sippy cup with a hard plastic body and soft silicone spout. Using overmolding, they:
- Molded the plastic cup body first.
- Injected silicone over the top edge while the plastic was still warm.
El resultado: A seamless bond between the two materials—no leaks, no need for assembly. They cut production time by 40% compared to gluing the spout on later.
Technical Advantages of Injection Molding
When done right, injection molding offers unmatched benefits for mass production. Here’s why manufacturers rely on it:
- High Production Speed: A single cycle takes 20–120 segundos (dependiendo del tamaño de la pieza). Por ejemplo, a machine making small plastic caps can produce 300+ caps per hour—enough for 7,200+ caps per day.
- Low Labor Costs: The process is fully automated. One operator can run 2–3 machines, reducing labor expenses by 50–70% compared to manual processes like hand – fundición.
- Calidad constante: CNC – controlled machines ensure every part is identical. A study of automotive injection molded parts found that the defect rate was under 0.5%—far lower than machining (which often has 2–3% defects).
- Versatilidad de materiales: Funciona con 100+ materiales, including plastics, elastomers, and even metal (via MIM). You can also mix colors or add additives (p.ej., UV blockers) to the plastic.
- Desperdicio mínimo: Unused plastic (destello, scraps) can be ground up and reused—most shops recycle 80–90% of their waste. This is a big improvement over CNC machining, which can waste 30–50% of the raw material.
Technical Challenges & How to Fix Them
Injection molding isn’t perfect—even small mistakes in parameters can cause defects. Here’s how to identify and solve common issues:
| Defect Name | Cause | Technical Fix |
| Sink Marks (dents on part surfaces) | Plastic shrinks too much during cooling (often from thick sections). | 1. Reduce part thickness in non – critical areas. 2. Increase cooling time. 3. Raise injection pressure to pack more plastic into the mold. |
| Flow Marks (streaks on the part) | Molten plastic cools too fast before filling the mold. | 1. Increase barrel temperature. 2. Speed up injection time. 3. Add a “gate” (entry point) closer to the problem area. |
| Weld Marks (lines where two plastic flows meet) | Plastic flows split around a feature (p.ej., a hole) and rejoin incompletely. | 1. Increase injection pressure to push the flows together harder. 2. Move the gate to reduce flow splits. 3. Use a material with better flow (p.ej., polypropylene instead of ABS). |
| Underinjection (part is incomplete) | Mold isn’t fully filled—caused by low pressure, low temperature, or a blocked gate. | 1. Increase injection pressure and temperature. 2. Clean the gate to remove debris. 3. Check if the mold is properly closed (a small gap can leak plastic). |
Ejemplo: Fixing Warping
A furniture manufacturer was making plastic chair legs that warped after cooling. The issue: The plastic cooled unevenly (thicker sections cooled slower than thin ones). The fix:
- Added cooling channels to the mold’s thicker areas to speed up cooling.
- Reduced the cooling time slightly (to prevent over – cooling the thin sections).
Warping dropped from 15% of parts to less than 1%.
Yigu Technology’s Perspective on Injection Molding
En Yigu Tecnología, we see moldeo por inyección as a bridge between design innovation and mass production. Its technical flexibility—from overmolding to microinjection—lets our clients turn complex ideas into affordable parts. We’ve helped clients optimize mold designs (p.ej., switching from aluminum to steel for high – volume runs) and fix defects (p.ej., eliminating sink marks with better cooling), cutting their production costs by 20–30%. As materials and machine tech advance, we expect injection molding to become even more accessible for small businesses, making it easier to compete in global markets.
Preguntas frecuentes
- What’s the difference between steel and aluminum molds for injection molding?
Steel molds are more durable (last 100,000–1 million+ cycles) and better for high – volume production (p.ej., 100,000+ regiones). They’re more expensive upfront (\(10,000–\)100,000+). Aluminum molds are cheaper (\(2,000–\)20,000) but only last 10,000–50,000 cycles—ideal for low – volume runs or prototyping.
- Can injection molding make parts with complex geometries (p.ej., internal holes or curves)?
Sí! As long as the mold is designed correctly. For internal holes, the mold will have “cores” (alfileres de metal) that create the holes. For curves, the mold is CNC – machined to match the 3D model. Just avoid “undercuts” (features that hook the part in the mold)—these make it hard to release the part. If you need undercuts, use a specialized mold with moving parts.
- How much does it cost to start injection molding for a new part?
Costs depend on mold size and material. A small aluminum mold for a simple part (p.ej., a plastic cap) costos \(2,000–\)5,000. A large steel mold for a complex part (p.ej., an automotive dashboard) can cost \(50,000–\)200,000+. Sin embargo, the cost per part drops with volume—for example, a part that costs \(2 to make in a 1,000 – part run might cost only \)0.20 in a 100,000 – part run.