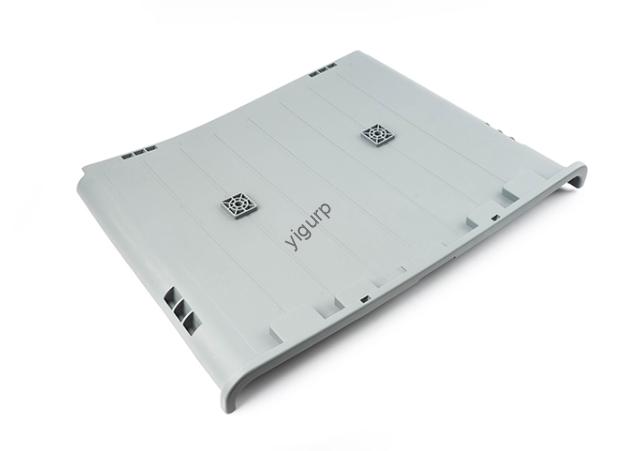
If you’re an engineer testing product designs or a buyer sourcing cost-effective prototypes, elFDM process 3D printed nylon prototype model is a game-changer. It blends speed, asequibilidad, and flexibility—making it ideal for industries from automotive to consumer goods. This guide breaks down everything you need to know, with real cases and hard data to help you make smart decisions.
1. What Is an FDM 3D Printed Nylon Prototype Model?
Primero, let’s clarify the basics.MDF (Modelado por deposición fundida) is a 3D printing technology that melts plastic filaments (like nylon) and deposits them layer by layer to build a model. When paired with nylon—a strong, durable material—the result is anylon prototype that can mimic final-product performance.
Nylon comes in several types, each suited to different needs. Below is a quick reference table:
| Nylon Type | Key Performance | Mejor para |
|---|---|---|
| PA6 | High rigidity, good impact resistance | Soportes automotrices, structural parts |
| PA11 | Excellent flexibility, resistencia química | Dispositivos médicos, flexible hoses |
| PA12 | Low water absorption, consistent dimensional stability | Cajas electrónicas, componentes aeroespaciales |
Ejemplo: A small automotive parts maker usedPA6 FDM prototypes to test engine mount designs. They cut testing time by 40% compared to traditional CNC machining, as they could print 3 versions in one week.
2. Step-by-Step Workflow for FDM Nylon Prototyping
Creating aFDM process 3D printed nylon prototype model is straightforward, but precision matters. Here’s the full workflow with key tips:
2.1 Modeling & Exporting
- 3D Model Design: Use software like SolidWorks or Fusion 360 to design your prototype. Focus on details that matter for testing—e.g., holes for assembly or edges for stress checks.
- Export STL Data: Save the model as an STL file (the standard for 3D printing). Double-check for errors (like missing faces) with tools like Meshlab—this avoids printing failures.
2.2 rebanar & Printing Preparation
- Import to Slicing Software: Use tools like Cura or Simplify3D. These let you adjust settings for nylon’s unique properties (it shrinks slightly when cooling!).
- Set Critical Parameters: Below are recommended settings for most nylon types (tested with a Creality Ender 3 V3 SE printer):
| Parameter | PA6 Setting | PA11 Setting | PA12 Setting |
|---|---|---|---|
| Altura de capa | 0.2milímetros | 0.25milímetros | 0.2milímetros |
| Fill Density | 70-80% | 50-60% | 75-85% |
| Printing Speed | 40-50 mm/s | 35-45 mm/s | 45-55 mm/s |
| Nozzle Temperature | 240-250°C | 230-240°C | 250-260°C |
| Bed Temperature | 70-80°C | 60-70°C | 80-90°C |
2.3 FDM Printing & Post-Treatment
- Load Nylon Material: Use dry nylon filament (la humedad provoca burbujas!). Store filaments in a dry box with < 10% humidity.
- Start Printing: Let the printer warm up fully before starting—this ensures even melting.
- Post-Treatment Steps:
- Remove supports with pliers (use soluble supports for complex models).
- Sand the surface with 200-400 grit sandpaper for a smooth finish.
- Optional: Apply a nylon sealant to boost water resistance.
3. Why Choose FDM Nylon Prototypes? Key Benefits with Data
ElFDM process 3D printed nylon prototype model stands out for three big reasons:
- Iteración rápida: Engineers at a consumer electronics firm reduced design cycles from 6 semanas (CNC) a 10 días (MDF). They printed 5 iterations of a phone case to test grip and durability.
- Ahorro de costos: Nylon filament costs ~$25/kg, while CNC-machined nylon blanks cost ~$50/kg. Para 10 prototipos, this cuts material costs by 50%.
- Personalización: A medical device company printed patient-specific knee brace prototypes. Each prototype was tailored to a patient’s MRI scan—something impossible with mass-produced parts.
4. Yigu Technology’s Perspective on FDM Nylon Prototypes
En Yigu Tecnología, we’ve supported over 500 clients in usingFDM process 3D printed nylon prototype models to speed up product development. We’ve found that PA12 is the most popular choice for electronics and aerospace clients, thanks to its stable dimensions. For automotive clients, PA6 works best for structural tests. We always advise clients to dry nylon filaments and test 1 small sample first—this avoids wasting time on faulty prints. Our team also offers post-treatment services to ensure prototypes meet exact surface finish requirements.
5. Preguntas frecuentes
Q1: How accurate are FDM nylon prototypes?
Most FDM printers have a dimensional accuracy of ±0.1mm for small parts (hasta 100 mm). Para piezas más grandes (200mm+), accuracy is ±0.2mm—enough for most prototyping needs.
Q2: Can FDM nylon prototypes be used for functional testing?
Sí! Nylon’s strength (resistencia a la tracción: 40-60 MPa) makes it suitable for load tests, impact tests, and even short-term use in low-stress applications (p.ej., temporary machine parts).
Q3: How much does an FDM nylon prototype cost?
For a small part (10x10x10mm), costs start at $5-$10. Partes más grandes (100x100x50mm) costo $20-$50, depending on fill density and post-treatment. This is 30-50% cheaper than SLA (Estereolitografía) prototipos.
