Introducción: The Power of Plastic
Look around you. El dispositivo en el que estás leyendo esto, las piezas de tu coche, los recipientes de su cocina; muchos de ellos comenzaron como una pieza de plástico moldeada a medida. Este proceso de fabricación es el motor oculto detrás del desarrollo de productos modernos., convertir diseños digitales en reales, piezas de trabajo a gran escala. It’s the bridge between a great idea and a product ready for the market.
Para ingenieros, diseñadores, y dueños de negocios, understanding this process isn’t just helpful; it’s essential for creating successful, asequible, and reliable products. This guide serves as your complete roadmap, walking you through the entire journey from initial idea to final production.
What Are Custom Molded Parts?
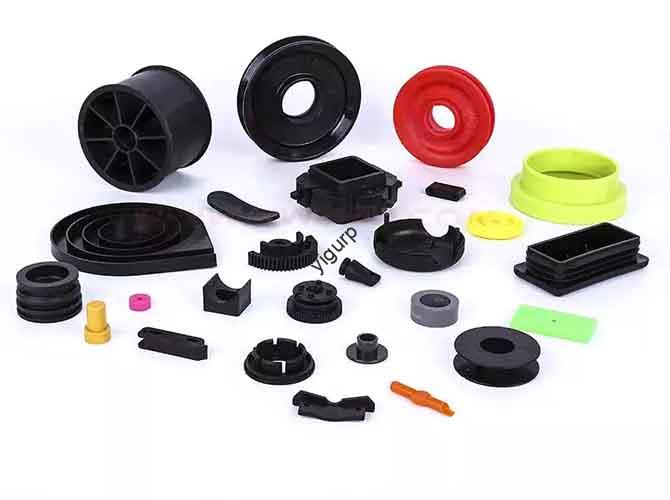
En pocas palabras, custom molded plastic parts are components created by shaping melted plastic material inside a specific, custom-built mold. This process is fundamentally different from using ready-made parts or other manufacturing methods. A diferencia del mecanizado CNC, que corta material de un bloque sólido, molding is a process that forms a part from raw material. Compared to 3D printing, which builds parts layer by layer and is ideal for one-time parts, molding is designed for repeatability and large-scale production. It allows for the creation of components that are precisely tailored to a product’s unique functional and visual requirements.
Why Choose Custom Molding?
Choosing the right manufacturing process is a critical decision. Custom molding offers a powerful combination of benefits that make it the preferred choice for a vast range of applications.
- Design Freedom and Complexity: Molding processes can produce incredibly detailed shapes, built-in features, and complex curves that would be impossible or extremely expensive to create with other methods.
- Cost-Effectiveness at Scale: While there is an initial investment in tooling, the per-unit cost of a molded part drops significantly as production volume increases. For runs of thousands or millions of parts, it is often the most economical choice.
- Material Variety and Performance: The world of polymers is vast. Custom molding gives you access to thousands of plastic materials, each with specific properties, from extreme durability and chemical resistance to optical clarity and rubber-like flexibility.
- Consistencia y repetibilidad: A well-made mold produces parts with extremely high accuracy and consistency from the first part to the millionth. This ensures every part meets the same quality standards, which is critical for assembly and product performance.
Understanding Custom Molding
To effectively manage a project, it’s crucial to understand the fundamental workflow. The custom molding process is a step-by-step journey where each stage builds upon the last. Mistakes in early stages can lead to significant delays and cost overruns later. Aquí, we simplify the entire process, providing a clear roadmap from start to finish.
The End-to-End Workflow
We view the custom molding process as a six-stage journey. Visualizing this flow helps you anticipate needs, allocate resources, and communicate effectively with your manufacturing partner.
1. Initial Concept and Design: This is the beginning of your part. It starts with an idea, which is then translated into a 3D CAD (Diseño asistido por computadora) modelo. This digital blueprint defines the part’s shape, características, y dimensiones.
2. Selección de materiales: Based on the part’s intended application, requisitos de desempeño, y presupuesto, the appropriate plastic material is chosen. This decision impacts everything from strength to appearance.
3. Moho (Estampación) Design and Creation: This is the most critical and expensive phase. A specialized toolmaker designs and builds the mold, usually from steel or aluminum. The quality of this tool determines the quality of every part it produces.
4. Prototyping and Testing: Before committing to mass production, initial parts (first samples) are produced to validate the design, material, and mold function. This is the opportunity to test form, adaptar, and function.
5. Mass Production: Once the prototype is approved, the full production run begins. The molding machine is set up for continuous, automated operation to produce the required quantity of parts.
6. Quality Control and Finishing: Throughout and after production, parts are inspected to ensure they meet specifications. Operaciones secundarias, such as assembly, decorating, or special packaging, are also performed in this stage.
The Heart of the Process
El “moho,” también conocido como “estampación,” is the heart of the custom molding process. It is a precision-machined metal block, typically made of steel or aluminum, that contains a cavity in the shape of the part you want to create. Melted plastic is forced into this cavity, cools, and solidifies, taking on the exact shape of the mold.
This tooling represents the most significant upfront investment in any molding project. Its design and construction are essential to success. Key considerations include:
- Material: Molds are typically made from hardened steel or aluminum. Steel molds are more durable and have a much longer lifespan, capable of producing millions of parts. They are the standard for high-volume production. Aluminum molds are less expensive and faster to produce but have a shorter operational life, making them suitable for prototyping or low-volume runs.
- Cavities: A mold can be designed with a single cavity, producing one part per cycle, or multiple cavities, producing several identical parts simultaneously. Multi-cavity molds increase production output but also increase the complexity and cost of the tool.
- Complejidad: The intricacy of your part design directly influences the mold’s complexity. Features like undercuts, trapos, or fine textures require more sophisticated mold mechanics, such as side-actions or lifters, which adds to the cost and lead time of the tool.
Diseño para la fabricabilidad (DFM)
Diseño para la fabricabilidad (DFM) is not just a buzzword; it is the single most important practice for ensuring a successful custom molded plastic part. It is the practice of designing a component in a way that makes it as easy and efficient to manufacture as possible, while still meeting all its functional and visual goals. Ignoring DFM is a direct path to costly redesigns, herramientas rotas, poor part quality, and catastrophic budget overruns.
What is DFM?
DFM is a proactive engineering practice. It involves analyzing a CAD model from the perspective of the manufacturing process—in this case, moldura de plastico. The goal is to identify and correct potential issues before a single piece of steel is cut for the mold. A part that looks perfect on a computer screen may be physically impossible to mold or may result in weak, warped, or visually flawed final products. DFM bridges this gap between the digital design and the physical reality of manufacturing. It is a collaborative process between the product designer and the molding expert that is absolutely essential for a smooth production launch.
Key DFM Principles
Several core principles govern good design for plastic molding. Entendiendo el “por qué” behind each one empowers you to create more robust and manufacturable designs from the start.
- Wall Thickness: This is arguably the most critical DFM principle. Walls should be as uniform in thickness as possible. Thick sections cool slower than thin sections, causing the material to shrink at different rates. This differential shrinkage creates internal stresses that lead to visual defects like sink marks (depressions on the surface) and functional problems like warping.
- ángulos de tiro: For a part to be cleanly removed from the mold, its vertical walls must be slightly angled. This taper is called a draft angle. sin eso, the part would scrape against the mold surface during removal, causing drag marks and potentially damaging both the part and the tool. A minimum of 1-2 degrees of draft is a standard rule of thumb.
- Radii and Corners: Sharp internal corners concentrate stress, creating weak points in the part that are prone to cracking. They also restrict the flow of melted plastic. By adding a smooth, rounded radius to both internal and external corners, stress is distributed more evenly, material flows more smoothly, and the part becomes significantly stronger.
- Undercuts: An undercut is any feature that prevents the part from being removed directly from the mold, such as a side hole or a snap-fit latch. These features require complex, moving parts in the mold called side-actions or lifters. While achievable, undercuts dramatically increase the cost, complejidad, and maintenance of the tooling. A key part of DFM is to re-evaluate if an undercut is truly necessary or if the design can be modified to achieve the same function without it.
- Bosses and Ribs: Ribs are thin, wall-like features used to add strength and stiffness to a part without adding thick, problematic walls. Bosses are cylindrical protrusions used for mounting or as alignment points for screws. Both must be designed carefully to avoid causing sink marks on the opposite surface. A common guideline is that the thickness of a rib or the wall of a boss should be approximately 60% of the main wall it is attached to.
Practical DFM Checklist
To help you avoid common pitfalls, we’ve compiled a practical checklist that translates these principles into actionable solutions. Reviewing your design against this table can save you weeks of delays and thousands of dollars in tooling modifications.
| Common Mistake / Pitfall | Best Practice / Solución |
| Non-uniform wall thickness | Aim for uniformity. If thickness must vary, transition gradually between sections. |
| Zero or insufficient draft angle | Apply a minimum of 1-2 degrees of draft on all surfaces parallel to the mold opening. |
| Sharp internal corners | Add a radius that is at least 0.5x the wall thickness to all internal corners. |
| Complex undercuts in the design | Re-evaluate the design. Can the feature be achieved differently to avoid an undercut? |
| Placing ribs or bosses incorrectly | Follow the 60% rule: Rib thickness should be ~60% of the wall it’s attached to. |
| Tall, unsupported features | Add gussets or supporting ribs to increase stability and prevent warping. |
| Texturing on a vertical wall | Ensure a sufficient draft angle (add 1 degree per 0.001″ of texture depth) to prevent scraping. |
Choosing the Right Material
Selecting the right plastic material is as critical as the part design itself. The material you choose determines the final part’s mechanical performance, apariencia, lifespan, y costo. With thousands of available polymers and blends, making the right choice can seem overwhelming. Sin embargo, by systematically evaluating your application’s requirements, you can narrow down the options to find the perfect fit. This decision-making process balances performance, procesabilidad, and price.
Factors to Consider
Before diving into specific materials, define the critical requirements for your part. This framework will guide your selection process.
- Propiedades mecánicas: What are the physical demands on the part? Consider its need for strength (de tensión), rigidez (módulo de flexión), resistencia al impacto, and hardness.
- Resistencia ambiental: Where will the part be used? It may need to withstand UV radiation from sunlight, exposure to specific chemicals, or high humidity and moisture absorption.
- Propiedades térmicas: What is the operating temperature range? The material must maintain its structural integrity and performance at the lowest and highest temperatures it will experience.
- Regulatory Requirements: Does the part need to meet specific industry standards? This includes certifications for medical use (FDA, USP Clase VI), electrónica (UL flame ratings), or environmental compliance (RoHS).
- Visual Appeal: What is the desired look and feel? This includes color (custom matching), transparencia (from crystal clear to opaque), y acabado superficial (from high gloss to textured).
- Costo: Material prices vary widely, from low-cost commodity plastics to high-performance engineering materials. The price per kilogram or pound is a major factor in the final per-part cost.
A Comparative Guide
To simplify the selection process, we’ve compiled a guide to some of the most common plastics used in custom molding. This table provides a high-level overview to help you start the conversation with your manufacturing partner.
| Material | Casos de uso comunes | Características clave | Relative Cost |
| ABS | Electrónica de consumo, Lego bricks, juguetes | Good impact strength, rigidez, fácil de procesar, good visual appeal | Low to Medium |
| polipropileno (PÁGINAS) | Embalaje, living hinges, automotor | Excelente resistencia química, flexible, bajo costo, ligero | Bajo |
| policarbonato (ordenador personal) | Eyewear lenses, escudos de seguridad, CDs | Alta resistencia al impacto, transparente, resistencia a altas temperaturas | Medium to High |
| Nylon (Pensilvania 6/6) | Engranajes, aspectos, partes estructurales | Alta resistencia, buena resistencia al desgaste, alto punto de fusión | Medio |
| PEAD | Bottles, tablas de cortar, contenedores | Excelente resistencia química, baja fricción, impact resistant | Bajo |
| TPE/TPU | Puños, sellos, overmolded parts | Flexibilidad similar al caucho, good grip, durable, good abrasion resistance | Medium to High |
| Acetal (POM) | Bujes, clips, piezas del sistema de combustible | Alta rigidez, baja fricción (self-lubricating), excellent dimensional stability | Medio |
| Acrílico (PMMA) | Light pipes, lentes, muestra | Excellent optical clarity, Estabilidad UV, scratch resistant, frágil | Medio |
Molding Techniques Explained
While injection molding is the most common method, it’s not the only option. The shape and scale of your project will determine the best molding technique. Understanding the primary types of custom molding gives you the vocabulary to discuss options with a manufacturing partner and ensures your part is made using the most efficient and effective process.
Moldeo por inyección
Injection molding is the workhorse of the high-volume plastics industry. It’s known for its precision, velocidad, and ability to produce complex parts.
- How it Works: Plastic pellets are melted and then injected under extremely high pressure into a closed, temperature-controlled mold. The plastic fills the cavity, cools, solidifica, and the finished part is removed. The process then repeats automatically.
- Ventajas: This method offers very fast cycle times (seconds to minutes), exceptional dimensional accuracy, and a low per-part cost once production is scaled up. It’s also excellent for producing parts with intricate details and fine surface finishes.
- Mejor para: High-volume production of solid parts, como cajas electrónicas, componentes automotrices, dispositivos médicos, carcasas de productos de consumo, engranajes, and knobs.
Moldeo por soplado
If your part is hollow, blow molding is likely the right process. It is the method used to create billions of bottles and containers every year.
- How it Works: The process begins by forming a hollow tube of heated plastic, called a parison. This parison is placed inside a two-part mold, which closes around it. Air is then blown into the parison, inflating it like a balloon until it presses against the mold walls and takes its shape.
- Ventajas: Blow molding is a highly efficient and cost-effective way to produce thin-walled, piezas huecas. The tooling is generally less complex than for injection molding.
- Mejor para: Bottles, fluid tanks, conductos, and other hollow containers where uniform wall thickness is a key requirement.
Rotational Molding
For very large, complejo, and durable hollow parts, rotational molding (or rotomolding) es la solución ideal.
- How it Works: A pre-measured amount of plastic powder is loaded into a hollow mold. The mold is then heated in a large oven while being rotated slowly on two perpendicular axes. The melting plastic tumbles and coats the entire inner surface of the mold, building up a uniform wall thickness. The mold is then cooled while still rotating, and the finished part is removed.
- Ventajas: Rotomolding can create very large, sin costura, and stress-free parts with excellent durability. Tooling costs are significantly lower than for injection or blow molding, making it economical for lower production volumes.
- Mejor para: Large storage tanks, kayaks, playground equipment, coolers, and complex hollow industrial components.
Prototyping and Testing
The prototyping stage is your final and most important reality check before committing tens of thousands of dollars to production tooling. It is the crucial step where you validate your vision and catch errors that are inexpensive to fix in a prototype but catastrophic to fix in a hardened steel mold. We have seen countless projects saved by a thorough prototyping and validation phase.
Why Never Skip Prototyping
The primary goal of prototyping is to test form, adaptar, and function. It’s your chance to hold a physical representation of your design and answer critical questions before it’s too late. Common rapid prototyping methods include 3D Printing (SLA, SLS, MDF), Mecanizado CNC, and Urethane Casting. While these methods don’t perfectly replicate a molded part’s properties, they are invaluable for design validation. A part that looks perfect on screen might feel flimsy or awkward in your hand. You might discover an unexpected assembly issue only when you have a physical part to test. Prototyping turns these “what-ifs” into certainties.
A Prototype Validation Checklist
Once you have a prototype in hand, conduct a rigorous evaluation. Use this checklist as a guide to ensure you cover all critical aspects.
1. Form and Ergonomics: Does the part look and feel right? Is it comfortable and intuitive to hold and use? Assess its weight, balance, and texture. This is often the first moment you experience the true user interaction with your product.
2. Fit and Assembly: Does the prototype connect correctly with all other components in the assembly? Check clearances, alignments, y tolerancias. Attempt to assemble and disassemble the product multiple times to identify any interference or difficulties.
3. Pruebas funcionales: Put the prototype through its paces. Does it perform its intended function under simulated real-world conditions? Test for strength by applying pressure, check flexibility, and verify that any moving parts or mechanisms work as designed.
4. DFM Review: Use the physical part to re-examine your design for manufacturability. Look for areas that may be prone to sink marks, pandeo, or other molding defects. Sometimes, holding a part reveals a thick section or sharp corner that was not obvious in the CAD model.
Conclusion: Your Partner
The journey of creating a custom molded plastic part is a complex but manageable process. It requires a blend of creative design, engineering discipline, and manufacturing expertise. Success depends on a few key pillars: a solid, manufacturable design (DFM), the selection of the correct material for the application, and choosing the right molding process for the part’s shape and volume.
From Concept to Reality
Navigating these stages can be challenging, but you don’t have to do it alone. While the process is intricate, a knowledgeable and experienced manufacturing partner can simplify it, guiding you past common pitfalls and ensuring your project is efficient, on-budget, and successful. They act as an extension of your team, providing the critical DFM feedback and material science knowledge needed to turn your vision into a high-quality, market-ready product.
Ready to turn your design into a high-quality custom molded plastic part? Contact our team of experts today to discuss your project.