En el desarrollo de productos, ya sea para la automoción, aeroespacial, or consumer goods—CNC bending prototype processing is a critical method for turning flat metal or plastic pipes/tubes into custom-shaped prototypes. A diferencia del doblado manual, que depende de la habilidad humana y a menudo conduce a inconsistencias, El doblado CNC utiliza control por computadora para garantizar la precisión, repetibilidad, y resultados de alta calidad. This guide breaks down every key stage of the process, shares practical examples, and provides data to help you avoid common pitfalls and create reliable prototypes.
1. Diseño & Programación: The Blueprint for Successful Bending
The first step inCNC bending prototype processing is creating a detailed design and translating it into machine-readable code. This phase sets the foundation for accuracy—skip or rush it, and you’ll likely face costly reworks.
Key Steps in Design & Programación:
- 3D Model Creation: Engineers use professional programas CAD (such as SolidWorks, autocad, or Inventor) to design the prototype’s shape, including pipe/tube dimensions (longitud, diámetro), bending angles (p.ej., 90°, 45°), and bend positions. Por ejemplo, a team developing an automotive fuel line prototype would map every bend in the line to ensure it fits within the engine bay.
- G-Code Generation: Once the design is final, CAM software (like Mastercam or BobCAD-CAM) converts the 3D model into código g—the language CNC machines understand. This code includes critical instructions: bend sequence, bend radius, fuerza de sujeción, and machine speed.
Real-World Mistake to Avoid: A furniture manufacturer once skipped optimizing the bend sequence in their G-code. The CNC machine bent a metal tube in the wrong order, causing the tube to collide with the machine’s clamping device—ruining 10 piezas prototipo. After reordering the bends in the CAM software, they completed the next run with zero defects.
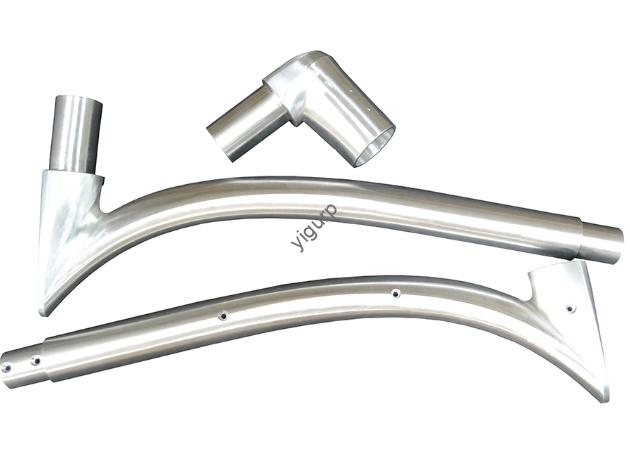
2. Preparación de materiales: Elegir & Prep the Right Pipe/Tube
Selecting the correct material and prepping it properly is essential for successful CNC bending. The wrong material or poor pre-treatment can lead to cracking, pandeo, or uneven bends.
Common Materials for CNC Bending Prototypes
| Tipo de material | Propiedades clave | Mejor para | Processing Difficulty | Rango de costos (per meter) |
|---|---|---|---|---|
| Aluminio (6061) | Ligero, resistente a la corrosión, easy to bend | Bienes de consumo (p.ej., marcos de sillas), HVAC parts | Bajo | $2–$5 |
| Acero inoxidable (304) | Fuerte, altamente resistente a la corrosión | Food equipment, dispositivos médicos | Medio | $5–$12 |
| Cobre | Excelente conductividad, maleable | Componentes electricos (p.ej., wiring tubes) | Bajo | $8–$15 |
| Plástico (CLORURO DE POLIVINILO) | Bajo costo, ligero, resistente a productos químicos | Plumbing prototypes, low-pressure tubes | Muy bajo | $1–$3 |
Pre-Treatment Steps:
- Corte: Use a pipe cutter or CNC saw to trim the raw material to the exact length needed for the prototype. Por ejemplo, if a prototype requires a 500mm-long aluminum tube, cutting it to 505mm (adding a small buffer) ensures you can trim it to size after bending.
- Limpieza de superficies: Remove oxides, aceite, or debris from the tube’s surface using a wire brush (for metal) or mild detergent (for plastic). Dirty surfaces can cause the CNC machine’s clamping device to slip—leading to inaccurate bends. A HVAC company once cleaned their copper tubes with acetone before bending, reducing slip-related errors by 70%.
- Desbarbado: Use a deburring tool to smooth sharp edges from the cut ends of the tube. This prevents injury during handling and ensures the tube fits into the CNC machine’s fixtures correctly.
3. Configuración de la máquina: Configure Tools for Precision Bending
Proper machine setup is where design meets execution. Even the best G-code won’t save a prototype if the CNC machine’s tools are mismatched or misaligned.
Critical Setup Steps:
- Moho & Anti-Wrinkle Block Selection: Choose a bending mold that matches the tube’s diameter and desired bend radius. Por ejemplo, a 20mm-diameter aluminum tube needs a mold with a 20mm inner radius to avoid flattening the tube. Pair the mold with an anti-wrinkle block—a tool that prevents the tube’s outer surface from wrinkling during bending. A bicycle manufacturer used the wrong anti-wrinkle block for a steel frame prototype, conduciendo a 80% of the tubes developing wrinkles. Switching to a block with a smaller gap fixed the issue.
- Fixture Alignment: Mount the mold and anti-wrinkle block on the CNC machine’s bed, then use a laser alignment tool to ensure they’re perfectly aligned with the tube’s path. Misaligned fixtures can cause the tube to bend at an angle 1–2° off target—enough to make the prototype unusable for tight-fitting applications.
- Clamping Force Adjustment: Set the machine’s clamping device to apply just enough force to hold the tube in place without crushing it. For aluminum tubes, this is typically 20–30 kN; para acero inoxidable, it’s 40–50 kN. A medical device maker applied too much clamping force to a thin copper tube, flattening its cross-section by 15%. Reducing the force to 25 kN solved the problem.
4. Test Run & Fine Machining: Avoid Full-Scale Failures
Before starting full prototype production, a test run is non-negotiable. It lets you catch errors early and adjust settings without wasting materials.
How to Conduct a Test Run:
- Low-Speed Bending: Load one test tube into the CNC machine and run the G-code at 50% of the planned speed. This gives you time to observe the bending process and spot issues like tube twisting or surface scratches.
- Inspect the Test Part: After bending, check the test tube’s key metrics:
- Bend Angle: Use a protractor or digital angle gauge to verify the angle is within ±0.5° of the design (the industry standard for prototypes).
- Precisión dimensional: Measure the distance between bends using calipers to ensure it matches the 3D model.
- Calidad de la superficie: Check for wrinkles, grietas, or scratches using a magnifying glass (10x magnification works well).
- Adjust & Retest: If the test part fails, troubleshoot the issue. Common fixes include:
- Increasing the anti-wrinkle block’s pressure to reduce wrinkles.
- Adjusting the G-code to change the bend sequence.
- Tightening the fixture alignment to fix angle errors.
Ejemplo: An aerospace supplier tested a titanium tube prototype for a jet engine. The first test run had a 2° off-angle bend. They realigned the mold using a laser tool and retested—this time, the angle was within ±0.3° of the design.
Fine Machining:
Once the test run is successful, start full prototype production. During machining:
- Assign an operator to monitor the CNC machine in real time. They should watch for unusual noises (which signal misalignment) or error messages (which indicate G-code issues).
- Pause the machine every 5–10 parts to spot-check for consistency. Even small drifts in clamping force can cause defects over time.
5. Postprocesamiento & Control de calidad: Finalize the Prototype
After bending, post-processing polishes the prototype and quality control ensures it meets industry standards.
Pasos de posprocesamiento:
- Guarnición: Use a CNC router or hacksaw to trim any excess material from the tube’s ends (remember the buffer length from material preparation?). A furniture maker trimmed their aluminum chair frame prototypes to remove 5mm of extra length, ensuring all frames were uniform.
- Pulido: Para prototipos metálicos, use a belt sander (with 200–400 grit sandpaper) para suavizar las imperfecciones de la superficie. For plastic prototypes, use a heat gun (set to low temperature) to melt small scratches.
- Revestimiento (Opcional): Apply a protective coating to improve durability. Por ejemplo:
- Anodize aluminum prototypes to prevent corrosion.
- Paint steel prototypes with heat-resistant paint for high-temperature applications.
Quality Control Checks:
- Inspección dimensional: Utilice un Máquina de medición de coordenadas (MMC) to scan the entire prototype. A CMM can measure 3D dimensions with ±0.001mm accuracy—critical for high-precision industries like aerospace.
- Pressure Testing: For fluid-carrying prototypes (p.ej., plumbing tubes), test them under pressure to ensure they don’t leak. The standard test is to apply 1.5x the prototype’s intended operating pressure for 30 minutos.
- Record Keeping: Document all processing parameters (G-code version, mold type, fuerza de sujeción) and inspection results. This creates a reference for future prototype runs and helps identify recurring issues.
Yigu Technology’s Perspective on CNC Bending Prototype Processing
En Yigu Tecnología, we seeCNC bending prototype processing as a bridge between design ideas and production-ready parts. Our team focuses on two priorities: material-machine matching (p.ej., using high-torque CNC machines for tough stainless steel) and iterative testing (we never skip test runs, even for simple prototypes). Por ejemplo, we helped a startup develop a PVC plumbing prototype—by optimizing the bend radius in the CAM software and using a custom anti-wrinkle block, we cut their defect rate from 30% a 5%. We believe this process isn’t just about making parts—it’s about helping clients launch better products faster, con menos desperdicio.
Preguntas frecuentes
1. How long does CNC bending prototype processing take?
It depends on the prototype’s complexity and material. A simple aluminum tube prototype (1–2 bends) takes 1–2 days (including design, configuración, e inspección). A complex stainless steel prototype (5+ enfermedad de buzo) may take 3–5 days. The test run and adjustment phase usually adds ½–1 day, but it’s worth it to avoid reworks.
2. Can CNC bending handle thick-walled tubes for heavy-duty prototypes?
Yes— but you need to adjust the machine settings. Thick-walled tubes (p.ej., 5mm+ wall thickness for steel) require higher clamping force (50–70 kN) and slower bending speeds (5–10 mm/s) to avoid cracking. We recommend using a CNC machine with a high-torque spindle for thick materials.
3. What’s the difference between CNC bending and manual bending for prototypes?
Manual bending is cheaper for 1–2 simple prototypes but lacks precision (tolerances are ±2–3°) y consistencia. CNC bending has higher upfront costs but offers ±0.5° tolerances, faster production for 5+ regiones, y repetibilidad (every prototype is identical). For most product development teams, CNC bending is better for testing fit, función, y escalabilidad.