Si alguna vez te has preguntado, “¿Puedo prensar plástico con calor??"La respuesta corta es yes—but it depends on the type of plastic and how you do it. El plástico prensado con calor es totalmente factible para proyectos como fundas de teléfonos personalizadas, bolsas de mano, o artículos promocionales, pero elige el plástico equivocado o altera la temperatura, and you’ll end up with warping, fusión, or a ruined design. En esta guía, we’ll break down everything you need to know to heat press plastic successfully, from choosing the right materials to troubleshooting common mistakes.
What Types of Plastic Can You Heat Press?
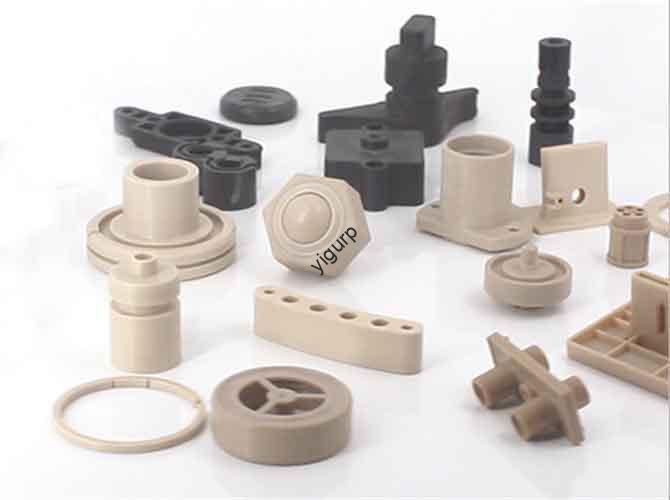
Not all plastics are created equal when it comes to heat pressing. The key factor is a plastic’s punto de fusión—you need a material that can handle the heat of your press (usually 250–400°F / 121–204°C) without deforming. Here’s a breakdown of the most common heat-press-friendly plastics and those to avoid:
| Plastic Type | Punto de fusión (°F) | Heat Press Compatibility | Best Uses |
| polipropileno (PÁGINAS) | 320–338 | Excelente | Tote bags, contenedores de comida, llaveros |
| Tereftalato de polietileno (PET/PETE) | 482 | Bien (use low heat) | Botellas de agua, clear cases, señalización |
| Acrilonitrilo Butadieno Estireno (ABS) | 221–257 | Justo (high risk of warping) | 3D printed parts, componentes de juguete |
| Cloruro de polivinilo (CLORURO DE POLIVINILO) | 176–212 | Pobre (releases toxic fumes when heated) | Avoid for heat pressing |
| Poliestireno (PD) | 212–248 | Pobre (melts easily) | Avoid for heat pressing |
Pro Tip from Experience: I once tried heat pressing a PVC keychain for a client—within 10 artículos de segunda clase, it started melting and releasing a strong, chemical smell. Stick to PP or PET for beginner projects; they’re more forgiving and safer.
Essential Tools for Heat Pressing Plastic
Before you start, make sure you have the right tools. Using the wrong equipment can ruin your plastic or design. Here’s what you’ll need:
- Heat Press Machine: A clamshell or swing-away press works best. Avoid using an iron—irons have uneven heat distribution, which leads to spotty results. Look for a press with adjustable temperature and pressure (most entry-level models cost \(150–)300).
- Heat-Resistant Mat: Place this under your plastic to protect your work surface and prevent heat transfer to unwanted areas.
- Teflon Sheet or Parchment Paper: Cover your design and plastic with this to stop sticking. Teflon sheets are reusable (better for frequent projects), while parchment paper is disposable (great for one-offs).
- Thermometer (Opcional): If your heat press’s temperature gauge is unreliable, use a digital thermometer to check the actual heat.
- Design Materials: For transfers, use heat-transfer vinyl (HTV) or sublimation paper. Make sure your design is sized correctly for your plastic item.
Step-by-Step Guide to Heat Pressing Plastic
Follow these steps to get a smooth, long-lasting design. I’ve used this process for over 50 plastic projects (from phone cases to gift tags) and rarely had issues—just take your time!
1. Prepare Your Plastic Item
- Clean the Surface: Wipe the plastic with a damp cloth and let it dry completely. Dirt or oil will stop the design from adhering.
- Check for Imperfections: Fix any scratches or dents with sandpaper (light grit, como 220) before pressing—they’ll show through your design.
- Pre-Press (Si es necesario): Some plastics (like PP) have moisture trapped inside. Pre-press for 5–10 seconds at 250°F to remove moisture—this prevents bubbling.
2. Prep Your Design
- Choose the Right Transfer Method:
- HTV: Best for solid colors and simple designs (p.ej., logotipos, texto). Cut the HTV with a vinyl cutter, then remove the excess (weeding).
- Sublimation: Great for full-color, photo-like designs. Use sublimation ink and paper—this works best on white or light-colored plastic (the ink dyes the plastic, so dark colors won’t show up).
- Position the Design: Use tape (low-tack painter’s tape works) to hold the design in place on the plastic. Double-check the alignment—once you press, you can’t reposition it!
3. Set Up Your Heat Press
- Temperature: Start with 275–300°F for PP and 300–325°F for PET. If the design doesn’t stick, increase by 10°F at a time (don’t go over 350°F—you’ll risk melting).
- Presión: Use medium pressure (your press’s gauge should read 3–4, or you should feel resistance when closing it). Too much pressure will warp thin plastic; too little, and the design won’t stick.
- Tiempo: Press for 15–30 seconds. Thin plastics (like phone case inserts) need 15 artículos de segunda clase; thicker items (like tote bag handles) need 30 artículos de segunda clase.
4. Press and Cool
- Press the Item: Close the heat press and set the timer. Don’t lift the press early—this can cause the design to peel.
- Cool Completely: After pressing, let the plastic cool for 1–2 minutes before removing the Teflon sheet or parchment paper. If you peel it while hot, the design might come off with it.
- Test Adhesion: Gently tug the edge of the design. If it lifts, re-press for 5–10 seconds at the same temperature.
Common Mistakes to Avoid When Heat Pressing Plastic
Even experienced crafters make mistakes—here are the ones I’ve learned to steer clear of, plus how to fix them:
- Mistake 1: Using the Wrong Temperature: If your plastic warps or melts, you used too much heat. Next time, lower the temperature by 20°F and test on a scrap piece first.
- Mistake 2: Skipping the Teflon Sheet: sin eso, your design will stick to the press. Always cover the plastic and design—even if you’re in a hurry.
- Mistake 3: Pressing Too Long: Over-pressing makes the plastic brittle. Set a timer and don’t leave the press unattended.
- Mistake 4: Not Weeding HTV Properly: Small pieces of excess vinyl will show up on your design. Use a weeding tool (like a hook) to remove every bit of unwanted vinyl.
How to Troubleshoot Heat Press Plastic Issues
Even with perfect prep, things can go wrong. Here’s how to fix the most common problems:
| Issue | Cause | Solución |
| Design Peels Off | Too little heat/pressure, or plastic was dirty | Clean the plastic, increase temperature by 10°F, and re-press for 10 artículos de segunda clase |
| Plastic Warps | Too much heat or pressure | Lower temperature by 20°F, reduce pressure, and use a heat-resistant mat |
| Bubbles in Design | Moisture in plastic or design wasn’t pressed evenly | Pre-press plastic for 10 artículos de segunda clase, smooth out the design before pressing, and use medium pressure |
Yigu Technology’s View on Heat Press Plastic
En Yigu Tecnología, we believe heat pressing plastic is a versatile, cost-effective way to create custom products—from brand merch to personal gifts. Sin embargo, success relies on two key factors: choosing the right plastic (we recommend PP for most projects, as it balances durability and heat resistance) and using reliable equipment. We’ve tested dozens of heat presses and found that models with precise temperature control (±5°F) yield the best results, as plastic is sensitive to small heat fluctuations. Además, we encourage sustainability—opt for recycled PP plastic when possible, as it works just as well as new plastic and reduces waste. With the right approach, heat pressing plastic can turn simple items into unique, piezas de alta calidad.
FAQ About Heat Press Plastic
- Can I heat press any plastic?
No—avoid PVC and polystyrene, as they melt easily or release toxic fumes. Stick to polypropylene (PÁGINAS) or polyethylene terephthalate (MASCOTA) for safe, good results.
- Do I need a special heat press for plastic?
No—any standard heat press (clamshell or swing-away) obras, as long as it has adjustable temperature and pressure. Irons are not recommended (uneven heat).
- How long do heat-pressed designs last on plastic?
With proper care (hand-washing for plastic items like cups), designs can last 1–3 years. HTV designs tend to last longer than sublimation designs on plastic.
- Can I heat press dark-colored plastic?
Sublimation won’t work (the ink can’t show up on dark colors), but HTV works great. Use white or light-colored HTV for the best contrast on dark plastic.
- Is heat pressing plastic safe?
Sí, if you use the right plastic (PP/PET) and work in a well-ventilated area. Never heat press PVC—it releases harmful chemicals when heated.