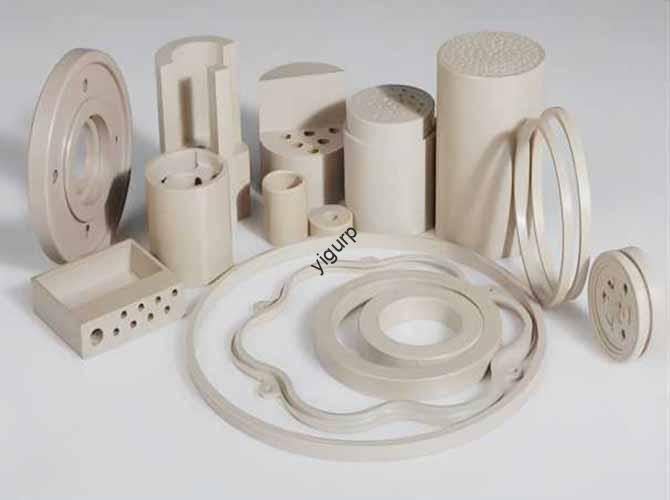
Ever found yourself stuck in product development—waiting weeks for a prototype, overspending on materials, or struggling to test complex designs? 3D printing solid prototypes are the solution. These physical, fully formed models transform how teams validate designs, reducir costos, and speed up time-to-market. Below, we break down their core benefits, real-world uses, step-by-step production, and how to avoid common pitfalls.
1. Core Benefits: Why 3D Printing Solid Prototypes Beat Traditional Methods
What makes 3D printing solid prototypes a game-changer? The table below compares them to traditional prototyping (Mecanizado CNC, manual making) to highlight clear advantages:
| Benefit Category | 3D Printing Solid Prototypes | Traditional Prototyping (CNC/Manual) |
| Production Speed | 1–3 days for complex designs (p.ej., piezas automotrices) | 2–4 weeks for the same complexity |
| Rentabilidad | 50–70% lower material waste; no tooling fees | 20–30% material waste; expensive tooling ($500+) |
| Flexibilidad de diseño | Handles internal cavities, fine details (0.1mm precision) | Struggles with intricate shapes; limitado por herramientas |
| Repetibilidad | Consistent results (±0.05mm tolerance) across batches | Variability from manual labor or tool wear |
| Small-Batch Suitability | Ideal for 1–100 units; no setup cost increases | Costly for small runs (tooling fees don’t scale) |
2. Aplicaciones clave: Solving Problems Across Industries
3D printing solid prototypes aren’t just for “testing”—they solve unique challenges in three critical sectors:
A. Diseño Industrial (Automotive/Aerospace)
Engineers need to validate part fit and function before mass production. Por ejemplo:
- An automotive team used 3D printing solid prototypes to test a new engine bracket design. Traditional CNC would have taken 3 weeks and \(2,000 in tooling—3D printing delivered 5 prototipos en 2 days for \)300 total.
- Resultado: They identified a stress point early, avoiding a $50,000 recall later.
B. Electrónica de Consumo
Brands prioritize ergonomics and user experience. A smartphone maker:
- Printed 10 solid prototypes of a new phone case (using SLA technology) to test grip and button placement.
- Used feedback to adjust the case’s curve—reducing user hand fatigue by 30% (per user testing).
do. Educación
Teachers struggle to make complex concepts tangible. A university:
- 3D printed solid prototypes of human bones and gear systems for engineering/biology classes.
- Student comprehension scores improved by 45% (vs. textbook-only learning), as students could touch and disassemble models.
3. Step-by-Step Production Process: How to Make a 3D Printed Solid Prototype
Creating a 3D printed solid prototype is straightforward—follow this linear, actionable workflow:
- 3Modelado D: Use software (SolidWorks, Fusión 360) to design a digital model. Focus on:
- Adding clear dimensions (p.ej., “100mm length, 5mm wall thickness”).
- Marking support structures for overhangs (angles >45° need support).
- Tech & Selección de materiales: Choose based on your needs:
| 3D Printing Tech | Mejor para | Materials Used |
| SLA (Estereolitografía) | Finos detalles (p.ej., joyas, electrónica) | Resinas (ABS-like, flexible) |
| MDF (Modelado por deposición fundida) | Durable parts (p.ej., paréntesis) | PLA, PETG, nylon |
| SLS (Sinterización selectiva por láser) | Heat-resistant parts (p.ej., componentes del motor) | Poliamida (nylon), glass-filled composites |
- Impresión & Postprocesamiento:
- Upload the model to the printer, set parameters (altura de capa: 0.1–0,2 mm), and start printing.
- Después de imprimir: Remove supports, sand the surface (for smoothness), and paint if needed (p.ej., for visual prototypes).
4. Common Pitfalls & How to Avoid Them
Even great 3D printing solid prototypes can fail—here’s how to fix top issues:
| Pitfall | Cause | Solución |
| Weak part structure | Thin walls (<1milímetros) or lack of support | Increase wall thickness to 1.5–2mm; add support for overhangs >45° |
| Rough surface finish | High layer height (>0.2milímetros) | Use 0.1mm layer height; sand with 400-grit sandpaper post-print |
| Dimensional inaccuracies | Printer calibration issues | Calibrate the printer’s bed level and filament flow before printing |
5. La perspectiva de la tecnología Yigu
En Yigu Tecnología, we see 3D printing solid prototypes as the backbone of fast, smart product development. We’ve helped clients cut prototyping time by 60% using our optimized SLA/FDM printers and high-performance materials (p.ej., heat-resistant resins for industrial parts). We also offer custom workflows—for example, a medical client used our SLS service to print biocompatible prototypes, accelerating their device’s FDA approval by 3 meses. For us, it’s not just about printing parts—it’s about helping you solve problems faster.
Preguntas frecuentes
- What’s the maximum size of a 3D printed solid prototype?
Most desktop printers handle up to 300x300x300mm. Para piezas más grandes (p.ej., parachoques automotrices), we use industrial printers (1000x1000x1000mm) or print in sections, then assemble.
- How long do 3D printed solid prototypes last?
Depende del material: PLA prototypes last 6–12 months (good for testing), while nylon/SLS prototypes last 2–3 years (suitable for long-term use).
- Can 3D printed solid prototypes be used for functional testing (p.ej., pruebas de estrés)?
Yes—choose durable materials like nylon or PETG. Por ejemplo, a nylon prototype can withstand 500+ cycles of bending (simulating real use) without breaking.
