If you work with mjf (Fusión de chorro múltiple) o SLS (Sinterización selectiva por láser) 3impresión D, sabes que la pieza impresa no es el producto final. El posprocesamiento es clave para desbloquear todo su potencial, ya sea que necesite una superficie lisa, mejor resistencia al agua, o conductividad eléctrica. This guide breaks down every critical post-processing step for MJF and SLS parts, con ejemplos del mundo real, datos, y consejos para resolver desafíos comunes.
1. Understanding MJF and SLS: Why Post-Processing Matters
Primero, let’s recap: both MJF and SLS are powder-based 3D printing technologies that use thermoplastics (like nylon PA12) or elastomers. A diferencia de FDM (Modelado por deposición fundida), they don’t need support structures—but their raw printed parts still have limitations:
- Rough surfaces from leftover powder
- Porosity that affects water tightness
- Limited color options (MJF prints gray; SLS prints white/gray)
- Basic mechanical properties (no conductivity or extra hardness)
Post-processing fixes these issues. Below is a detailed breakdown of the most effective methods, with pros, contras, and real use cases.
2. Essential Post-Processing Steps for MJF & SLS Parts
We’ve organized the most common processes by goal—from cleaning to enhancing performance. Each section includes data and examples to help you choose.
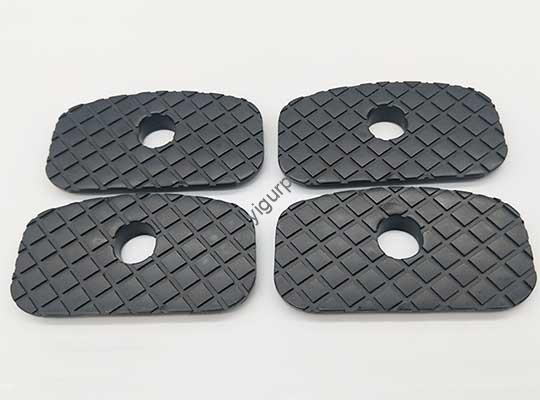
2.1 Powder Removal & Granallado: The First Step
Every MJF/SLS part starts with leftover powder (trapped in crevices or on the surface). This step is non-negotiable.
How it works:
- Powder removal: Use a soft brush or compressed air to blow loose powder off the part. For tight spaces (like hollow tubes), use a vacuum nozzle.
- Shot peening: Blast the part with high-pressure compressed air mixed with tiny glass beads (100–150 μm in size). This removes remaining powder and smooths minor surface roughness.
Key Data:
| Metric | MJF Parts | SLS Parts |
| Typical glass bead size | 120 µm | 100 µm |
| Processing time | 5–10 mins | 3–8 mins |
| Rugosidad de la superficie (Real academia de bellas artes) reduction | 20–30% | 15–25% |
Real Example:
A manufacturer of SLS nylon PA12 gears used shot peening to remove powder from tooth gaps. The process cut assembly time by 40% (no more manual picking of powder) and reduced friction between gears by 15%.
Ventajas:
- Fast and low-cost (no special chemicals)
- No effect on part size or shape
- Works for all MJF/SLS geometries
Contras:
- Only removes powder (doesn’t fix deep scratches or add color)
2.2 Media Tumbling (Vibration Polishing): For a Satin Finish
If you need a smooth, superficie mate (like for consumer products or medical devices), media tumbling is ideal.
How it works:
Place 10–50 parts in a vibrating drum filled with small ceramic chips (3–5 milímetros) and a mild detergent. Let it run for 4–8 hours—the chips gently rub against the part, reducing roughness.
Real Example:
A startup making SLS nylon watch cases used media tumbling. The process turned rough, powdery surfaces into a satin finish (Ra from 8 μm en 2 µm) and allowed them to process 30 cases at once—saving 60% of labor time vs. hand polishing.
Ventajas & Contras (At a Glance):
| Ventajas | Contras |
| Processes multiple parts at once | Not for parts with intricate details (p.ej., thin ribs or small holes—chips can wear them down) |
| No chemicals (ecológico) | Lento (4–8 hours per batch) |
| Doesn’t change part dimensions | Only achieves a satin finish (no gloss) |
2.3 Dyeing: Add Color Without Altering Size
Dyeing is the cheapest way to add color to MJF and SLS parts—perfect for branding or aesthetic needs.
How it works:
Immerse parts in a heated water bath (60–80°C) with acid dyes. Let them soak for 10–15 minutes (longer for darker colors). The dye penetrates the surface but not the core.
Critical Differences: MJF contra. SLS
| Característica | MJF Parts | SLS Parts |
| Base color | Gray (superficie); jet-black (centro) | White or gray (uniform) |
| Best dye color | Negro (dye hides the core color) | Any color (rojo, verde, blue—over 20 opciones) |
| Dye penetration depth | 0.5 milímetros | 0.5 milímetros |
Real Example:
A toy company dyed 500 SLS nylon PA12 figurines green. They processed 100 a la vez, costear \(0.20 per part—far cheaper than painting (\)1.50 por parte). The only downside: a scratch on the figurine revealed the white base (since dye only goes 0.5 mm de profundidad).
Ventajas:
- Bajo costo (\(0.10–)0.30 por parte)
- No effect on part size or weight
- Rápido (10–15 minutes per batch)
Contras:
- Dye wears off with heavy use (solo 0.5 mm de profundidad)
- Doesn’t smooth surfaces (rough parts stay rough)
2.4 Cuadro: For Gloss, Metallic Sheen, or Extra Protection
Painting goes beyond color—it adds physical benefits like water resistance and scratch protection.
How it works:
- Pre-treatment: Clean the part with alcohol to remove oil/dust (critical for adhesion).
- Cuadro: Apply 3–5 thin coats of paint (en lugar de 1 thick coat) because MJF/SLS parts are porous. Use acrylic or enamel paints for best results.
- Curación: Let each coat dry for 1–2 hours before applying the next.
Real Example:
An automotive supplier painted MJF nylon PA12 sensor housings with a metallic silver paint. The paint added a glossy finish (popular with customers) and improved water resistance—testing showed the housings could withstand 500 hours of rain without leaking (vs. 200 hours for uncoated parts).
Ventajas:
- Adds gloss, metálico, or matte finishes
- Improves water tightness and scratch resistance
- Works for both MJF and SLS parts
Contras:
- Labor-intensive (parts must be painted one by one)
- Pre-treatment is critical (bad cleaning = paint peeling)
- Adds minor weight (0.5–1 g per part)
2.5 Watertight Coatings: For Sealing Porous Parts
While raw MJF/SLS parts have basic water resistance, coatings like silicone or acrylate make them fully watertight—ideal for underwater or medical devices.
Key Coating Options:
| Coating Type | Mejor para | Application Method | Water Resistance (Probado) |
| Silicona | Piezas flexibles (p.ej., juntas) | Spraying or dipping | 1,000+ hours of immersion |
| Acrylate | Rigid parts (p.ej., contenedores) | Brushing or spraying | 800+ hours of immersion |
Real Example:
A medical device company used silicone coating on SLS nylon PA12 insulin pump reservoirs. The coating made the reservoirs 100% watertight—no leakage even when dropped in water for 30 días. It also didn’t affect the part’s flexibility (critical for pump use).
Ventajas:
- Excellent water resistance
- Silicone coatings preserve flexibility
Contras:
- Thicker coatings (0.1–0,3 milímetros) may affect small part dimensions
- Requires curing time (2–4 hours for silicone)
2.6 Metal Plating: For Strength and Conductivity
Metal plating is for high-performance parts—think aerospace components or electrical connectors that need extra strength or conductivity.
How it works:
- Deberes: Clean the part and apply a thin conductive layer (like graphite) because plastic isn’t conductive.
- galvanoplastia: Submerge the part in a solution with dissolved metal (cobre, níquel, oro, etc.). Pass an electric current—metal particles stick to the part’s surface.
Common Metal Options:
| Metal | Main Benefit | Use Case Example | Costo (vs. Cuadro) |
| Cobre | Conductividad eléctrica | Connectors for electronics | 3x more expensive |
| Níquel | Strength and corrosion resistance | Soportes aeroespaciales | 4x more expensive |
| Oro | Conductividad + atractivo estético | High-end electrical components | 10x more expensive |
Real Example:
An electronics firm nickel-plated SLS nylon PA12 connectors. The plating increased the part’s tensile strength by 30% and made it conductive—perfect for linking circuit boards. The downside: each connector cost \(5 to plate (vs. \)1 to paint).
Ventajas:
- Boosts strength and conductivity
- Creates a high-quality, acabado duradero
Contras:
- Caro (3–10x cost of painting)
- Adds weight (5–10% of part weight)
3. Yigu Technology’s Perspective on MJF/SLS Post-Processing
En Yigu Tecnología, we’ve supported hundreds of clients in optimizing MJF and SLS post-processing. Our experience shows that choosing the right process depends on three factors: end-use, presupuesto, and volume. Por ejemplo, small-batch consumer products (like phone cases) benefit from media tumbling + dyeing (cost-effective and fast), while medical devices need watertight coatings + controles de calidad. We also recommend combining processes—e.g., shot peening followed by painting—to get both smoothness and protection. By aligning post-processing with your part’s purpose, you can reduce waste and improve performance.
4. Preguntas frecuentes: Common Questions About MJF/SLS Post-Processing
Q1: Can I skip powder removal if my MJF part looks clean?
No. Even if the surface looks clean, powder trapped in crevices (like holes or slots) can cause cracking or warping over time. Always do shot peening after brush/vacuum removal.
Q2: Why can’t MJF parts be dyed bright colors (p.ej., red or green)?
MJF parts have a jet-black core. Bright dyes can’t cover this—they’ll look dull or uneven. Stick to black dye for MJF; SLS parts (white/gray core) work with any bright color.
Q3: Is metal plating worth the cost for non-aerospace parts?
It depends on your needs. If you need conductivity (p.ej., electrónica) or extra strength (p.ej., herramientas industriales), Sí. For basic parts (p.ej., paréntesis), painting or media tumbling is a cheaper alternative.