If you’re designing parts forLaser Sintering Molding (SLS)—una tecnología de impresión 3D por fusión de lecho de polvo de primer nivel—un gran diseño no es sólo “agradable de tener”. Es la diferencia entre una pieza que se agrieta con el uso y una que es fuerte, preciso, y rentable. Esta guía desglosa todas las reglas de diseño críticas para SLS, con ejemplos del mundo real, datos, and tips to fix common headaches like warping or stuck powder.
1. Why SLS Design Rules Matter
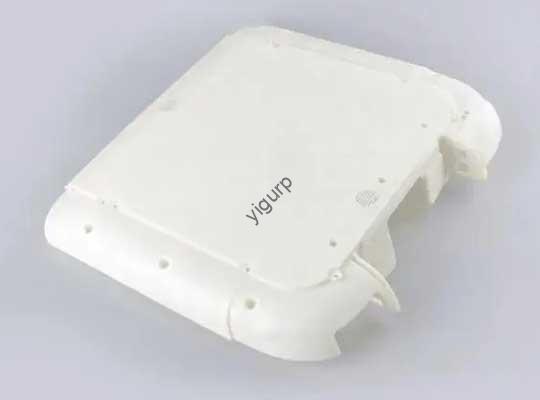
SLS uses lasers to fuse thermoplastic powders (comoPensilvania 12 or carbon-filled polyamide) into parts. A diferencia de FDM, it doesn’t need support structures—but its powder-based process creates unique design challenges:
- Thin walls can collapse under laser heat.
- Small holes trap unsintered powder (ruining functionality).
- Large flat surfaces warp as the part cools.
Follow these rules, and you’ll cut reprints, save material, and get parts that work right the first time.
2. Critical SLS Design Guidelines (With Data & Ejemplos)
We’ve organized the most important rules by feature—from wall thickness to text. Each section includes easy-to-use tables and real cases to guide you.
2.1 Wall Thickness: Avoid Collapse & Cracking
Wall thickness is make-or-break for SLS parts. Too thin, and the part will collapse during printing; demasiado grueso, and you waste material (y dinero).
Key Recommendations by Material
| Tipo de material | Minimum Wall Thickness (With Support) | Minimum Wall Thickness (No Support) | Preferred Thickness (For Consistency) | Maximum Recommended Thickness |
|---|---|---|---|---|
| Pensilvania 12 (Nylon) | 0.6 milímetros | 0.7 milímetros | 1.3 milímetros | 4 milímetros |
| Carbon-Filled Polyamide | 1.0 milímetros | 2.0 milímetros | 1.3–1.5 mm | 4 milímetros |
Real Example:
A manufacturer designed a PA 12 bracket with 0.5 mm paredes (too thin!). The laser’s heat melted the thin sections, causing 80% of the parts to collapse. When they adjusted to 1.3 mm paredes, the success rate jumped to 99%—and they still saved 30% material vs. a 4 mm wall design.
Para propina:
Walls thinner than 0.5 mm willoverthicken from the laser’s heat. Stick to the minimums above to avoid distorted parts.
2.2 Hole Sizes: Prevent Trapped Powder
SLS prints holes directly—no need for post-drilling. But small holes trap unsintered powder, which can block fluid flow (for valves) or break the part when you try to remove it.
Must-Follow Hole Rules
- Minimum diameter: 1.5 milímetros (any smaller traps powder).
- Best practice: Design holes to match standard drill bit sizes (p.ej., 2 milímetros, 3 milímetros). If the hole needs to be precise, you can drill it slightly larger post-print.
Real Example:
A medical device company printed PA 12 filters with 1.0 mm agujeros. Después de imprimir, they couldn’t remove the trapped powder—rendering 50% of the filters useless. When they increased holes to 1.5 milímetros, powder came out easily, and the filters worked perfectly for fluid filtration.
2.3 Tamaño de pieza: Stay Within Printable Limits
SLS printers have maximum and minimum size limits. Going beyond them leads to failed prints or low precision.
SLS Size Guidelines
| Metric | Especificación |
|---|---|
| Maximum Printable Size | 340 incógnita 340 incógnita 605 milímetros |
| Recommended Max Size | 320 incógnita 320 incógnita 580 milímetros (avoids edge warping) |
| Minimum Feature Size | 0.5 milímetros (printable, but risky) |
| Recommended Min Size | 0.75 milímetros (for consistent results) |
Para propina:
If your part is larger than 320 incógnita 320 incógnita 580 milímetros, split it into smaller interlocking pieces. SLS can print parts that fit together perfectly—saving you from oversized print failures.
2.4 Tolerancias: Focus Only on What Matters
Tolerance is how much a part’s size can vary. Too many tight tolerances increase print time and cost; too few ruin mating parts (like a lid that won’t fit a box).
SLS Tolerance Facts
- Maximum accuracy: Arriba a 0.3% of the feature size (o 0.3 mm—whichever is larger). Por ejemplo, a 100 mm part can vary by ±0.3 mm.
- Rule of thumb: Only use tight tolerances for mating surfaces (p.ej., a shaft that fits a bearing). For non-critical areas (p.ej., a part’s outer edge), loosen tolerances to save time.
Real Example:
An automotive supplier added tight tolerances (±0,1mm) to every part of an SLS bracket—even the non-mating edges. This doubled print time and cost. When they limited tight tolerances to just the mating hole, they cut costs by 40% with no loss in functionality.
2.5 Hollow Parts: Add Escape Holes for Powder
Hollow parts save weight and material—but you needescape holes to remove residual powder from the cavity.
Hollow Part Rules
- Minimum escape hole size: 3.5 milímetros (smaller holes trap powder; larger holes let media in for interior polishing).
- Where to place holes: Put them in hidden areas (p.ej., the bottom of a hollow cup) so they don’t ruin aesthetics.
Real Example:
A luggage brand printed hollow PA 12 handles with no escape holes. Después de imprimir, the trapped powder made the handles heavy and brittle. When they added two 3.5 mm agujeros, powder poured out easily—the handles were 25% lighter and passed drop tests.
2.6 Interlocking Parts: Print Functional Assemblies in One Go
SLS’s superpower? Printing interlocking, partes móviles (like hinges or gears) in a single build—no assembly needed. But you need enough clearance to remove powder.
Interlocking Part Rule
- Minimum clearance: 0.5 mm between moving parts (p.ej., a gear and its axle). More clearance (0.8–1.0 mm) is better for easy movement.
Real Example:
A toy company printed a SLS gear set with 0.3 mm clearance. Powder got stuck between the gears, making them lock up. When they increased clearance to 0.5 milímetros, the gears spun smoothly—no assembly required.
2.7 Engravings, Embossings & Text: Keep Them Visible
SLS can print logos, texto, or details directly on parts—but small details wear off during post-processing (like media tumbling).
Detail Guidelines
| Feature Type | Minimum Size Requirement | Pro Tips |
|---|---|---|
| Engravings/Embossings | 1 mm depth/height | Prevents wear during media tumbling |
| Text | 2 mm height | UsarSans serif fonts (p.ej., Arial) for readability |
| Fragile Letters (p.ej., “i”) | Add a small draft (5–10°) | Stops them from breaking in post-processing |
Real Example:
A electronics brand printed PA 12 cases with 1.5 mm tall text (too small!). Media tumbling wore the text down, making it unreadable. When they increased text height to 2 mm and used Arial, the text stayed clear—even after polishing.
2.8 Avoid Warping: Skip Large Flat Surfaces
Large flat surfaces (p.ej., a 200 mmx 200 mm plate) warp as SLS parts cool. The powder shrinks unevenly, causing the surface to bow or crack.
How to Fix It
- Rule 1: Avoid large flat surfaces whenever possible.
- Rule 2: If you need a flat surface, add costillas (thin support structures) underneath. Ribs should be 0.8–1.0 mm thick and spaced 10–15 mm apart.
Real Example:
A furniture maker printed large flat SLS PA 12 panels (300 mmx 200 milímetros) with no ribs. 70% of the panels warped by 2–3 mm. When they added 1.0 mm ribs spaced 12 mm de separación, warping dropped to less than 0.5 mm—perfect for their furniture designs.
3. Yigu Technology’s Take on SLS Design
En Yigu Tecnología, we’ve helped hundreds of clients fix SLS design issues. The biggest mistake we see? Overlooking small details—like 0.3 mm clearance for interlocking parts or 1 mm engravings. Our advice: Prioritizefunction first—match wall thickness, tamaño del agujero, and clearance to how the part will be used. Por ejemplo, a medical part needs tighter tolerances than a decorative one. By aligning design with end-use, you’ll get SLS parts that are strong, preciso, and cost-efficient—every time.
4. Preguntas frecuentes: Common SLS Design Questions
Q1: Can I print a wall thinner than 0.7 mm for PA 12 if I use support?
Sí, but only down to 0.6 mm—and it’s risky. The laser’s heat can still overthicken or collapse 0.6 mm paredes. We recommend sticking to 0.7 milímetros (no support) for consistent results.
Q2: Why do I need to use Sans serif fonts for SLS text?
Sans serif fonts (no small “tails” on letters) have simpler shapes. This makes them easier for the SLS laser to print clearly, and they’re less likely to break off during post-processing compared to serif fonts (p.ej., Times New Roman).
Q3: If my part is larger than 340 incógnita 340 incógnita 605 milímetros, can I still print it with SLS?
No—SLS printers can’t go beyond their maximum build size. Instead, split the part into smaller interlocking pieces (con 0.5 mm+ clearance). SLS prints these pieces perfectly, and you can assemble them post-print for a full-size part.