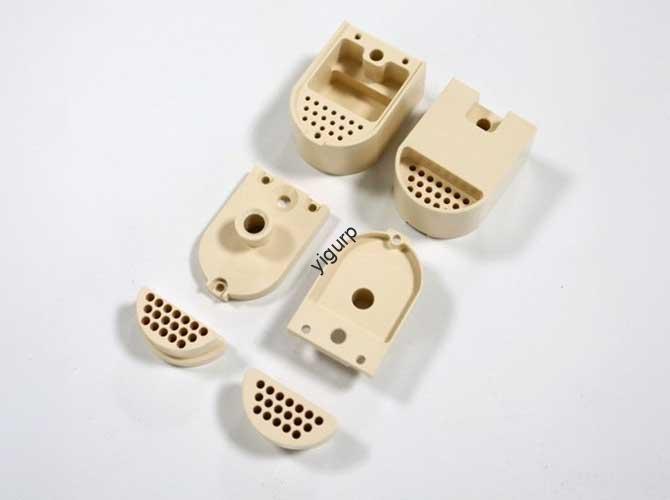
Have you ever spent hours 3impresión D a part, sólo para encontrarlo deformado, agrietado, o deformarse una vez terminado? en la mayoría de los casos, the root cause is insufficient 3D printing cooling. Este proceso crítico controla la temperatura del material durante la impresión para garantizar que las piezas se solidifiquen correctamente, pero ¿cómo funciona?? ¿Qué método de refrigeración es el adecuado para su proyecto?? And how can you avoid common mistakes? Let’s answer these questions with clear, actionable insights.
1. The Science of 3D Printing Cooling: Why It Can’t Be Ignored
3D printing cooling isn’t just “adding a fan”—it’s a precise balance of temperature control. Here’s a simplecause-and-effect chain to explain its importance:
- Paso 1: 3D printing materials (p.ej., PLA, ABS) are heated to 180–260°C to flow through the nozzle.
- Paso 2: After extrusion, the material must cool quickly but evenly to hold its shape.
- Paso 3: If cooling is too slow → Material sags, warps, or fuses with the next layer.
- Paso 4: If cooling is too fast → Material becomes brittle and cracks.
En breve, 3D printing cooling acts like a “freeze frame” for your part—without it, even the best design will fail.
2. Common 3D Printing Cooling Types: Which One to Choose?
Not all cooling methods work for every project. Below is acomparison table to help you select the right option based on your needs:
| Cooling Type | Ventajas clave | Main Disadvantages | Ideal Use Cases | Maintenance Needs |
|---|---|---|---|---|
| Fan Cooling | Bajo costo; easy to install/operate; adjustable speed | Less effective for high-power printers; uneven cooling for large parts | Small-to-medium parts (p.ej., PLA toys, simple brackets); low-temperature materials | Clean fan blades monthly; replace filters (if used) quarterly |
| Water Cooling Systems | High heat transfer efficiency; consistent cooling; works for high-power printers | Risk of coolant leakage; higher cost; complex setup | Piezas grandes (p.ej., interiores de automóviles); high-temperature materials (p.ej., ABS, PETG); industrial-grade prints | Check seals weekly; replace coolant every 6 meses; clean tubes annually |
3. Application Scenarios: Tailoring Cooling to Your Project
Different 3D printing projects demand specific cooling approaches. Let’s useejemplos del mundo real to illustrate:
- Guión 1: Electronic Product Shells → These parts have thin walls and complex details. Usar on-type cooling technology (cooling channels built near the part surface) to ensure even cooling—this prevents warping that could block USB ports or button holes.
- Guión 2: Fabricación de moldes → Molds need uniform thickness to avoid defects. Mold-like cooling technology shortens molding cycles by 30–40% and eliminates hot/cold spots, ensuring the final mold produces consistent parts.
- Guión 3: Small PLA Prototypes → A basic fan cooling system (set to 50–70% speed) is enough—PLA cools quickly, so excessive cooling would only make the part brittle.
4. Critical Precautions: Avoid These Costly Cooling Mistakes
Even the best cooling system fails if misused. Here’s alist of actionable tips to prevent errors:
- For Fan Cooling:
- Never blow the fan directly at the printing nozzle—this cools the nozzle too much, causing material clogs.
- Adjust speed based on material: 30–50% for ABS (needs slower cooling), 60–80% for PLA (needs faster cooling).
- For Water Cooling Systems:
- Test for leaks before printing: Fill the system with water, pressurize it, and check for drips (a single leak can ruin your part and damage the printer).
- Use distilled water (not tap water)—minerals in tap water build up in tubes, reducing cooling efficiency.
- General Rule:
- Monitor the first 10 layers—if you see warping, pause and adjust cooling (this saves time and material).
5. Future of 3D Printing Cooling: What’s Next?
As 3D printing technology advances, cooling systems are becoming smarter. Here’s alinear breakdown of upcoming trends:
- Short-Term (1–2 Years): More efficient fan designs (p.ej., dual-blade fans) that reduce noise while improving cooling.
- Mid-Term (3–5 Years): Integrated sensor systems that automatically adjust cooling speed based on part geometry and material (no more manual tweaks!).
- Long-Term (5+ Years): AI-powered cooling that learns from past prints—if a part warped before, the system will adjust parameters to fix it next time.
En breve, the future of3D printing cooling is “set it and forget it”—but with better results.
Yigu Technology’s Perspective on 3D Printing Cooling
En Yigu Tecnología, we’ve helped 300+ clients fix cooling-related print failures. We believe3D printing cooling is often overlooked, but it’s the key to consistent quality. Many clients start with cheap fan systems for industrial parts—this leads to 20–30% rework rates. Our solution? Custom cooling kits that match material and part size (p.ej., water cooling for ABS molds, smart fans for PLA prototypes). This approach cuts rework by 40% and boosts print speed by 15%. For 3D printing, cooling isn’t an add-on—it’s a foundation.
Preguntas frecuentes
1. My PLA part keeps cracking—Is this a cooling issue?
Sí, likely! PLA cools fast, so excessive fan speed (encima 80%) makes it brittle. Try lowering the fan speed to 50–60% and check if cracks disappear. If not, ensure the print bed is at 50–60°C (too cold can also cause cracking).
2. Can I use water cooling for a small desktop 3D printer?
It’s possible, but not necessary. Most desktop printers (p.ej., Ender 3) use PLA or PETG, which work well with fan cooling. Water cooling is better for large printers (over 300mm build size) or high-temperature materials (p.ej., nylon).
3. How do I know if my water cooling system is leaking?
Before printing, fill the system, turn it on, and run it for 30 minutos (no print). Place a paper towel under tubes and connections—if the towel gets wet, you have a leak. Tighten loose fittings or replace worn seals to fix it.
