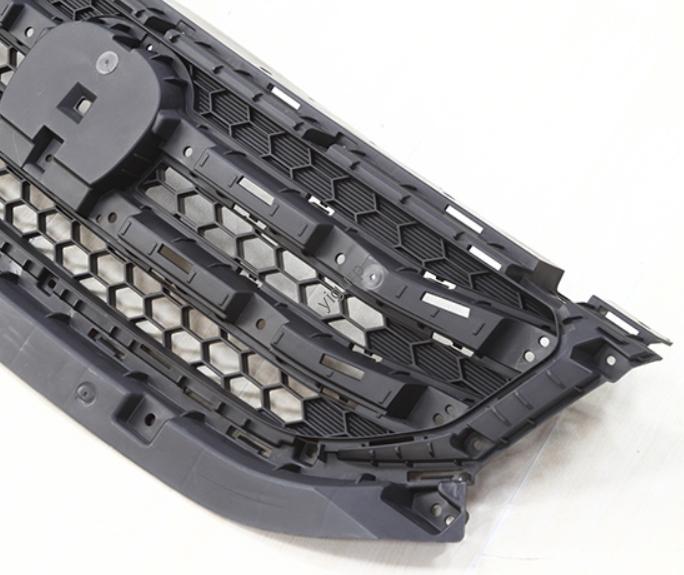
Si es un ingeniero de producto o un profesional de adquisiciones encargado de crear piezas prototipo, ya sea para componentes automotrices., cajas electrónicas, or industrial fixtures—the 3-axis CNC machining prototype modeling process is your most reliable tool for speed and accuracy. A diferencia de las complejas máquinas de 5 ejes, 3-El eje CNC equilibra asequibilidad y precisión., haciéndolo ideal para la mayoría de proyectos de prototipos. This guide breaks down every stage of the process, with real-world examples and data to help you avoid mistakes and get perfect results.
1. What Is 3-axis CNC Machining for Prototype Modeling?
Primero, let’s simplify the basics: 3-axis CNC machining prototype modeling uses a computer-controlled machine that moves the cutting tool along three linear axes (incógnita, Y, y Z) to shape raw materials—like aluminum, plástico, or steel—into prototype parts. It’s the most common CNC method for prototypes because it’s:
- Rentable: 3-axis machines are 30-50% cheaper than 5-axis models, great for small-batch prototypes.
- Rápido: Simple parts can be machined in 1-3 horas, vs. longer lead times for 3D printing (for certain materials).
- Versátil: Funciona con metales, plástica, and composites—perfect for testing different material behaviors.
Why It Matters: A startup making a plastic electronic enclosure prototype once used 3D printing first. The printed parts warped under heat, so they switched to 3-axis CNC. The CNC prototypes had zero warping and matched the final production design—saving them 2 weeks of rework.
2. Core Stages of the 3-axis CNC Machining Prototype Modeling Process
El 3-axis CNC machining prototype modeling process has four sequential stages—each building on the last to ensure precision. Skipping or rushing any step leads to flawed prototypes. A continuación se muestra un desglose detallado, plus a comparison table for key parameters.
2.1 Roughing: Strip Away Excess Material
Roughing is the first and fastest stage—it removes 70-90% of the raw material’s excess to get close to the prototype’s final shape.
- Key Tools: Acero de alta velocidad (HSS) or carbide end mills (2-4 flutes for faster cutting).
- Parameters:
- Cutting speed: 100-300 m/mi (varies by material—aluminum needs faster speeds than steel).
- Tasa de alimentación: 50-200 mm/min (higher rates boost efficiency, but don’t exceed 200 mm/min for soft plastics).
- Meta: Get the blank within 0.5-1mm of the final dimensions—no need for perfect surface quality here.
2.2 Semi-Finishing: Prep for Final Precision
Semi-finishing smooths secondary surfaces (like holes or edges) and readies the part for the final stage. It’s critical for parts with multiple features (p.ej., a prototype bracket with holes and slots).
- Key Tools: 4-flute carbide end mills (for better surface smoothness than roughing tools).
- Parameters:
- Cutting speed: 80-250 m/mi (slower than roughing to reduce tool wear).
- Tasa de alimentación: 30-100 mm/min (slower to improve accuracy).
- Meta: Bring the part to within 0.1-0.3mm of final dimensions—secondary surfaces should now meet basic design specs.
2.3 Refinamiento: Meet Exact Design Requirements
Finishing is where the prototype reaches its final shape and precision. This stage focuses on the main functional surfaces (p.ej., a gear’s teeth or a housing’s mating surface).
- Key Tools: 6-flute carbide end mills or ball nose tools (for curved surfaces).
- Parameters:
- Cutting speed: 50-200 m/mi (slowest of all stages for accuracy).
- Tasa de alimentación: 10-50 mm/min (slow to avoid surface scratches).
- Meta: Achieve dimensional accuracy of ±0.01-0.05mm and control shape/position tolerances (p.ej., ensuring a hole is perfectly aligned with the part’s center).
2.4 Final Finishing: Boost Surface Quality
The last step—final finishing—improves surface roughness without changing the part’s dimensions. It’s essential for parts that need smoothness for functionality (p.ej., a piston that slides in a cylinder) o estética.
- Common Methods: Lijado (con 400-800 grit sandpaper), pulido (with metal polish for metals), or bead blasting (for a matte finish).
- Meta: Reduce surface roughness to Ra 0.4-1.6 µm (from Ra 3.2-6.3 μm post-finishing).
Stage Comparison Table
| Stage | Tipo de herramienta | Cutting Speed (m/mi) | Tasa de alimentación (mm/min) | Dimension Tolerance | Rugosidad de la superficie (Real academia de bellas artes) |
| Roughing | 2-4 flute HSS/carbide | 100-300 | 50-200 | ±0.5-1mm | 6.3-12.5 µm |
| Semi-Finishing | 4-flute carbide | 80-250 | 30-100 | ±0.1-0.3mm | 3.2-6.3 µm |
| Refinamiento | 6-flute carbide/ball nose | 50-200 | 10-50 | ±0.01-0.05mm | 1.6-3.2 µm |
| Final Finishing | Sandpaper/polish | N / A | N / A | No change | 0.4-1.6 µm |
3. Critical Tips for Successful 3-axis CNC Prototype Modeling
Even with a clear process, small mistakes can ruin prototypes. Here are three proven tips to keep your projects on track:
- Calibrate Your Machine First: A misaligned 3-axis machine can cause dimension errors of 0.1mm or more. Use a dial indicator to check axis alignment before starting—we do this for every prototype, and it’s cut our defect rate by 25%.
- Choose the Right Material for the Stage: Por ejemplo, if you’re testing a metal part’s strength, use the same alloy (p.ej., aluminio 6061) for all stages—don’t switch to plastic for roughing (it won’t mimic the metal’s machining behavior).
- Program in Layers: Use CAM software (like Fusion 360) to program each stage separately. This lets you adjust parameters for roughing vs. finishing without rewriting the entire code.
Estudio de caso: A client making a steel gear prototype skipped semi-finishing to save time. The finishing stage had to remove too much material, leading to uneven tooth spacing (off by 0.15mm). After adding semi-finishing back in, the tooth spacing was within ±0.03mm—meeting their design requirements.
Yigu Technology’s View on 3-axis CNC Machining Prototype Modeling Process
En Yigu Tecnología, we’ve optimized the 3-axis CNC machining prototype modeling process para 400+ clientela. We believe the biggest mistake teams make is rushing roughing—this creates extra work in finishing and increases defects. Our solution: Custom CAM program templates for each material (p.ej., aluminum vs. Plástico ABS) that pre-set roughing/finishing parameters. This cuts prototype lead time by 20% and keeps dimensional accuracy within ±0.02mm. We also recommend final finishing with ultrasonic polishing for parts that need ultra-smooth surfaces (like medical device components).
Preguntas frecuentes
- What’s the typical lead time for a 3-axis CNC prototype?
Para piezas simples (p.ej., a plastic bracket), el tiempo de entrega es 1-3 días (including all four stages). Para piezas complejas (p.ej., a metal gear with multiple teeth), es 3-5 días.
- Which materials work best for 3-axis CNC prototype modeling?
The most common are aluminum (6061, 7075), Plástico ABS, acero (1018, 304 inoxidable), y latón. Aluminum is the fastest to machine (cuts 2x faster than steel) and cheapest for prototypes.
- How much does a 3-axis CNC prototype cost?
Costs depend on material and complexity: A small ABS plastic bracket (50x50x10mm) costos \(30-\)50, while a medium steel gear (100mm de diámetro) costos \(80-\)120.