Der CNC machining air conditioning prototype process is a systematic workflow that transforms air conditioning design concepts into physical prototypes, Validierung der Authentizität des Aussehens, Strukturelle Rationalität, heat exchange efficiency, und Kernfunktionslogik (Z.B., airflow uniformity, noise control). In diesem Artikel wird der Prozess mithilfe datengesteuerter Tabellen Schritt für Schritt aufgeschlüsselt – vom vorläufigen Entwurf bis zum endgültigen Debugging, praktische Richtlinien, und Tipps zur Fehlerbehebung, die Ihnen bei der Bewältigung wichtiger Herausforderungen helfen und den Erfolg von Prototypen sicherstellen.
1. Vorläufige Vorbereitung: Define Requirements & Lay the Design Foundation
Preliminary preparation sets the direction for the entire prototype development. Es konzentriert sich auf zwei Kernaufgaben: requirements analysis & conceptual design Und 3D Modellierung & structural detailing, both tailored to the unique needs of different air conditioning types (Z.B., Kompakte Struktur für wandmontierte Klimaanlage, multidirektionaler Luftstrom für zentrale Klimaanlage).
1.1 Requirements Analysis & Conceptual Design
Vor Beginn der Bearbeitung, Klären Sie die Anforderungen an Funktionalität und Aussehen, um falsch ausgerichtete Entwicklungsziele zu vermeiden – dieser Schritt reduziert das Risiko von Nacharbeiten um 30% durchschnittlich.
1.1.1 Functional Requirements Clarification
Verschiedene AC-Typen haben unterschiedliche Funktionsprioritäten. In der folgenden Tabelle sind die wichtigsten Spezifikationen für gängige Modelle aufgeführt:
| AC-Typ | Kernfunktioneller Fokus | Beispiel für wichtige Spezifikationen |
| Wandmontierte Klimaanlage | Kompaktes Innengerät, effizienter Wärmeaustausch | Kühlleistung: 2–3,5 kW; Lärm (Innengerät): ≤30dB; Dicke des Innengeräts ≤180 mm |
| Vertikale Klimaanlage | Großer Luftstrom, stabile Basis | Kühlleistung: 3.5–5kW; Luftversorgungsbereich: 0°–90° (Auf-/Abschwingen); Grundgewicht ≥30kg |
| Zentrale AC-Steckdose | Multidirektionaler Luftstrom, Kompatibilität | Gleichmäßigkeit des Luftstroms: ±5 % Abweichung; Schwenkwinkel (links rechts): 0°–120°; Korrosionsbeständigkeit des Materials |
1.1.2 Appearance Concept Design
Erstellen Sie vorläufige Skizzen oder 3D-Entwürfe mit Tools wie Sketchup oder Nashorn, mit drei Schlüsselüberlegungen:
- Ästhetische Koordination: Wandmontierte Klimaanlagen sind schlank, geschwungene Linien (Radius 8–12 mm) passend zu den Hauswänden; Vertikale ACs nehmen zylindrische oder rechteckige Formen für die Wohnzimmerdekoration an.
- Mensch-Computer-Interaktion: Platzieren Sie Displays und Tasten auf Augenhöhe (1.5–1.8m from the ground for wall-mounted ACs); use touch-sensitive or physical knobs with clear icons.
- Environmental Adaptation: Add dust filters (removable design for easy cleaning) and drainage ports (positioned to avoid water leakage); use anti-mildew materials for high-humidity areas.
1.2 3D Modellierung & Structural Detailing
Use professional CAD software to translate concepts into precise models, ensuring processability for CNC machining.
1.2.1 Softwareauswahl & Core Structural Design
- Software -Auswahl: Priorisieren Solidworks, Und NX, oder Vordergrund– Sie unterstützen parametrisches Design, allowing easy adjustment of dimensions (Z.B., evaporator size, air duct width) and compatibility with CAM software.
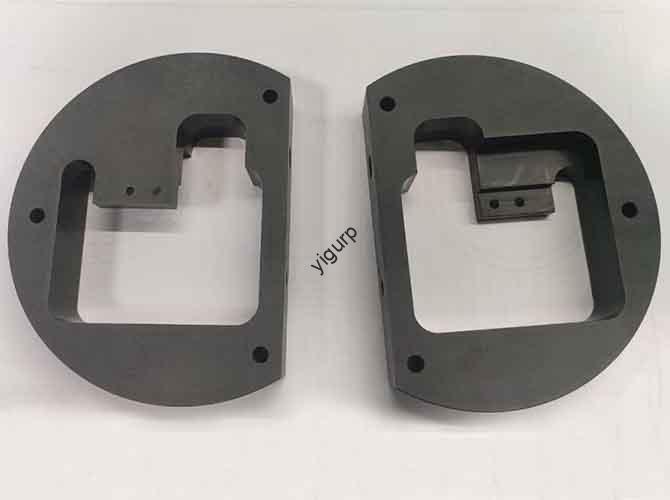
- Komponentenaufschlüsselung: Split the AC into parts like indoor/outdoor unit housing, Luftkanalkomponenten (deflectors, volutes), Kühlkörper, Motorhalterungen, Und Kontrollplatten for separate machining.
- Key Structure Optimization:
- Gehäuse: Determine material thickness (1–3mm for plastic, 0.8–1.5mm for aluminum alloy) and assembly structures (Schnappschüsse, M3–M4 screw holes with ±0.1mm tolerance).
- Air Ducts: For wall-mounted ACs, optimize airflow paths to reduce turbulence (Z.B., curved volutes with 5°–10° expansion angle); for central AC outlets, design multi-layer deflectors for uniform air distribution.
- Heat Sinks: Design fin density (0.5–1mm spacing) und Form (wavy or louvered) based on heat exchange efficiency—wavy fins improve heat dissipation by 15% compared to flat fins.
- Detail Features: Add brand logos (embossed height 0.8–1mm), indicator light holes (diameter 3–5mm), and filter mounting grooves (depth 5–8mm, Toleranz ± 0,05 mm).
2. Materialauswahl & Prozessplanung: Match Materials to Performance Needs
Choosing the right materials and defining machining strategies are critical for prototype performance. This phase follows a “material selection → parameter setting → sequence planning” workflow to ensure efficiency and precision.
2.1 Materialauswahl: Balance Performance, Kosten, and Processability
Different AC components require materials with specific properties (Z.B., thermal conductivity for heat sinks, corrosion resistance for outdoor units). The table below compares suitable options:
| Komponente | Empfohlenes Material | Schlüsseleigenschaften | Verarbeitungsvorteile | Kostenbereich (pro kg) |
| Indoor Unit Housing | ABS -Plastik / PC-Mischung | Leicht, wirkungsbeständig, low noise transmission | Leicht zu schneiden; smooth surface for painting | \(3- )6 |
| Outdoor Unit Housing | Aluminiumlegierung (6061) / Edelstahl (304) | Korrosionsbeständig, dauerhaft, wetterfest | Good for anodization; high strength for outdoor use | \(6- )10 (Aluminium); \(15- )22 (SS) |
| Air Duct Components | ABS -Plastik / Aluminiumlegierung | Hohe Starrheit, gute dimensionale Stabilität | Plastik: No burrs; Metall: Suitable for curved machining | \(3- )6 (Plastik); \(6- )10 (Metall) |
| Heat Sinks | Aluminiumlegierung (1050) / Kupfer | Ausgezeichnete thermische Leitfähigkeit (Al: 220 W/m · k; Cu: 401 W/m · k) | Fast machining; easy to form fins | \(5- )8 (Aluminium); \(18- )25 (Kupfer) |
| Control Panels | ABS + PC-Mischung | Isolierung, Schlagfestigkeit, smooth surface for silk-screen | Compatible with touch-sensitive film installation | \(4- )7 |
Beispiel: Wall-mounted AC heat sinks use aluminum alloy (kostengünstig, leicht), while high-end central AC heat sinks use copper (superior thermal conductivity) for large cooling capacity.
2.2 Prozessplanung: Define CNC Machining Strategies
Clear process planning ensures efficient and precise machining, Reduzierung der Produktionszeit durch 20%.
2.2.1 Tool Selection by Material & Aufgabe
| Material | Bearbeitungsaufgabe | Werkzeugtyp | Spezifikationen |
| Plastik (ABS/PC) | Rauen | Hartmetall-Flachfräser | Φ6–10mm, 2–3 Zähne |
| Plastik (ABS/PC) | Fertig | Hartmetall-Kugelfräser | Φ2–4mm, 4–6 Zähne |
| Aluminiumlegierung | Rauen | Hartmetall-Schaftfräser | Φ4–6mm, 2 Zähne |
| Aluminiumlegierung | Fertig | TiAlN-Coated Carbide Cutter | Φ3–5mm, 4 Zähne |
| Edelstahl | Rauen | Schaftfräser aus Schnellarbeitsstahl | Φ4–8mm, 2 Zähne |
| Edelstahl | Fertig | Diamond-Coated Cutter | Φ2–4mm, 4 Zähne |
2.2.2 Einstellung der Schnittparameter
Optimized parameters prevent material deformation and ensure surface quality:
| Material | Bearbeitungsstufe | Geschwindigkeit (Drehzahl) | Futterrate (mm/Zahn) | Schnitttiefe (mm) | Kühlmittel |
| ABS -Plastik | Rauen | 300–600 | 0.2–0,5 | 0.5–2 | Druckluft |
| ABS -Plastik | Fertig | 800–1500 | 0.1–0,2 | 0.1–0,3 | Druckluft |
| Aluminiumlegierung (6061) | Rauen | 1500–2500 | 0.1–0,3 | 1–3 | Emulsion |
| Aluminiumlegierung (6061) | Fertig | 2500–4000 | 0.05–0,1 | 0.05–0,1 | Emulsion |
| Edelstahl (304) | Rauen | 800–1200 | 0.08–0,15 | 0.3–1 | Emulsion |
| Edelstahl (304) | Fertig | 1500–2000 | 0.03–0,08 | 0.03–0.05 | Emulsion |
2.2.3 Bearbeitungssequenz
Follow this order to avoid component damage and ensure accuracy:
- Process large parts first (Z.B., indoor/outdoor housings) to set the assembly reference.
- Machine complex curved surfaces (Z.B., volutes, deflectors) in Schichten (0.5–1 mm pro Schicht) to ensure shape precision.
- Finish small precision parts (Z.B., Motorhalterungen, Bedienfeldtasten) last to prevent collision.
3. CNC -Bearbeitungsausführung: Turn Models into Physical Components
This phase is the core of prototype creation, im Anschluss an a “Maschinenvorbereitung → Schruppen → Vorschlichten → Schlichten” workflow to ensure component precision (tolerance ±0.03mm for key parts).
3.1 Machine Preparation & Programmierung
- Maschinenauswahl:
- Most parts (Gehäuse, Kühlkörper) Verwenden Sie a 3-Achse CNC-Fräsmaschine (Positionierungsgenauigkeit ±0,01 mm).
- Complex parts like volutes or central AC deflectors require a 5-axis CNC machine for multi-angle machining.
- Programmierung & Kalibrierung:
- Import 3D models into CAM software (Z.B., Mastercam, Und NX) to generate toolpaths; set safety planes (5–10mm above the workpiece) to avoid tool collision.
- Clamp materials (plastic plates, aluminum blocks) and calibrate the zero point using a touch probe (accuracy ±0.005mm).
3.2 Rauen & Halbfinish: Shape the Basic Form
- Rauen: Remove 80–90% of excess material to approach the component’s basic shape. Zum Beispiel:
- Gehäuse: Mill the outer contour first, then dig the internal cavity (avoids plastic collapse).
- Heat Sinks: Rough-cut the base shape, leaving 0.5–1mm allowance for fin machining.
- Halbfinish: Korrigieren Sie Abweichungen beim Schruppen und lassen Sie für die Schlichtbearbeitung ein Aufmaß von 0,1–0,2 mm ein. Zu den wichtigsten Schritten gehören::
- Smoothing air duct inner walls to reduce airflow resistance.
- Pre-drilling screw holes (90% des Enddurchmessers) for precise tapping later.
3.3 Fertig: Erreichen Sie Präzision & Oberflächenqualität
Die Endbearbeitung bestimmt das Aussehen und die Funktionsleistung des Prototyps. The table below outlines requirements for key components:
| Komponente | Oberflächenrauheit | Verarbeitungsmethode |
| Indoor Unit Housing | Ra ≤0,8μm | Polish with 800–1200 mesh sandpaper; Werkzeugspuren entfernen |
| Heat Sinks | Ra ≤0,4μm | High-speed finishing for fin spacing (0.5–1mm); deburr fin edges with a wire brush |
| Volutes | Ra ≤0.6μm | 5-axis finishing for curved surfaces; ensure smooth airflow path |
| Bedienfeld | Ra ≤1,6μm | Polish and clean; prepare for silk-screen or touch-sensitive film |
- Spezielle Strukturbearbeitung:
- Heat sink fins: Verwenden Sie einen speziellen Lamellenschneider, um einen gleichmäßigen Abstand sicherzustellen (Abweichung von ±0,05 mm).
- Abweiser für Wechselstromsteckdosen: Bearbeiten Sie Schwenkwellen mit einer Toleranz von ±0,02 mm, um eine reibungslose Bewegung zu gewährleisten.
4. Nachbearbeitung & Montage: Leistung verbessern & Ästhetik
Durch die Nachbearbeitung werden Fehler beseitigt und Komponenten für den Zusammenbau vorbereitet, Während eine sorgfältige Montage sicherstellt, dass der Prototyp wie vorgesehen funktioniert.
4.1 Nachbearbeitung: Verbessern Sie die Haltbarkeit & Aussehen
- Enttäuschung & Reinigung:
- Kunststoffteile: Entfernen Sie Grate mit einer Klinge; Mit Isopropylalkohol reinigen, um Ölrückstände zu entfernen.
- Metallteile: Mit 400–800 Mesh Schleifpapier schleifen; für Aluminium, Verwenden Sie eine Drahtbürste, um Oxidation zu entfernen.
- Oberflächenbehandlung:
| Komponente | Behandlungsmethode | Zweck |
| Indoor Unit Housing | Matt-/Glanzlack aufsprühen; Markenlogos mit Heißprägung | Verbesserung der Ästhetik; verhindern Kratzer |
| Outdoor Unit Housing | Anodisieren (Aluminium) oder galvanisieren (Edelstahl); add anti-UV coating | Korrosionsresistenz verbessern; withstand outdoor weather |
| Bedienfeld | Silk-screen buttons/icons; spray insulating paint | Ensure visibility; prevent electrical leakage |
- Functional Enhancement:
- Attach rubber seals to filter mounting grooves (improves air tightness by 20%).
- Install waterproof membranes on control panels to prevent dust/water ingress.
4.2 Montage & Debuggen: Validate Functionality
Follow a sequential assembly order to avoid rework, then conduct comprehensive testing:
4.2.1 Assembly Sequence
- Assemble core components: Mount the evaporator/condenser to the housing → install the fan and motor → attach air duct components.
- Add secondary parts: Install the control panel → attach the filter → connect wires (Verwenden Sie zur Isolierung Schrumpfschläuche).
- Secure structures: Use screws (Drehmoment: 1.5–2.0 N·m for M3 screws), Schnappschüsse, or epoxy glue (for air duct joints).
4.2.2 Funktionales Debuggen
| Test Item | Werkzeuge/Methoden | Kriterien übergeben |
| Airflow Uniformity | Anemometer (measured at 1m from the outlet) | Variation ≤5% across different points; meets design airflow rate (Z.B., 300m³/h for wall-mounted AC) |
| Noise Level | Sound level meter (Innengerät: 1m away; outdoor unit: 3m away) | Indoor unit ≤30dB; outdoor unit ≤55dB |
| Heat Exchange Efficiency | Thermometer (measure inlet/outlet air temperature) | Kühlung: Temperature drop ≥8°C (Innenräume); Heizung: Temperature rise ≥5°C (Innenräume) |
| Water Leakage | Fill drainage port with water (1L); observe for 30 Minuten | No leakage from housing or joints |
| Swing Function | Protractor + stopwatch | Swing angle meets design specs (Z.B., 0°–90° for wall-mounted AC); no jitter |
5. Anwendungsfälle: Tailor Processes to AC Types
Different AC types require adjusted processes to meet their unique needs.
5.1 Wall-Mounted AC Prototype
- Fokus: Compact structure and silent operation.
- Process Adjustments:
- Use thin aluminum alloy (0.8mm) for the indoor unit housing to reduce thickness (≤180mm).
- Optimize air duct curvature to reduce turbulence (noise ≤30dB); test filter removal/installation ease.
5.2 Central AC Outlet Prototype
- Fokus: Multi-directional airflow and corrosion resistance.
- Process Adjustments:
- Verwenden Sie Edelstahl (304) for outdoor-facing parts (Korrosionsbeständigkeit); machine deflectors with 5-axis CNC for 0°–120° swing.
- Test compatibility with central AC main units (airflow matching, installation fit).
Perspektive der Yigu -Technologie
Bei Yigu Technology, Wir sehen die CNC machining air conditioning prototype process als a “Leistungsvalidator”—it identifies design flaws early to save mass production costs. Unser Team priorisiert zwei Säulen: precision and functionality. For key parts like heat sinks, we use aluminum alloy with 5-axis finishing (fin spacing ±0.05mm) to ensure heat exchange efficiency. For air ducts, we optimize curvature via CFD simulation and CNC machining (Ra ≤0.6μm) to reduce noise. Wir integrieren auch die 3D-Scan-Nachbearbeitung, um die Maßhaltigkeit zu überprüfen (± 0,03 mm), Reduzierung der Nacharbeitsraten um 25%. Indem wir uns auf diese Details konzentrieren, Wir helfen unseren Kunden, die Markteinführungszeit um 1–2 Wochen zu verkürzen. Whether you need a wall-mounted or central AC prototype, we tailor solutions to meet global energy efficiency and safety standards.
FAQ
- Q: How long does the entire CNC machining air conditioning prototype process take?
A: Typically 12–18 working days. This includes 2–3 days for preparation (requirements analysis, Modellieren), 4–6 Tage für CNC -Bearbeitung, 2–3 Tage für die Nachbearbeitung, 3–4 days for assembly, and 1–2 days for debugging/testing.