Stainless steel CNC bending uses computer numerical control to shape stainless steel into precise angles (Z.B., 90°, 135°) with press brakes—critical for making parts like brackets, Gehege, und Chassis. But stainless steel’s high strength and springback (it “bounces back” after bending) often cause errors: uneven angles, surface scratches, or even cracked parts. Dieser Artikel bricht zusammen 5 Kernphasen of stainless steel CNC bending processing, solving common pain points with step-by-step solutions to ensure consistent, high-quality outputs.
1. Entwurfsphase: Avoid Machining Headaches Before They Start
A flawed design can make even the best CNC bending machine fail. The goal here is to prioritize Hersteller—ensuring your design works with stainless steel’s properties, not against them.
Common Design Problems & Lösungen
| Design Problem | Why It Ruins Bending | Fix |
| Overly tight bends (Radius < 1x Materialdicke) | Stainless steel is rigid; tight bends cause cracking or uneven angles | Use a minimum bend radius of 1.5x material thickness (Z.B., 3mm radius for 2mm-thick stainless steel). |
| Unnecessary notches or holes near bend lines (within 2x material thickness) | Weakens the material; holes can deform during bending | Move notches/holes at least 3x material thickness away from bend lines (Z.B., 6mm away for 2mm-thick steel). |
| Complex multi-bend patterns (mehr als 3 bends in one small section) | Increases tool collision risk; hard to align each bend | Simplify: Split complex patterns into 2–3 separate sections (Z.B., bend one side, then reposition the part for the next bend). |
Schlüsselfrage: What if my design Bedürfnisse a tight bend (Z.B., a small enclosure)?
Verwenden annealed stainless steel (it’s softer than standard stainless steel) für den Teil. Annealing reduces springback by 30–40%, making tight bends possible without cracking.
2. Programmierungsphase: Prevent Errors That Damage Parts or Machines
Programming mistakes for stainless steel CNC bending are costly—they can scratch the material, bend it to the wrong angle, or even break the press brake’s tooling. The focus here is on program accuracy Und springback compensation (critical for stainless steel).
3 Non-Negotiable Programming Rules
- Compensate for Springback: Stainless steel springs back 5–10% after bending. Zum Beispiel, if you need a 90° angle, program the machine to bend to 95–100°—the material will bounce back to the correct angle. Use a springback calculator (many CNC software tools have this) to get exact values.
- Test with a Prototype First: Never run a new program on a full batch. Cut a small prototype (from scrap stainless steel) and measure its angle with a protractor. If it’s off by 2°, adjust the program’s bend angle before scaling up.
- Optimize Tool Path Order: Bend from the inside out for parts with multiple bends. Zum Beispiel, if making a U-shaped bracket, bend the two inner 90° angles first, then the outer edges. This avoids tool collisions and ensures alignment.
Beispiel: A manufacturer once skipped springback compensation for a 3mm-thick stainless steel bracket. They programmed a 90° bend, but the material sprung back to 98°—making 50 brackets unusable. Testing a prototype would have caught this and saved $200 in Material.
3. Machine Tool Preparation Stage: Set Parameters for Stainless Steel’s Strength
Stainless steel is harder than aluminum or mild steel, so wrong machine settings lead to poor precision or tool wear. The key here is to match parameters to stainless steel’s properties (Z.B., hohe Zugfestigkeit).
Parameter Settings for Stainless Steel CNC Bending
| Parameter | Recommendation for Stainless Steel (304/316 Grad) | Warum ist es wichtig |
| Biegekraft | 1.5x higher than mild steel (Z.B., 150kN for 3mm-thick, 200mm-wide steel) | Stainless steel needs more force to bend without springback. |
| Werkzeuggeschwindigkeit | 5–8mm/s (slower than aluminum’s 10–12mm/s) | Slow speed prevents surface scratches and ensures even bending. |
| Backgauge Position | Calibrate to ±0.1mm accuracy | Even a small misalignment (0.2mm) causes angles to be off by 1–2°. |
Für die Spitze: Clean the press brake’s tooling (punch and die) before starting. Stainless steel can leave metal shavings on tools—these shavings scratch the material’s surface during bending. Use a wire brush to remove debris, then wipe with isopropyl alcohol.
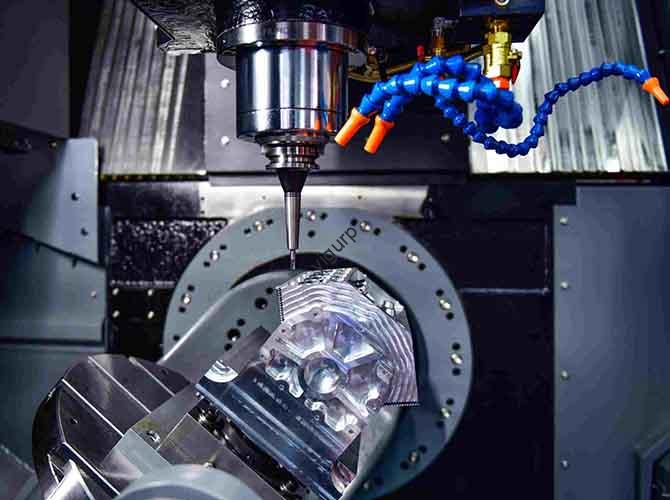
4. Verarbeitungsstufe: Choose Tools & Maintain Them for Smooth Bends
The wrong tool or worn tooling ruins stainless steel’s surface and reduces precision. The goal here is to pick stainless steel-specific tools Und replace them before wear affects quality.
Tool Selection Guide for Stainless Steel Bending
| Werkzeugtyp | Am besten für | Warum funktioniert es | Replacement Interval |
| Chrome-Plated Punches | Finishing bends (glatte Oberfläche) | Chrome resists scratches; prevents stainless steel from sticking to the tool. | Every 500–800 bends |
| High-Strength Steel Dies | Roughing bends (thick stainless steel > 4mm) | Durable enough to handle high bending forces without cracking. | Every 1000–1200 bends |
| Anti-Scratch Pads | All bends (visible parts like enclosures) | Attach to the die; protects stainless steel’s surface from tool marks. | Jeder 100 Biegungen (or when pad shows wear) |
Ursache & Wirkung: Using a worn punch (with dents) for stainless steel bending leads to:
- Surface scratches (ruining parts that need a polished finish)
- Uneven bends (the dent causes the material to fold incorrectly)
- Longer processing time (you have to rework or scrap parts)
5. Quality Control Stage: Gewährleisten Sie die Konsistenz über Chargen hinweg
Without proper checks, a single bad bend can ruin a whole batch of stainless steel parts. The focus here is on Echtzeitüberwachung Und systematische Prüfung.
3-Step Quality Control Process
- In-Prozess-Schecks: Nach jedem 10 Teile, measure the bend angle with a digital protractor (Genauigkeit: ±0.1°) and check for scratches with a light (hold the part at an angle to spot small marks). If angles are off by 1°, adjust the program’s springback compensation.
- Post-Bending Testing: Für kritische Teile (Z.B., food-grade stainless steel containers), test for flatness with a surface plate. Place the part on the plate—if there’s a gap larger than 0.1mm, the bend is uneven and needs reworking.
- Aufzeichnung: Log each batch’s parameters (bending force, tool type, springback value) und qualitativ hochwertige Ergebnisse. If you see repeated scratches, you’ll know to replace the anti-scratch pads sooner next time.
Perspektive der Yigu -Technologie
Bei Yigu Technology, we’ve helped clients optimize stainless steel CNC bending for years. The biggest mistake we see is ignoring springback—stainless steel’s “memory” is stronger than other metals, so compensation isn’t optional. Our CNC press brakes come with built-in stainless steel profiles that auto-adjust bending force and springback values. We also recommend our chrome-plated tooling, which reduces scratches by 70% vs. standard tools. Erinnern: Beim Biegen von Edelstahl geht es nicht um mehr Kraft – es geht um passende Werkzeuge, Einstellungen, und Design entsprechend den individuellen Anforderungen des Materials.
FAQ
- Q: Mein Edelstahlteil hat nach dem Biegen Kratzer – wie kann ich das beheben??
A: Erste, Überprüfen Sie Ihre Werkzeuge: Ersetzen Sie abgenutzte Stempel oder fügen Sie der Matrize Anti-Kratz-Pads hinzu. Falls dennoch Kratzer auftreten, Verwenden Sie zum Polieren ein Schleifpapier der Körnung 400 (für nicht sichtbare Teile) oder eine Edelstahlpolitur (für sichtbare Teile).
- Q: Kann ich dünnen Edelstahl biegen? (0.5mm dick) mit einer Standard-CNC-Abkantpresse?
A: Ja, Verwenden Sie jedoch einen Locher mit kleinem Durchmesser (3mm oder weniger) and reduce bending force to 50–80kN. Thin stainless steel bends easily but can wrinkle—slow tool speed (3–5mm/s) prevents this.
- Q: Why does my stainless steel bend angle change halfway through a batch?
A: Your tooling is worn. As punches/dies wear, they apply less even force—causing angles to shift. Check the tooling for dents; if you see them, replace the tool immediately. This is why we recommend checking tool wear every 100 Biegungen.