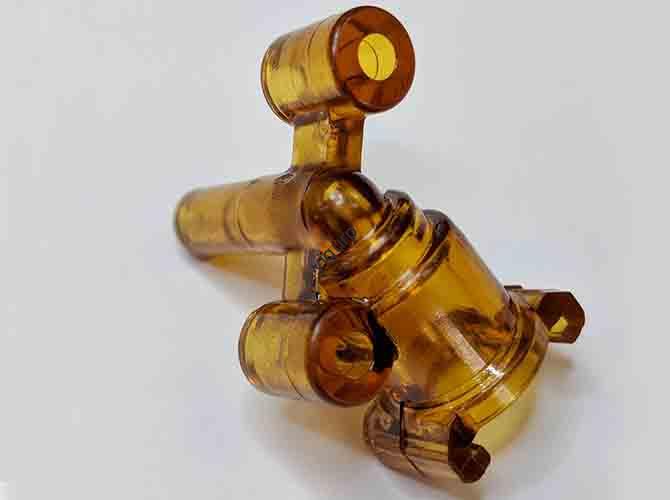
Ein Silikon-Prototyp ist ein detailliertes Modell eines endgültigen Teils, gemacht, um seine Form zu testen, fit, und wie es funktioniert. Für Produkte, die gebogen werden müssen, Arbeiten Sie sicher mit dem menschlichen Körper, oder mit Hitze umgehen, Diese Prototypen sind äußerst wichtig. Sie lassen Ingenieure und Designer durchhalten, fühlen, and test a part that works exactly like the final product. Making smart choices about how to make it, what materials to use, and which company to work with is crucial for staying within budget, meeting deadlines, and launching a successful product. Making mistakes during prototyping can lead to expensive changes and major delays.
In diesem Ratgeber, we will give you the expert knowledge needed to make good decisions. We will cover:
- When to choose silicone for your prototype.
- A detailed comparison of manufacturing methods like Liquid Injection Molding (LIM) und 3D-Druck.
- How to use rapid tooling for small production runs.
- A practical guide to choosing materials, including hardness and color.
- Money-saving strategies for your design.
- How to select a skilled manufacturing partner.
When to Choose Silicone
Deciding if silicone is the right material for your prototype is the first important step. Silicone has unique properties that make it perfect for specific uses where other materials would not work. Its main advantages for prototyping are its amazing flexibility, strong durability, wide temperature resistance, and natural safety for contact with living tissue. If your project needs these features, a silicone prototype is likely the right choice.
We see silicone as the best material for many demanding applications. These uses take advantage of its special benefits to create working, realistic prototypes.
Perfect Use Cases:
- Wearable Devices: For parts like watch bands, fitness tracker cases, and earbuds, silicone provides comfort, sweat resistance, and skin-contact safety. How it feels is essential for testing the user experience.
- Medizinisch & Gesundheitspflege: Im medizinischen Bereich, silicone is essential. We use it for prototypes of seals, Dichtungen, Schlauch, and devices that touch patients like breathing masks and surgical tool grips. For these applications, choosing medical-grade materials that meet standards like ISO 10993 for safety is absolutely necessary and shows a commitment to safety from the very beginning.
- Unterhaltungselektronik: Silicone protects and improves many electronic devices. Prototypes for button keypads, protective phone cases, and dust-proof port covers allow for testing the touch feedback and sealing effectiveness long before mass production.
- Automobilteile: The automotive environment is harsh. Silicone prototypes are used to test parts like seals, O-Ringe, wire harness connectors, and vibration dampeners that must withstand extreme temperatures, Feuchtigkeit, and engine fluids.
Key Advantages for Prototyping:
- Funktionstests: A silicone prototype is more than a visual model. It is a working part that can be assembled, compressed, stretched, and exposed to its intended environment to test real-world performance and durability.
- Safety for Living Tissue: Silicone’s inactive and non-allergenic nature makes it the top choice for any prototype that will have long contact with skin or be used in a medical setting.
- Temperatur & Umweltresistenz: Silicone maintains its properties from as low as -50°C to over 200°C. It also shows excellent resistance to UV radiation and many chemicals, allowing for realistic environmental testing.
- Excellent Touch & Comfort: For handheld products, how it “feels” is a critical design feature. Silicone prototypes allow you to test the comfort, Textur, and touch response of buttons and grips, ensuring a positive user experience.
Prototyping: LIM vs. 3D Drucken
Once you’ve decided on silicone, the next major decision is how to make your prototype. The two main methods are Liquid Injection Molding (LIM) and direct silicone 3D printing. These processes are completely different, and choosing the right one depends entirely on your project’s specific needs for quantity, Geschwindigkeit, kosten, and material accuracy.
Liquid Injection Molding involves injecting two-part liquid silicone rubber (LSR) into a pre-made mold cavity where it hardens into a solid part. 3D-Druck, a building process, creates the part layer by layer directly from a digital file, using a silicone-like photopolymer material. Understanding the trade-offs between these two methods is key to an efficient development process.
To provide maximum clarity, we have prepared a direct comparison of the two methods across critical decision-making factors.
| Faktor | 3D Drucken (Silicone-like) | Flüssigkeitsspritzguss (LIM) |
| Best for Quantity | 1-10 Teile | 10-500+ Teile |
| Vorlaufzeit | 1-3 Tage | 1-3 Wochen (includes tooling) |
| Kosten pro Teil | High and relatively flat | High initial tooling cost, but very low per-part cost that decreases with volume |
| Materialeigenschaften | Mimics silicone; may have lower tear strength, different stretching ability, or become brittle over time. Good for form/fit. | True, production-grade LSR properties. Perfect for functional and mechanical testing. |
| Design Complexity | Excellent for highly complex shapes, innere Strukturen, and organic forms. No tooling constraints. | Limited by moldability. Features like undercuts or negative draft require complex, more expensive tooling (side-actions). |
| Oberflächenbeschaffenheit | Visible layer lines are common. May require post-processing (glättend) for a better finish. | Smooth surface that directly reflects the finish of the mold cavity (z.B., poliert, strukturiert). |
| Color | Limited to a few standard options, often clear or black. | Virtually unlimited. Can be custom matched to Pantone (PMS) or RAL color codes. |
Here, we can share a real-world example of how these methods work together. For a recent project developing a complex wearable sensor housing, our team needed to test three different comfort designs quickly. We used 3D printing to create one of each design variation. This allowed us to get physical models for fit testing in just two days. After user feedback helped us select the final design, we needed a larger batch of 100 units for functional field testing and marketing. We then switched to Liquid Injection Molding, creating a rapid aluminum tool. This approach provided us with cost-effective, production-quality prototypes that had the true mechanical properties and durability required for rigorous real-world testing. This two-stage process optimized for both speed in the early phase and quality in the later phase.
Rapid Tooling for Prototypes
When you need more than a handful of parts but aren’t ready to commit to expensive mass-production tooling, rapid tooling is the perfect solution. It serves as the critical bridge between single 3D printed prototypes and full-scale production, offering a way to get production-quality silicone parts in low to mid volumes (typischerweise 20 Zu 500+ Teile) kostengünstig.
Im Kern, rapid tooling for silicone involves creating a simplified, fast-turnaround mold for use in the Liquid Injection Molding process. Instead of using hardened P20 steel, which is the standard for high-volume production, these molds are typically CNC machined from aluminum. This material choice dramatically reduces both the time and cost required to create the tool, making it perfect for the prototyping and pilot production stages.
You should consider rapid tooling in several key scenarios:
- When you need more than 20 parts but fewer than a few thousand. It is not economical to 3D print this quantity, but it’s too small to justify a full steel production tool.
- When you must test with true production-grade Liquid Silicone Rubber (LSR). 3D printed materials mimic silicone, but rapid tooling allows you to use the exact same material that will be used in mass production, ensuring accurate functional, chemisch, and thermal testing.
- For pilot runs, clinical trials, or initial market launches. It allows you to produce a batch of market-ready parts to gather user feedback or secure initial sales before investing in expensive, long-lead-time tooling.
- When your design is stable but you want to reduce the risk of the final tooling investment. A rapid tool can confirm that your design can be molded and meets all functional requirements before you commit to a $10,000+ steel tool.
The choice between an aluminum rapid tool and a traditional steel tool comes down to a trade-off between speed, kosten, und Langlebigkeit des Werkzeugs.
Aluminum Tools:
- Vorteile: They are significantly faster to machine, with lead times often in the 1-2 week range. The cost is much lower than steel. They are perfect for producing hundreds to a few thousand parts, an ideal range for prototyping and early production.
- Nachteile: Aluminum is a softer material, so the tool life is shorter. It is not suitable for high-volume mass production runs of tens of thousands of parts or more.
P20 Steel Tools:
- Vorteile: These tools are highly durable and can withstand hundreds of thousands of molding cycles. They are the standard for long-term, high-volume mass production. They can also include more complex features like elaborate cooling channels for optimized cycle times.
- Nachteile: The cost is much higher, and the lead times are significantly longer, often ranging from 4 Zu 8 weeks or more.
The rapid tooling process is straightforward and efficient:
1. Finalize CAD: The 3D design of the part is finalized.
2. Tool Design (DFM): We perform a Design for Manufacturability analysis to optimize the part for molding and design the aluminum tool.
3. CNC-Bearbeitung: The aluminum blocks are precisely machined to create the core and cavity of the mold.
4. Molding Silicone Parts: The finished tool is placed in a Liquid Injection Molding press, and the silicone prototypes are produced.
Specifying Material Properties
Making informed decisions about your prototype’s material properties is just as important as choosing the manufacturing method. For silicone, the two most critical specifications you will need to provide are Shore hardness and the desired color and transparency. These choices directly impact the final product’s function, fühlen, und Aussehen. Getting them right early on prevents costly and time-consuming re-runs.
Selecting Shore Hardness
Shore hardness, or durometer, is the standard measure of a material’s firmness or resistance to indentation. For flexible materials like silicone, we almost always use the Shore A scale. A lower number indicates a softer, more bendable material, while a higher number means a harder, more rigid material.
Instead of just thinking in numbers, it is helpful to relate these durometer values to familiar, everyday objects. This makes it much easier to visualize how your prototype will feel. We use the following guide to help our clients pinpoint the exact feel they are trying to achieve.
| Shore A Value | Feels Like… | Common Prototype Applications |
| 10A – 20A | A gummy bear, very soft gel | Soft seals for delicate electronics, cushioning pads, special effects skins, Anatomische Modelle |
| 30A – 40A | A pencil eraser, a flexible rubber band | Wearable watch bands, stress balls, soft-touch button overlays, flexible grips |
| 50A – 60A | A car tire tread, a shoe sole | This is the most common range. Perfect for keypads, Schutzhüllen, general-purpose gaskets, and seals. |
| 70A – 80A | A shoe heel, very stiff rubber | Firm O-rings, semi-rigid seals, components that require structural integrity with minimal flex |
When specifying hardness, consider the primary function of your part. Is it for cushioning? A soft 20A-30A might be best. Does it need to be a durable seal that holds its shape under pressure? A firmer 60A-70A would be more appropriate.
Color and Transparency
The visual appearance of your prototype is crucial, especially for consumer-facing products. Liquid Silicone Rubber offers a wide range of aesthetic possibilities.
- Standard Options: The natural, unpigmented base for most Liquid Silicone Rubber is either optically transparent (water-clear) or translucent (milky-white). A transparent prototype is excellent for testing light pipes or when you need to see internal components. A translucent prototype is good for diffusing light from indicator LEDs.
- Color Matching: Custom colors are easily achieved by adding a pigment masterbatch to the base LSR before molding. For precise color control, we recommend providing a Pantone (PMS) or RAL color code. This allows the material supplier to create a custom-compounded silicone that matches your brand’s specific color requirements. As a point of expertise, it is important to note that achieving a perfect Pantone match in a translucent silicone can be challenging, as the underlying translucency affects the final perceived color. It may require a few iterations to dial in the exact shade.
- Transparency Levels: It’s important to be clear about the level of clarity you need.
- Transparent (Water-Clear): This is typically a special, optically clear grade of LSR. It is used for prototypes of lenses, Lichtleiter, and clear windows where maximum light transmission is essential.
- Translucent: This standard grade diffuses light. It is perfect for hiding internal components while still allowing light from status indicators (like LEDs) to shine through with a soft glow.
- Opaque: A solid color with no light transmission. This is achieved by using a higher pigment load and is the standard for most non-optical parts like keypads, Fälle, and seals.
Understanding Prototype Costs
A clear understanding of what drives the cost of a silicone prototype is essential for effective budget management. By recognizing the key factors that influence price, you can make strategic design decisions that significantly reduce costs without compromising function. The primary cost components are always a combination of tooling cost (for Liquid Injection Molding), material cost, and labor/machine time.
We can break down the main cost drivers to give you a transparent view of where your money goes.
Key Cost Drivers:
- Part Complexity: This is one of the biggest cost drivers, particularly for injection molding. Complex features like undercuts (areas that prevent the part from being ejected directly from a simple two-part mold), tief, thin ribs, or extremely small details require more complex molds. Undercuts, Zum Beispiel, require side-actions or manual inserts in the tool, which are moving parts that add significant cost and complexity to the mold’s construction and operation.
- Part Size and Volume: It’s a simple equation: larger parts require more material, which increases the material cost per part. Furthermore, larger parts demand larger molds, which require more aluminum or steel and more CNC machining time, thus increasing the one-time tooling cost.
- Wall Thickness: Inconsistent wall thickness is a common issue that increases cost. Thicker sections take longer to cure, which leads to longer machine cycle times. This increases the cost per part. Drastic variations in thickness can also lead to cosmetic defects like sink marks, potentially requiring tool adjustments.
- Toleranzen: Tighter tolerances are always more expensive. Holding a tolerance of +/- 0.05mm requires a much more precise (and therefore expensive) tool and a more rigorous quality control process than holding a tolerance of +/- 0.25mm.
- Material Choice: Not all silicones are created equal. General-purpose LSR is the most cost-effective. Jedoch, specialty grades such as optically clear silicone, medical-grade USP Class VI material, or conductive silicone come at a significant premium.
Actionable Cost-Saving Strategies (DFM for Silicone):
Knowing the cost drivers is only half the battle. Applying Design for Manufacturability (DFM) principles is how you actively reduce costs. Here is our checklist for optimizing your design.
1. Simplify Your Design, Especially Undercuts: Examine every feature carefully. Can an undercut be eliminated with a small design change? Sometimes, a simple slot or a pass-through core can achieve the same function as a complex undercut, dramatically reducing tool cost.
2. Maintain Uniform Wall Thickness: Design your part with a consistent wall thickness whenever possible. This promotes even material flow, uniform curing, and faster cycle times, which directly translates to a lower cost per part and better cosmetic quality.
3. Be Mindful of the Parting Line: The parting line is where the two halves of the mold meet. A simple, flat parting line on a single plane is the cheapest and easiest to manufacture. Komplex, stepped, or curved parting lines add considerable time and cost to the tool-making process. Discuss this with your supplier early on.
4. Specify Realistic Tolerances: Don’t over-tolerance your part. Apply tight tolerances only to the most critical features, such as mating surfaces or sealing areas. Loosen tolerances on non-critical dimensions to reduce tooling and inspection costs.
5. Choose the Right Method for Your Quantity: This is a fundamental cost-saving strategy. Do not use Liquid Injection Molding to make one or two parts; the tooling cost will be prohibitive. Conversely, do not use 3D printing to make 200 Teile; the high per-part cost will be far more expensive than a rapid tool and a batch run.
Choosing the Right Supplier
Selecting the right manufacturing partner is as crucial as perfecting your design. A capable supplier is more than just a vendor; they are an extension of your development team. The right partner will provide valuable feedback, help you avoid common pitfalls, and ensure your prototypes meet your quality standards on time and on budget.
Here is a guide on what to look for when evaluating potential suppliers for your silicone prototype project.
- Interne Kapazitäten: Look for a supplier who offers both silicone 3D printing and Liquid Injection Molding in-house. A partner with multiple technologies can provide unbiased, expert advice on which method is genuinely best for your specific stage of development, rather than pushing the only process they offer.
- Technische Unterstützung (DFM): A truly valuable partner will not just take your CAD file and produce a quote. They will offer a comprehensive Design for Manufacturability (DFM) review. This free service should identify potential issues with your design—like undercuts, draft angles, or inconsistent wall thickness—and suggest optimizations that will improve quality and reduce cost *before* any metal is cut.
- Experience with Your Industry: The requirements for a medical device are vastly different from those for a consumer electronic. If you are developing a medical product, seek a supplier with ISO 13485 certification or demonstrable experience with medical-grade materials and validation processes. If you are in automotive, look for experience with the relevant standards and materials.
- Case Studies and Examples: Don’t just rely on their word. Ask to see case studies or physical examples of similar silicone parts they have produced. This is direct evidence of their experience and expertise. Seeing a part similar to yours, with a high-quality finish and complex features, is a powerful indicator of their real-world capabilities.
- Clear Communication and Quoting: Your supplier should be responsive, transparent, and easy to work with. Their quotes should be detailed and clearly break down one-time costs (like tooling) from per-part costs. They should be able to answer technical questions clearly and provide regular updates on your project’s status.
Conclusion: The Right Choice
Navigating the world of silicone prototyping requires a series of informed decisions. By following a structured approach, you can reduce risks for your project and accelerate your path to a successful product launch. The journey begins with confirming that silicone’s unique properties align with your application’s demands. From there, the key is to select the right manufacturing process for your stage of development: 3D printing for unmatched speed in early-stage validation, and rapid tooling with Liquid Injection Molding when you need production-grade properties and higher quantities.
Equally important is the careful specification of material properties like Shore hardness and color to ensure your prototype looks and feels exactly as intended. Endlich, applying Design for Manufacturability principles is not just a suggestion; it is a powerful tool for controlling costs and improving quality. A well-planned prototyping strategy, executed with a capable manufacturing partner, doesn’t just create a model—it builds confidence, reduces market risk, and ultimately leads to a better final product.