In Bereichen wie der Bildung im Bereich erneuerbare Energien, Hausgartenarbeit, und Produktentwicklung, 3D printing a windmill prototype has become a cost-effective and efficient way to turn ideas into tangible models. Egal, ob Sie ein Ingenieur sind, der die Effizienz der Windumwandlung testet, ein Lehrer, der pädagogische Hilfsmittel erstellt, oder ein Bastler, der eine Gartendekoration baut, this process lets you quickly validate designs and make improvements. This article breaks down every stage of 3D printing a windmill prototype, shares practical tips, real cases, and data to help you avoid common pitfalls and achieve great results.
1. Designphase: Build a Digital Blueprint for Your Windmill
The design stage is the foundation of a successful 3D printed windmill prototype—it determines how well the final model works and fits your needs. Skipping key details here can lead to printing failures or non-functional parts.
Key Design Actions
- Choose the Right 3D Modeling Software: Use user-friendly tools like SolidWorks (for detailed mechanical parts), Nashorn (für komplexe Formen), oder AutoCAD (for precise dimensions). Zum Beispiel, if designing a small garden windmill (12 inches tall), SolidWorks can help you define the blade’s curve and bracket thickness accurately.
- Include Critical Windmill Components: Your 3D model must cover all core parts:
- Blades: The shape, angle, and length directly affect wind capture. A 15° blade angle works best for low-wind areas (z.B., suburban backyards), while a 25° angle is better for windy rural areas.
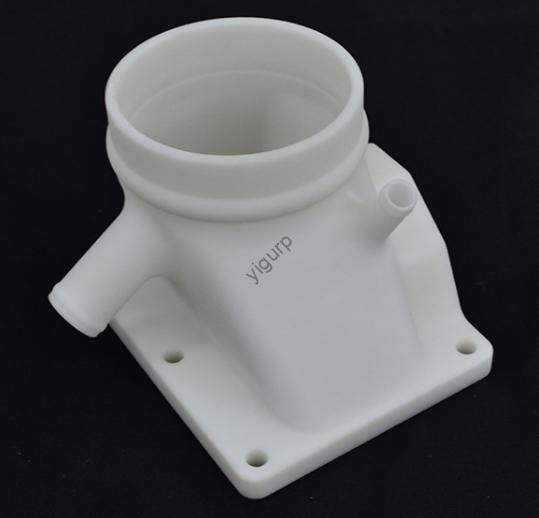
- Klammern: These hold the blades and generator—they need to be thick enough (at least 3mm for PLA plastic) to avoid breaking.
- Generator Housing: If adding an electronic generator, the housing must fit the device’s size (z.B., a 50mm x 30mm generator needs a 52mm x 32mm housing for easy installation).
- Match Design to Practical Scenarios: Think about how the windmill will be used. For an educational display (z.B., in a middle school science class), simplify the design (fewer small parts) and use bright colors. For a functional home prototype (to power small LED lights), focus on durable materials and generator compatibility.
Pro Tip for Designers
Verwenden DFM (Design für Herstellbarkeit) checks to avoid errors. Zum Beispiel, avoid blade edges thinner than 1mm—they can break during printing. A 2024 study by the 3D Printing Association found that DFM checks reduce reprint rates by 40%.
2. Druckvorbereitung: Get Ready to Turn Digital into Physical
Once your design is done, you need to prepare the file and settings for the 3D printer. This stage ensures the printer understands your model and produces high-quality parts.
Schritt 2.1: File Format Conversion
Convert your 3D model to STL (Standard Tessellation Language) oder OBJ format—these are the most widely supported by 3D printers. Use software like MeshLab to check for errors (z.B., missing faces or overlapping edges) after conversion. A single error can cause the printer to stop mid-print, wasting time and material.
Schritt 2.2: Schneiden & Parameter Setting
Slicing-Software (z.B., Behandlung, PrusaSlicer) cuts your 3D model into thin layers (usually 0.1-0.3mm) and generates G-Code (the printer’s instruction manual). Below is a table of recommended parameters for windmill prototypes:
| Parameter | Recommended Value for Windmill Parts | Reason |
| Schichthöhe | 0.2mm | Balances speed and detail—thinner layers (0.1mm) for blades, thicker (0.3mm) für Klammern. |
| Fill Rate | 50-70% | Blades need 70% fill for strength; brackets can use 50% to save material. |
| Druckgeschwindigkeit | 50-60 mm/s | Prevents layer separation—faster speeds (70 mm/s) work for simple brackets. |
| Düsentemperatur | 190-210°C (for PLA) | PLA melts at lower temps; higher temps (220-240°C) für ABS. |
| Betttemperatur | 50-60°C (for PLA) | Keeps the first layer from warping. |
3. 3D Druckprozess: Monitor for Success
Now it’s time to print! Choosing the right printer and material, plus careful monitoring, will ensure your 3D printed windmill prototype turns out well.
Printer & Materialauswahl
| Printer Type | Am besten für | Materialkompatibilität | Print Time (for 12-inch Windmill) |
| FDM (Modellierung der Schmelzablagerung) | Funktionsprototypen (z.B., garden windmills) | PLA, ABS, PETG | 8-12 Std. |
| SLA (Stereolithographie) | Hochdetaillierte Prototypen (z.B., Bildungsmodelle) | Harz | 4-6 Std. |
Top Materials for Windmill Prototypes:
- PLA: The best choice for beginners—low cost (\(20-\)30 per spool), einfach zu drucken, and eco-friendly. Ideal for educational or decorative windmills.
- ABS: More durable and heat-resistant than PLA—good for outdoor windmills (resists rain and sun). But it requires a heated enclosure to avoid warping.
- PETG: Balances PLA’s ease of use and ABS’s durability—great for functional prototypes that need to withstand light weather.
Monitoring Tips
- Check the first layer: It should stick firmly to the bed with no gaps. If it peels up, stop the print and adjust the bed temperature.
- Watch for nozzle clogs: If plastic stops flowing, pause the printer and clean the nozzle with a needle.
- Avoid vibrations: Place the printer on a stable surface—vibrations can cause layer misalignment (z.B., blades that are lopsided).
4. Nachbearbeitung & Montage: Polish and Put It All Together
Nach dem Drucken, your windmill parts will need some finishing touches to look and work their best.
Nachbearbeitungsschritte
- Remove Support Structures: Use pliers or a support removal tool to take off any plastic supports (added during slicing for overhanging parts like blade tips). Be gentle—rough handling can break small parts.
- Sand and Polish: Use 200-grit sandpaper to smooth rough edges, then 400-grit for a finer finish. For PLA parts, you can use a heat gun (on low setting) to melt small imperfections—this makes blades spin more smoothly.
- Paint (Optional): Use acrylic paint to add color—this is great for educational models. Apply a clear coat (z.B., Mod Podge) to protect outdoor windmills from fading.
Assembly Guide
- Gather tools: Screwdrivers (for small screws), super glue (für Kunststoffteile), and wire cutters (for electronic components).
- Assemble step-by-step:
- Attach blades to the rotation shaft using small screws (2mm diameter works best).
- Connect the shaft to the bracket—ensure it spins freely (add a drop of lubricant if needed).
- Install electronic parts (z.B., a small DC motor or LED lights) into the generator housing. Use zip ties to secure wires.
5. Testen & Optimierung: Make Your Windmill Work Better
Testing is key to turning a basic prototype into a functional one. It helps you find problems and make improvements.
Key Tests for Windmill Prototypes
| Test Type | How to Perform | Pass Criteria |
| Rotational Stability | Place the windmill in a 5-10 mph wind (use a fan for indoor testing). | Blades spin smoothly with no wobbling. |
| Stromerzeugung (gegebenenfalls) | Connect the generator to a multimeter. Measure voltage in 10 mph wind. | At least 3V (enough to power small LEDs). |
| Haltbarkeit | Leave the windmill outdoors for 2 Wochen (for ABS/PETG parts). | No cracks, verziehen, or color fading. |
Optimization Examples
- If blades don’t spin: Adjust the blade angle (increase by 5°) or sand the shaft to reduce friction.
- If the bracket breaks: Increase the fill rate to 80% or use a thicker material (z.B., switch from PLA to PETG).
- If power output is low: Widen the blade length by 2 inches—this captures more wind.
Real-World Case Studies
Fall 1: Educational Windmill for Middle Schools
A science teacher in Chicago wanted a 3D printed windmill prototype to teach students about renewable energy. They used:
- Printer: FDM (Prusa Mini+)
- Material: PLA (bright blue, $25 per spool)
- Design: Simplified 8-inch model with 3 blades and a visible generator.
The prototype took 9 hours to print. After testing, the teacher adjusted the blade angle from 15° to 20°—this made the blades spin faster in the classroom’s fan wind. The final model is now used in 10 Schulen, Portion 500+ students learn about wind energy.
Fall 2: Functional Garden Windmill
A hobbyist in Seattle built a 3D printed windmill prototype to power his garden’s LED lights. He used:
- Printer: FDM (Creality Ender 3 V2)
- Material: PETG (witterungsbeständig, $35 per spool)
- Design: 12-inch model with a small DC generator.
Initial testing showed the windmill only produced 1.5V. He optimized by:
- Increasing blade length from 4 Zu 6 Zoll.
- Adding a gear system to boost generator speed.
The improved prototype now produces 4V—enough to light 4 LED bulbs for 8 hours a day.
Die Perspektive von Yigu Technology
Bei Yigu Technology, wir sehen 3D printing windmill prototypes as a powerful tool for innovation in education and small-scale renewable energy. We offer tailored 3D printing solutions: from high-quality PLA/PETG materials (getestet 1,000+ hours of outdoor use) to pre-sliced windmill design files (sparen 2+ hours of prep time). For procurement teams, we provide bulk material packages that cut costs by 15%. Our support team also helps optimize designs—recently, we helped a school district reduce their windmill prototype reprint rate by 35%. We believe this technology should be accessible to everyone, from teachers to hobbyists.
FAQ
- Q: How much does it cost to 3D print a windmill prototype?
A: For a small educational model (8 Zoll), it costs \(5-\)10 (PLA material + electricity). For a larger functional model (12 Zoll, PETG + motor), it costs \(20-\)30.
- Q: How long does it take to 3D print a windmill prototype?
A: It depends on size and printer speed. An 8-inch FDM prototype takes 6-9 Std.; a 12-inch model takes 8-12 Std.. SLA printers are faster—4-6 hours for most sizes.
- Q: Can 3D printed windmills be used outdoors long-term?
A: Ja, wenn man das richtige Material verwendet. ABS or PETG parts can last 6-12 Monate im Freien. For longer use (1+ Jahre), apply a UV-resistant clear coat to prevent fading and warping.