When it comes to bringing an automotive design to life, metal automobile prototype models are the unsung heroes. They let engineers test ideas, check if parts work together, and get ready for mass production—all without spending a fortune on full-scale molds. Whether you’re a procurement professional sourcing the right prototypes or a product engineer refining a design, understanding how these models are made and why they matter is key. Let’s break down everything you need to know, mit Beispielen aus der Praxis und umsetzbaren Daten.
1. Why Metal Stands Out for Automotive Prototypes
Not all prototype materials are equal—and metal is a top choice for automotive projects. Unlike plastic, metal materials offer the strength, Hitzebeständigkeit, and durability that mimic real-world automotive parts. This means tests on metal prototypes are more reliable, helping teams catch issues early.
Zum Beispiel, a European automaker once used plastic prototypes for an engine bracket. The plastic held up in lab tests but failed when exposed to the high temperatures of a real engine. Switching to an aluminum alloy prototype solved the problem—because aluminum’s heat resistance matched the bracket’s actual working conditions.
Below is a quick guide to common metals used in automotive prototypes, with their key traits and uses:
| Metal Material | Schlüsseleigenschaften | Typical Automotive Uses |
| Aluminiumlegierungen | Geringe Dichte (2.7 g/cm³), hohe Festigkeit, good heat conductivity | Motorkomponenten, body structural parts, Felgen |
| Edelstahl | Korrosionsbeständig, hohe Zugfestigkeit (bis zu 1,500 MPa) | Exhaust systems, Kraftstofftanks, Bremskomponenten |
| Messing | Leicht zu bearbeiten, gute elektrische Leitfähigkeit | Elektrische Anschlüsse, small fittings |
| Magnesiumlegierungen | Ultraleicht (1.8 g/cm³), hohe Steifigkeit | Dashboard frames, seat structures |
| Zinklegierungen | Niedriger Schmelzpunkt, gute Gießbarkeit | Türgriffe, Zierbesatz |
2. Schritt für Schritt: How Metal Automobile Prototypes Are Made
Creating a metal automobile prototype model is a precise process—each step affects the final quality. Let’s walk through the key stages, with examples to show how they work in practice.
2.1 Materialauswahl: Match the Metal to Your Needs
The first step is picking the right metal. This depends on what the prototype will be used for. Zum Beispiel:
- If you’re testing a suspension part (which needs high strength), stainless steel or a strong aluminum alloy (like 6061-T6) is best.
- If weight is critical (z.B., a prototype for an electric vehicle’s body panel), magnesium alloy is a better choice.
A U.S.-based EV startup recently chose Aluminiumlegierung 5052 for their battery case prototype. Why? It’s lightweight, korrosionsbeständig (important for battery protection), and easy to machine—cutting their prototyping time by 20%.
2.2 Data Collection: Start with Accurate Designs
You can’t make a good prototype without good data. Der Prozess beginnt mit:
- Importing 3D CAD files (z.B., STEP or IGES formats) from the design team. These files are the blueprint for the prototype.
- Using tools like SolidWorks or AutoCAD to check for errors—like missing dimensions or tight tolerances—before machining.
A Chinese automotive supplier once skipped this check and made a prototype from a faulty CAD file. The part didn’t fit during assembly, costing them 2 weeks of rework. Always validate your 3D files first!
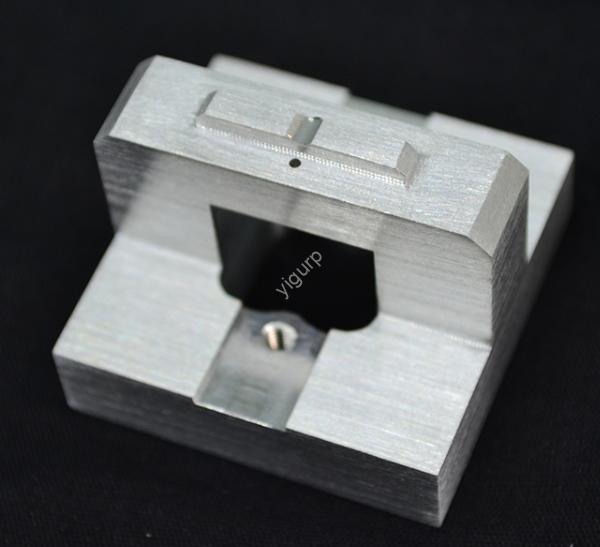
2.3 Bearbeitung: CNC vs. Manual Work
Most metal prototypes are made with CNC-Bearbeitung—it’s fast, genau, und konsistent. So funktioniert es:
- Programmierung: A engineer writes G-code (die Sprache, die CNC-Maschinen verwenden) based on the 3D file.
- Setting up: The metal (z.B., an aluminum block) is clamped to the CNC table.
- Bearbeitung: The machine cuts, Bohrer, and shapes the metal to match the design—often with tolerances as tight as ±0.005 mm.
Für komplexe Teile (like a curved exhaust manifold), multi-axis CNC machining (z.B., 5-Achsmaschinen) verwendet wird. It lets the machine reach all angles of the part, so you don’t need to reposition it—saving time and reducing errors.
Manual work comes next for small fixes:
- Entgraten: Using sandpaper or a file to smooth out sharp edges left by CNC cutting.
- Grinding and polishing: Making the surface smooth (z.B., for a prototype door handle that needs a sleek finish).
2.4 Appearance Treatment: Protect and Improve the Prototype
Surface treatment isn’t just about looks—it also adds durability. Common processes include:
- Malerei: Applying a heat-resistant paint for engine parts.
- Sandstrahlen: Creating a matte finish for parts that need grip (z.B., a prototype gear shifter).
- Eloxieren: Adding a protective layer to aluminum parts (prevents corrosion).
A German automaker used anodized aluminum for their prototype steering wheel. The anodized layer made the wheel scratch-resistant—perfect for testing how drivers would handle it daily.
2.5 Assembly Testing: Make Sure It Works
Once all parts are ready, it’s time to test:
- Test assembly: Putting the prototype together to check if parts fit. Zum Beispiel, a prototype engine block should line up with the cylinder head without gaps.
- Functional testing: Simulating real use. A brake caliper prototype might be tested for stopping power, while a suspension part is tested for durability over 10,000 Zyklen.
A Japanese automaker once found a problem during functional testing: their prototype brake pad didn’t grip the rotor well at high speeds. They adjusted the pad’s material (switching from brass to a stainless steel composite) and fixed the issue before mass production.
2.6 Packaging and Shipping: Keep the Prototype Safe
Endlich, the prototype is packaged to avoid damage. This might include:
- Foam inserts to hold the part in place.
- Waterproof boxes for parts shipped overseas.
- Tracking numbers so you can monitor delivery.
A Canadian automotive design firm once used flimsy packaging for a stainless steel prototype. The part bent during shipping, costing them $500 to replace. Invest in good packaging—it’s cheaper than reworking!
3. Yigu Technology’s View on Metal Automobile Prototype Models
Bei Yigu Technology, we believe metal automobile prototype models are the bridge between design and production. Over the years, mit denen wir zusammengearbeitet haben 500+ automotive clients to create prototypes that solve real problems—from lightweight EV parts to high-strength engine components. We prioritize using high-quality metals (like 6061-T6 aluminum and 304 Edelstahl) and 5-axis CNC machining to ensure precision. Für uns, a good prototype isn’t just a copy of the design—it’s a tool to help clients reduce risks and launch better products faster.
FAQ
- How long does it take to make a metal automobile prototype model?
It depends on the part’s complexity. A simple aluminum bracket might take 3–5 days, while a complex 5-axis part (like an exhaust manifold) could take 10–14 days. Always share your timeline with your supplier upfront.
- What’s the cost of a metal automobile prototype?
Costs range from \(200 (for a small aluminum part) Zu \)5,000+ (for a large, complex part like a prototype engine block). The material, Größe, and machining time all affect the price.
- Can I use a metal prototype for mass production testing?
Ja! Metal prototypes are ideal for testing mass production processes (z.B., how parts will be assembled on a factory line). They mimic the properties of production parts, so your test results will be reliable.