1. Vor-CNC-Bearbeitung: Design and Preparation for Game Machine Prototypes
Vor dem Start CNC -Bearbeitung for the game machine prototype, a systematic design and preparation stage is essential to align with functional, strukturell, and user experience needs. Diese Phase folgt einer linearen Sequenz, mit Schlüsseldetails in der folgenden Tabelle organisiert.
| Designschritt | Schlüsselanforderungen | Empfohlene Materialien |
| Produktbedarfsanalyse | Clarify game machine type (handheld/desktop), Größe (handheld: 180×100×30mm; Desktop: 300×200×150mm), und Kernfunktionen: Reserve space for joysticks, Knöpfe (action/start/select), Anzeige (4-7 inch touchscreen), Batterie (5000-8000Mah), und Ports (USB-C, HDMI, headphone jack); Ensure structural support for heat dissipation (fan slots for high-performance chips) and anti-slip grip (handheld models). | – |
| Part Splitting | Divide the game machine model into machinable components: Handheld upper/lower shells, joystick bases, button panels, screen frames, circuit board mounts; Desktop case panels, controller docks, internal cooling brackets. Avoid overhangs or closed cavities that hinder CNC machining. | – |
| 3D Modellierung | Verwenden Sie die CAD -Software (Solidworks, Und NX) to create 3D models with precise dimensions. Highlight critical features: Button holes (diameter 8-10mm), joystick mounting slots (15-20MM -Tiefe), screen cutouts (match display size with 0.1mm gap), and screw holes (M2-M3 for shell assembly). Fügen Sie Schrägen von 3°–5° hinzu, um eine zukünftige Formkompatibilität zu gewährleisten. | – |
| Materialauswahl | Wählen Sie Materialien basierend auf der Funktion des Teils aus, Verarbeitbarkeit, und Haltbarkeit. Prioritize compatibility with mass production processes. | Handheld Shells/Desktop Panels: ABS -Plastik (niedrige Kosten, wirkungsbeständig, leicht zu färben); Joystick Bases/Button Panels: PC -Kunststoff (hohe Starrheit, Tragenresistent); Internal Cooling Brackets: Aluminiumlegierung (good heat conduction, leicht); Transparent Screen Frames: Acryl (klar, kratzfest). |
| Materielle Vorbehandlung | Rohstoffe in Lücken schneiden (Lassen Sie 2-3 mm Bearbeitungszugabe): For plastic sheets, Verwenden Sie Laserschnitt; Für Blöcke aus Aluminiumlegierung, Verwenden Sie Bandsägen. Anneal Aluminiumlegierung (300-350° C für 1-2 Std.) Inneren Stress reduzieren; Clean all blanks with alcohol to remove oil and dust. | – |
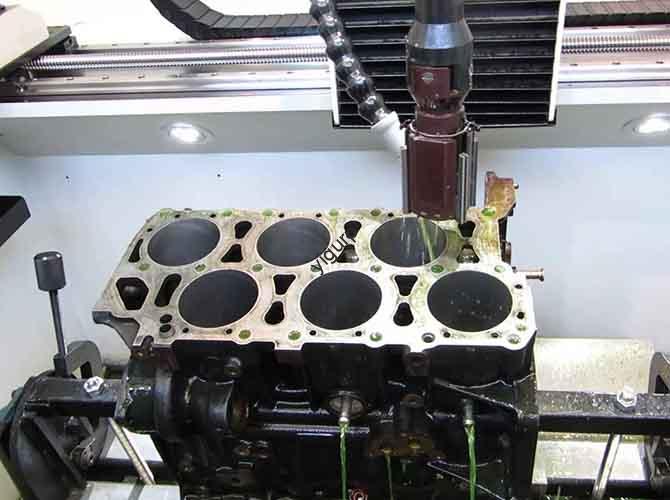
2. Core CNC Machining Process for Game Machine Prototypes
Der CNC-Bearbeitungsprozess is the bridge between 3D models and physical prototype parts. It requires strict control over programming, clamping, and cutting to ensure precision and functional reliability.
2.1 CAM Programming and Toolpath Design
Scientific programming determines machining efficiency and part quality. The table below outlines key steps and parameters:
| Programming Step | Schlüsselaktionen | Empfohlene Software & Werkzeuge |
| Modellimport & Coordinate Setup | Import 3D models (STEP/IGS format) into CAM software; Set machining origin (align with part center for symmetrical components like handheld shells). | Mastercam, PowerMill |
| Toolpath Generation | – Rauen: Verwenden Sie Werkzeuge mit großem Durchmesser (φ8-10mm flat cutters) to remove 80-90% von überschüssigem Material; Leave 0.5-1mm finishing allowance.- Fertig: Verwenden Sie Werkzeuge mit kleinem Durchmesser (φ0.3-0.5mm ball cutters) für Details (Knopflöcher, joystick slots, logo grooves); Set cutting depth to 0.1-0.2mm per pass.- Corner Cleaning: Use φ1-2mm end mills to remove residue in complex areas (Z.B., port cutouts, circuit board mount edges). | – Rauen: Hochgeschwindigkeitsstahl (HSS) Schneider- Fertig: Carbide cutters |
| Parametereinstellung | Adjust rotational speed, Futterrate, and cutting depth based on material: | – |
| – Aluminiumlegierung: 8000-10000 Drehzahl, 300-500 MM/min -Futterrate- ABS -Plastik: 4000-6000 Drehzahl, 200-300 MM/min -Futterrate- PC -Kunststoff: 5000-7000 Drehzahl, 250-350 MM/min -Futterrate | – |
2.2 Clamping and Machining Execution
Proper clamping prevents part displacement, while precise execution ensures dimensional accuracy.
2.2.1 Clamping Guidelines
- Fixture Selection:
- Use vises with soft jaws (rubber-coated) for aluminum alloy blocks to avoid surface scratches.
- Use vacuum suction cups for thin plastic sheets (Z.B., 2-3mm button panels) to ensure even pressure and prevent deformation.
- Use custom jigs for irregular parts (Z.B., joystick bases with curved edges) to maintain alignment during machining.
- Symmetrical Part Handling: For handheld upper/lower shells, use double-sided clamping (machine one side, flip, and re-calibrate with a probe) to ensure left-right symmetry (error ≤±0.05mm).
2.2.2 Machining Execution Steps
- Rauen: Focus on speed—use layer-by-layer milling to shape the part’s basic outline (Z.B., handheld shell edges, desktop case openings). Für Plastikteile, control cutting force (max 30N) Um das Knacken zu vermeiden; für Aluminiumlegierung, use cutting fluid to reduce heat-induced deformation.
- Fertig: Prioritize precision—machine critical features first (Knopflöcher, joystick slots, port cutouts). For threaded holes (M2-M3), use taps (für Plastik) or thread milling cutters (für Metall) to ensure smooth screw installation (no cross-threading).
- Sonderbearbeitung:
- Use 4-axis linkage machining for curved surfaces (Z.B., handheld grip edges) to achieve consistent curvature (error ≤±0.1mm) and enhance user comfort.
- For button holes, machine chamfers (C0.5) to avoid sharp edges that may scratch fingers during use.
2.3 Quality Inspection During Machining
Conduct in-process checks to catch defects early:
- Dimensionale Inspektion: Use digital calipers (for outer dimensions, Toleranz ± 0,1 mm) and micrometers (for aluminum alloy brackets, tolerance ±0.01mm) after each process.
- Surface Quality Check: Use a stylus roughness meter to verify surface finish (Ra ≤1.6μm for visible parts like handheld shells; Ra ≤3.2μm for internal brackets).
- Feature Verification: Use go/no-go gauges to test button holes (ensure buttons fit smoothly) and joystick slots (match joystick diameter with 0.1mm gap).
3. Nach dem Maschinieren: Surface Treatment and Finishing
After CNC machining, targeted surface treatment enhances the prototype’s appearance, Haltbarkeit, and user experience.
3.1 Deburring and Polishing
- Enttäuschung:
- Use 400-mesh sandpaper to remove machining burrs on plastic parts; für Metallteile, use a round file (für Löcher) and flat file (für Kanten) to eliminate sharp corners.
- Verwenden Sie Druckluft (0.5-0.8 MPA) to blow out debris from small holes (Z.B., Knopflöcher, port cutouts).
- Polieren:
- For aluminum alloy parts: Use vibration grinding (1-2 Std.) to achieve a matte finish; for high-gloss effects, perform mechanical polishing with 800-1200 mesh sandpaper followed by a wool wheel with polishing paste.
- Für Plastikteile: Use a polishing machine with a cotton wheel to reduce visible machining marks and improve touch feel.
3.2 Material-Specific Surface Treatment
Different materials require tailored treatments to meet design goals, as shown in the table:
| Material | Oberflächenbehandlungsmethode | Zweck & Wirkung |
| Aluminiumlegierung | Sandstrahlen + Anodisierung | Sandstrahlen (80-120 mesh grit) creates a non-slip texture; Anodisierung (Dicke 5-10μm) adds corrosion resistance (salt spray test ≥48 hours) and color options (Schwarz, Rot, Blau) for gaming-themed designs. |
| ABS -Plastik | Malerei + Silk Screen | Matt-/Glanzlack aufsprühen (2-3 Mäntel, dry time 12-24 Std.) to match brand colors; silk screen prints button labels (Z.B., “A/B/X/Y”), Markenlogos, and decorative patterns (adhesion test: no peeling after 100 tape pulls). |
| Acryl | Lasergravur + Anti-Fingerprint Coating | Laser engraving adds translucent patterns (Z.B., game icons) on screen frames without affecting visibility; anti-fingerprint coating reduces smudges by 60% for daily use. |
4. Assembly and Testing of Game Machine Prototypes
Scientific assembly and rigorous testing ensure the prototype meets structural and functional requirements.
4.1 Montageprozess
Follow this step-by-step sequence to avoid errors:
- Kontrolle vor der Montage:
- Verwenden Sie eine Koordinatenmessmaschine (CMM) to inspect critical dimensions (Z.B., button hole spacing, Toleranz ±0,03 mm).
- Test-fit all parts: Check if buttons align with holes, if joysticks fit into slots, and if the screen matches the frame cutout (gap ≤0.1mm).
- Component Installation:
- Housing Assembly: Fasten handheld upper/lower shells with M2 screws (Drehmoment 1-1.5 N · m) to ensure even fit (Keine Lücken); assemble desktop case panels with snaps (für Plastik) oder Schrauben (for metal brackets).
- Funktionsteile: Install buttons (with silicone gaskets for tactile feedback), joysticks (with spring mechanisms for reset), and the screen (secured with double-sided tape); connect the circuit board to buttons/joysticks using wires.
- Interne Komponenten: Mount the battery, cooling fan, und Ports; ensure the fan aligns with vent slots (airflow unobstructed) and ports match case cutouts (no interference).
- Final Check: Verify all parts are securely fastened; shake the prototype gently (handheld: 10° tilt, Desktop: 5° tilt) to check for loose components (no rattling).
4.2 Testing Procedures
Conduct comprehensive tests to validate performance:
- Appearance Inspection:
- Check color consistency (ΔE ≤1.5) und Oberflächenfehler (no scratches >0.5mm, ≤1 blemish per 100cm²).
- Verify button labels/symbols (no smudging) and logo alignment (no misplacement).
- Structural Testing:
- Button Durability Test: Press each button 10,000 mal; check for stuck issues or reduced tactile feedback.
- Joystick Reliability Test: Move joysticks in all directions 5,000 mal; check for drift (no position offset >0.1mm).
- Drop Test: Drop the handheld prototype from 1.2m (onto a foam pad); check for shell cracks or component damage.
- Funktionale Überprüfung:
- Power on the prototype; Testen Sie die Reaktionsfähigkeit der Tasten (trigger time ≤0.1s) and joystick accuracy (no input lag).
- Simulate game scenarios (Z.B., action games with frequent button presses); test heat dissipation (surface temperature ≤45°C after 1 Stunde der Nutzung) und Akkulaufzeit (≥4 hours of continuous gameplay).
5. Optimization and Iteration
Address issues found during testing to improve the prototype:
- Problem Logging:
- Record defects (Z.B., “Button stuck after 5,000 Pressen”, “Joystick drift (0.2mm)”, “Handheld shell cracked in drop test”) with photos and specific measurements.
- Designoptimierung:
- Modify 3D models: Adjust button hole depth (add 0.5mm to prevent sticking), thicken joystick base (improve stability), or reinforce handheld shell edges (add rib structures for impact resistance).
- Regenerate CAM programs: Update toolpaths for optimized parts (Z.B., adjust joystick slot size to reduce drift).
- Sekundärverarbeitung:
- Rework defective parts: Re-machine button holes, polish joystick slots, or replace cracked shells with reinforced materials (Z.B., ABS+PC blend).
- Replace non-functional components: Swap stuck buttons or drifting joysticks with higher-quality alternatives.
6. Output Results and Documentation
Deliver a complete prototype package with useful documentation:
- Prototypen: Functional game machine prototypes (1-10 Einheiten) for demonstrations, user testing, or low-volume trial production.
- Technische Dokumente:
- 3D model files (STEP/IGS) and 2D drawings (DXF) with dimension annotations.
- CNC machining programs (G-Code) and tool lists (cutter type, Durchmesser, Lebensdauer).
- Assembly drawings (with part numbers, screw torque specs) and inspection reports (CMM data, test results).
- Feedback Report: Summarize challenges (Z.B., “Aluminum alloy cooling bracket deformed during machining”) and solutions (Z.B., “Increased annealing time to 2.5 Std.”); suggest mass production improvements (Z.B., “Switch to injection molding for ABS handheld shells”).
7. Wichtige Vorsichtsmaßnahmen
To ensure process efficiency and prototype quality:
- Präzisionskontrolle: CNC machining accuracy is ±0.05mm, but account for material behavior—aluminum alloy expands (add +0.02mm tolerance), plastic shrinks (hinzufügen -0.03mm tolerance) Nach der Bearbeitung.
- Kostenbilanz: CNC is ideal for small-batch prototypes (1-100 Einheiten); für die Massenproduktion (>1000 units), use injection molding (Kunststoff) or die casting (Metalle) to reduce costs by 50-70%.
- Sicherheit: Wear safety glasses and gloves during machining; use fume extractors when spraying paint or anodizing to avoid toxic exposure.
Standpunkt der Yigu -Technologie
Bei Yigu Technology, Wir glauben CNC machining is the core of creating high-quality game machine prototypes. It enables precise replication of complex functional structures (Z.B., Knopflöcher, joystick slots) and supports rapid iteration—critical for game machines where tactile feedback, structural durability, and user comfort directly impact gameplay experience. When executing this process, we prioritize two core aspects: material-function matching (Z.B., aluminum alloy for heat-dissipating brackets, PC plastic for wear-resistant button panels) und Prozessoptimierung (Z.B., 4-axis machining for ergonomic grip edges, in-process CMM checks to avoid rework). By integrating strict quality control at every stage—from design to testing—we help clients shorten prototype cycles by 20-30% and mitigate mass production risks. Blick nach vorn, we will leverage AI-driven CAM programming to further enhance machining efficiency while maintaining ±0.03mm precision, supporting faster innovation for game machine brands.
FAQ
- What materials are best for CNC machined game machine prototype parts, und warum?
The best materials depend on part function: ABS plastic for housings (niedrige Kosten, wirkungsbeständig, leicht zu färben); PC plastic for button panels/joystick bases (hohe Starrheit, Tragenresistent); aluminum alloy for cooling brackets (good heat conduction, leicht); and acrylic for transparent screen frames (klar, kratzfest). These materials balance machinability, Funktionalität, and compatibility with mass production.
- Can a CNC machined game machine prototype be used directly for mass production?
NEIN. CNC prototypes are for design verification, Funktionstests, and user feedback—they are not cost-effective for mass production (>1000 Einheiten). For large-scale manufacturing, processes like injection molding (for plastic housings/button panels) or die casting (for metal brackets) replace CNC machining, as they reduce per-unit costs by 50-70% and increase production speed by 3-5 mal.
- How long does it take to make a CNC machined game machine prototype from design to testing?
The timeline depends on complexity: A simple handheld prototype (ABS shell, basic buttons) nimmt 7-10 Tage (2-3 days design, 3-4 days CNC machining, 1-2 days surface treatment, 1 day assembly/testing). A complex desktop prototype (aluminum alloy cooling system, multiple ports) nimmt 12-15 Tage, as it requires more intricate machining and functional testing.