Creating a reliable CNC machining electric baking pan prototype is a critical step in the product development cycle. Es schließt die Lücke zwischen Designkonzepten und Massenproduktion, Unterstützung von Ingenieuren beim Testen des Formulars, Funktion, und Leistung. In diesem Artikel wird der gesamte Prozess mit klaren Vergleichen aufgeschlüsselt, Schritt-für-Schritt-Anleitung, und praktische Werkzeuge, um den Erfolg sicherzustellen.
1. Vorläufige Vorbereitung: The Foundation of Prototype Success
Before starting CNC machining, two core tasks—design drawing finalization Und Materialauswahl—must be completed. These steps directly determine the prototype’s accuracy and usability.
1.1 Design Drawing Requirements
Accurate 3D design drawings are non-negotiable. They must detail every component to avoid machining errors. Below is a checklist of key elements to include:
- Curvature of upper/lower covers (Toleranz: ±0,1 mm)
- Dimensions of the heating plate (Länge, Breite, Dicke)
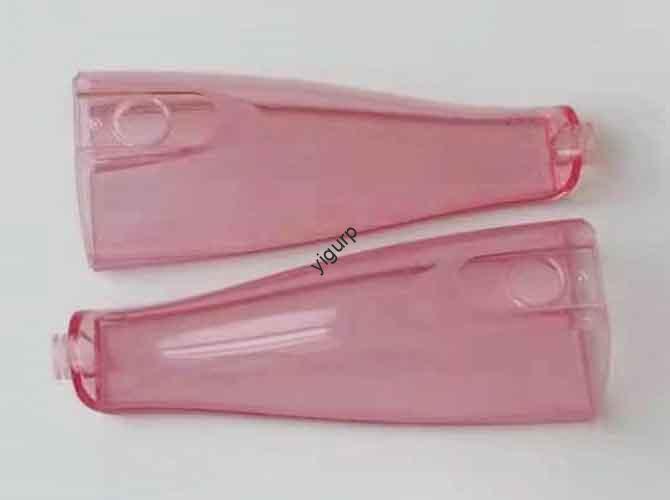
- Position and shape of the handle (to ensure ergonomic fit)
- Locations of functional parts (z.B., temperature knobs, indicator lights)
Why is this important? A missing detail (z.B., unmarked knob position) can force rework, increasing costs by 20–30% and delaying timelines by 1–2 weeks.
1.2 Materialauswahl: Plastic vs. Metall
Choosing the right material depends on your prototype’s purpose (appearance testing vs. performance testing). The table below compares the two most common options:
| Materialtyp | Hauptvorteile | Am besten für | Kostenspanne (pro kg) | Bearbeitbarkeit |
| ABS-Kunststoff | Niedrige Kosten, leicht zu bearbeiten, gute Oberflächenbeschaffenheit | Appearance verification, basic structure testing | \(2–)5 | Exzellent (fast cutting speed) |
| Aluminiumlegierung | Hohe Wärmeleitfähigkeit, stark, korrosionsbeständig | Heating plate testing, strength testing | \(8–)15 | Gut (requires adjusted parameters) |
Beispiel: If you need to test how heat distributes in the baking pan, Aluminiumlegierung ist ideal. For a prototype to showcase the product’s look, ABS plastic is more cost-effective.
2. CNC-Bearbeitungsprozess: From Setup to Finishing
The CNC machining phase turns raw materials into prototype components. It follows a linear workflow: machine setup → clamping → rough machining → finishing.
2.1 Machine Setup and Programming
Erste, select the right CNC equipment and program it for precision.
- Machine Selection:
- Kleine Prototypen (Größe <30cm): Use a small CNC milling machine (z.B., Haas TM-1).
- Large prototypes (size >50cm): Choose a large machining center (z.B., Mazak VTC-800/30SR).
- CAM Software Programming:
- Import 3D design drawings into software like SolidWorks CAM or Mastercam.
- Set machining parameters (variiert je nach Material):
- For ABS Plastic: Cutting speed = 1500–2000 rpm; Feed rate = 500–800 mm/min.
- For Aluminum Alloy: Cutting speed = 800–1200 rpm; Feed rate = 300–500 mm/min.
- Tool Path Planning:
- Roughing: Use a large tool (z.B., 10mm end mill) to remove 80–90% of excess material.
- Abschluss: Use a small tool (z.B., 3mm end mill) to ensure surface smoothness (Ra <0.8μm).
2.2 Clamping, Grobbearbeitung, and Finishing
Einmal programmiert, the machining begins. Here’s what to focus on at each step:
| Schritt | Zweck | Key Actions | Common Issues to Avoid |
| Clamping | Secure material to the machine table | – Use flat pliers for block ABS plastic.- Use indexing heads for cylindrical metal. | Loose clamping (causes workpiece movement). |
| Grobbearbeitung | Shape the workpiece (initial form) | – Cut at high feed rates to save time.- Monitor for vibration or excessive cutting force. | Overheating (use coolant for metal). |
| Abschluss | Improve accuracy and surface quality | – Use small cutting depths (0.1-0,3 mm).- Focus on appearance surfaces (z.B., upper cover). | Scratches (use sharp tools). |
3. Nachbearbeitung: Perfecting the Prototype
Nach der Bearbeitung, post-processing removes flaws and enhances the prototype’s look and performance.
3.1 Burr Removal
Burrs (sharp edges) are common after machining. Use these tools based on burr size:
- Small burrs (Rand <0.5mm): Sandpaper (400–Körnung 600) for gentle sanding.
- Large burrs (edge >1mm): File (flat or round) Erste, then sand with 200–400 grit sandpaper.
Fallstudie: After machining an electric baking pan handle, burrs at the edges could scratch users. Removing them takes 5–10 minutes and ensures safety.
3.2 Surface Treatment Options
Choose a treatment based on material and prototype goals:
- Oil Spraying (for ABS Plastic):
- Use matte or glossy paint (z.B., AkzoNobel industrial paint).
- Apply in a dust-free room to avoid particles in the coating.
- Hot Stamping (for logos/instructions):
- Stamp brand names or “ON/OFF” labels onto the surface.
- Vorteile: Hohe Verschleißfestigkeit (dauert 1000+ rub tests).
- Galvanisieren (for Aluminum Alloy):
- Plate with nickel or chrome to boost corrosion resistance.
- Use case: Electroplated heating plates resist oxidation for 2+ Jahre.
4. Assembly and Inspection: Ensuring Prototype Quality
The final steps—Montage Und Inspektion—confirm the prototype meets design standards.
4.1 Assembly Process
Assemble components (upper cover, heating plate, handle) in this order:
- Attach the heating plate to the lower cover (use M3 screws).
- Install the hinge between upper and lower covers (test for smooth rotation).
- Fix the handle to the upper cover (ensure it can support 5kg weight).
Tip: Use a torque wrench to tighten screws (torque = 1.5–2.0 N·m) to avoid damage.
4.2 Inspection Checklist
Test the prototype in three key areas:
| Inspection Type | Tools Used | Pass Criteria |
| Aussehen | Visual check, gloss meter | – Uniform paint color (no spots).- Clear hot-stamped logos. |
| Function | Multimeter (for heating tests) | – Temperature knob turns smoothly.- Heating plate simulates 50–250°C (if functional). |
| Maßgenauigkeit | Bremssättel, Mikrometer | – Heating plate size: ±0.05mm.- Cover thickness: ±0,1 mm. |
Die Perspektive von Yigu Technology
Bei Yigu Technology, we believe CNC machining electric baking pan prototypes are more than just “test models”—they are a way to reduce risks before mass production. Our team prioritizes two things: material matching (z.B., using food-grade aluminum alloy for heating plates) and precision machining (Toleranz <0.03mm). We’ve found that investing in high-quality prototypes cuts 15–20% of post-production issues. For clients, this means faster time-to-market and lower costs. Whether you need an appearance prototype or a functional one, we tailor the process to your goals—no shortcuts, just reliable results.
FAQ
- Q: How long does it take to make a CNC machining electric baking pan prototype?
A: Typically 5–7 days. Dazu gehört 1 day for preparation, 2–3 days for machining, 1 day for post-processing, Und 1 day for assembly/inspection.
- Q: Can I use other materials besides ABS plastic and aluminum alloy?
A: Ja. Zum Beispiel, PC plastic (hitzebeständig) is used for high-temperature prototypes, and stainless steel (stärker) is for parts needing extra durability. Jedoch, these materials cost 30–50% more than ABS or aluminum.
- Q: What if the prototype fails the dimensional accuracy test?
A: Erste, check the CAM program and clamping. If the issue is machining parameters, adjust the cutting speed/feed rate and re-machine the part. Most reworks take 1–2 days and add 10–15% to the cost (avoidable with careful setup).