Wenn Sie neugierig auf den 3D-Druck von Kupfer waren – egal, ob Sie Ingenieur sind, ein Hersteller, oder ein Bastler, der fortgeschrittene Materialien erforschen möchte – Sie möchten wahrscheinlich zuerst eine klare Antwort: Ja, Kupfer kann effektiv 3D-gedruckt werden, Aufgrund der hohen Wärmeleitfähigkeit und des Reflexionsvermögens von Kupfer bringt es jedoch besondere Herausforderungen mit sich. Jedoch, with the right 3D printing technologies and parameter tweaks, it’s now widely used in industries like aerospace, Elektronik, and medical devices for creating complex, Hochleistungsteile.
In diesem Ratgeber, we’ll break down everything you need to know about copper 3D printing—from how it works and which technologies are best, to its real-world uses, Herausforderungen, and tips for success. Am Ende, you’ll have a clear roadmap to decide if copper 3D printing is right for your project.
1. Why Copper 3D Printing Matters: Key Benefits and Industry Uses
Copper isn’t just another 3D printing material—it’s a game-changer for applications that demand specific properties. Unlike plastics or even some metals, copper offers excellent electrical conductivity (second only to silver), superior thermal conductivity, and good corrosion resistance. These traits make it irreplaceable in many high-tech fields.
1.1 Top Benefits of Copper 3D Printing
- Komplexe Geometrien: Traditional manufacturing (like casting or machining) struggles with intricate copper parts (z.B., custom heat exchangers or tiny electrical connectors). 3D printing lets you create designs with internal channels, Gitter, or unique shapes that were previously impossible.
- Materialeffizienz: 3D printing is additive—you only use the copper you need. This reduces waste, which is a big plus since copper is a valuable, often expensive material.
- Faster Prototyping: Instead of waiting weeks for a custom copper part via traditional methods, 3D printing can produce prototypes in days, speeding up product development.
1.2 Key Industry Applications (with Real-World Examples)
To show how copper 3D printing is used today, here’s a breakdown of its most impactful use cases:
| Industrie | Anwendung | Why Copper 3D Printing Works | Beispiel |
| Luft- und Raumfahrt | Heat sinks for satellites | Copper’s thermal conductivity dissipates heat in space (where cooling is hard). 3D printing creates lightweight, efficient designs. | NASA used copper 3D printed parts in its RS-25 rocket engines to improve heat management. |
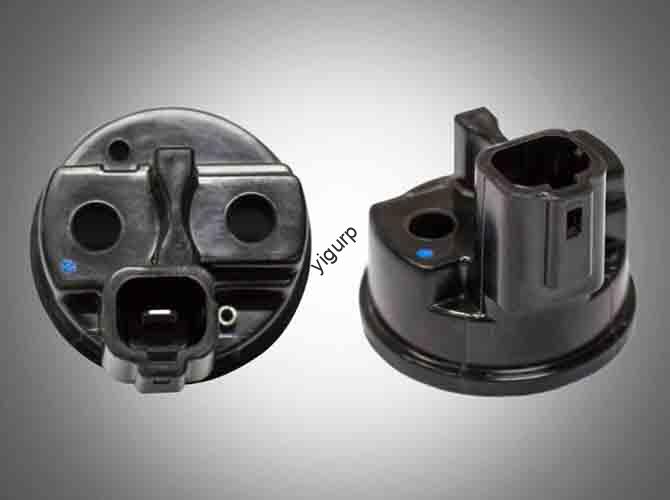
| Elektronik | Custom electrical connectors | Copper’s high electrical conductivity ensures minimal energy loss. 3D printing makes small, precise connectors for devices like smartphones or IoT sensors. | Companies like HP have partnered with electronics firms to 3D print copper connectors for 5G equipment. |
| Medizinisch | Dental implants and surgical tools | Copper has natural antimicrobial properties (kills bacteria like E. coli). 3D printing creates implants that fit a patient’s unique anatomy. | Some dental labs now offer 3D printed copper-alloy crowns that reduce infection risk. |
| Automobil | Electric vehicle (EV) Komponenten | EVs need parts that conduct electricity and handle heat (z.B., Motorwicklungen). 3D printed copper parts are smaller and more efficient than traditional ones. | Tesla has tested 3D printed copper motor parts to boost EV range. |
2. How Copper 3D Printing Works: The Best Technologies
Not all 3D printing technologies work well with copper. Its high thermal conductivity (it transfers heat quickly) and high reflectivity (it bounces back laser light) make it tricky for some methods. Below are the three most effective technologies, zusammen mit ihren Profis, Nachteile, und ideale Einsatzmöglichkeiten.
2.1 Selektives Laserschmelzen (SLM): The Most Common Choice for Pure Copper
SLM uses a high-power laser to melt tiny particles of copper powder layer by layer. It’s the go-to for printing pure copper (99.9%+ Reinheit) because it can handle copper’s high melting point (1,085°C or 1,985°F) with the right laser setup.
- Vorteile:
- Produces dense, starke Teile (bis zu 99.5% Dichte, almost as solid as machined copper).
- Works with pure copper, which is essential for electrical/thermal applications.
- Nachteile:
- Langsam: Copper’s reflectivity means the laser needs more power (often 500W+), which can slow down printing.
- Teuer: SLM machines and copper powder are costly (copper powder can cost \(50–)100 pro kg).
- Am besten für: High-performance parts like rocket components, elektrische Steckverbinder, or heat sinks.
2.2 Binder Jetting: A Cheaper, Faster Alternative for Copper Alloys
Binder jetting doesn’t use a laser—instead, it sprays a liquid “binder” onto copper powder to glue layers together. Nach dem Drucken, the part (called a “green part”) is heated in an oven (sintered) to melt the binder and fuse the copper particles.
- Vorteile:
- Schnell: Binder jetting can print parts 2–3x faster than SLM.
- Erschwinglich: Machines and materials are cheaper than SLM (binder-compatible copper powder is ~\(30–)60 pro kg).
- Nachteile:
- Lower density: Sintered parts are usually 90–95% dense, which reduces electrical/thermal conductivity slightly.
- Limited to alloys: It works best with copper alloys (like brass or bronze) rather than pure copper.
- Am besten für: Low-to-medium performance parts like decorative items, Klammern, or non-critical mechanical components.
2.3 Gezielte Energiedeposition (DED): For Large or Repair Jobs
DED uses a nozzle to blow copper powder (or wire) onto a surface while a laser or electron beam melts it. It’s often used to repair existing copper parts or print very large components.
- Vorteile:
- Vielseitig: Can print on top of existing parts (great for repairs) or create large parts (z.B., industrial heat exchangers).
- Uses wire or powder: Copper wire is cheaper than powder, lowering material costs.
- Nachteile:
- Less precise: DED parts have a rougher surface and lower detail than SLM parts.
- Requires post-processing: You’ll need to machine parts after printing to get a smooth finish.
- Am besten für: Repairing copper pipes, creating large industrial parts, or adding features to existing components.
3. The Challenges of Copper 3D Printing (and How to Fix Them)
While copper 3D printing is powerful, it’s not without hurdles. Below are the most common challenges and practical solutions to overcome them—based on industry best practices.
3.1 Herausforderung 1: High Thermal Conductivity Causes Warping
Copper transfers heat so quickly that when the laser melts it, the surrounding powder (and already printed layers) can cool too fast. This creates stress, leading to warping (parts bending or cracking).
Lösung:
- Use a heated build plate (keep it at 150–250°C) to slow cooling.
- Add support structures made of copper (or a compatible material) to hold parts in place.
- Choose a slower printing speed—this gives layers time to bond without warping.
3.2 Herausforderung 2: High Reflectivity Wastes Laser Power
Copper reflects up to 90% of laser light (im Vergleich zu Stahl, which reflects ~50%). This means most of the laser’s energy doesn’t melt the powder—it bounces off.
Lösung:
- Use a high-power fiber laser (500W or higher) specifically designed for metals. These lasers have a wavelength that’s less reflective to copper.
- Coat the copper powder with a thin layer of carbon (temporarily). The carbon absorbs the laser light, melting the copper underneath. The carbon burns off during printing, leaving pure copper.
- Adjust the laser focus—narrowing the laser beam increases energy density, even with reflection.
3.3 Herausforderung 3: Powder Handling Is Tricky
Copper powder is fine (usually 15–45 microns, about the size of a dust particle) and can be messy. It’s also slightly toxic if inhaled, and it can oxidize (Rost) if exposed to air and moisture.
Lösung:
- Use a closed-loop powder handling system (many SLM machines have this) to keep powder clean and dry.
- Wear protective gear: a respirator mask, gloves, and safety glasses when handling powder.
- Store unused powder in an airtight container with a desiccant (to absorb moisture) um Oxidation zu verhindern.
4. Copper 3D Printing Materials: Pure Copper vs. Legierungen
Not all copper used in 3D printing is the same. Your choice between pure copper and copper alloys depends on your application—here’s how to decide.
4.1 Reines Kupfer (Cu-ETP or Cu-OFE)
- Purity: 99.9%–99.99% copper.
- Schlüsseleigenschaften: Highest electrical conductivity (100% IACS, the standard for conductivity) und Wärmeleitfähigkeit (401 W/mK).
- Am besten für: Elektrische Teile (Anschlüsse, Drähte), Kühlkörper, and applications where conductivity is critical.
- Drawback: Harder to print than alloys (due to high reflectivity/warping) and less strong (tensile strength of ~220 MPa).
4.2 Kupferlegierungen
Alloys are copper mixed with other metals (like tin, Zink, or nickel) um die Kraft zu verbessern, druckbar, oder Korrosionsbeständigkeit. Here are the most common ones:
| Legierung | Zusammensetzung | Schlüsseleigenschaften | Am besten für |
| Messing (Cu-Zn) | 60% Kupfer, 40% Zink | Einfach zu drucken (lower reflectivity than pure copper), gute Korrosionsbeständigkeit, niedrige Kosten. | Dekorative Teile, Scharniere, non-critical mechanical components. |
| Bronze (Cu-Sn) | 90% Kupfer, 10% Zinn | Stronger than pure copper (tensile strength ~300 MPa), gute Verschleißfestigkeit. | Lager, Getriebe, historical replicas. |
| Kupfer-Nickel (Cu-Ni) | 70% Kupfer, 30% Nickel | Ausgezeichnete Korrosionsbeständigkeit (works in saltwater), hohe Temperaturbeständigkeit. | Marineteile (z.B., boat propellers), Industrieventile. |
5. Step-by-Step Guide to Your First Copper 3D Printing Project
If you’re ready to try copper 3D printing, follow these steps to avoid common mistakes and get a successful print.
Schritt 1: Define Your Project Goals
Fragen Sie sich:
- What’s the part for? (Elektrisch? Thermal? Mechanisch?)
- What properties matter most? (Leitfähigkeit? Stärke? Kosten?)
- What’s the size and complexity? (Klein, detailed part? Groß, simple part?)
This will help you choose the right technology (z.B., SLM for a conductive part, binder jetting for a cheap decorative part) und Material (pure copper vs. Legierung).
Schritt 2: Design the Part for 3D Printing
Not all designs work for 3D printing. Use these tips:
- Avoid overhangs: Parts with overhangs (sections sticking out without support) will warp. Keep overhangs under 45° if possible, or add supports.
- Add escape holes: If your part has internal channels (z.B., a heat sink), add small holes to let unused powder escape after printing.
- Use the right wall thickness: For SLM, walls should be at least 0.5mm thick; zum Binderstrahlen, 1mm dick. Thinner walls may break.
Schritt 3: Choose the Right Machine and Settings
- Maschine: For pure copper, use an SLM machine with a 500W+ fiber laser (z.B., EOS M300-4, Renishaw AM250). For alloys, a binder jetting machine (z.B., ExOne X1 25Pro) funktioniert.
- Key Settings:
- Laser power: 500–800W (higher for pure copper).
- Layer height: 20–50 Mikrometer (thinner layers = more detail, slower print).
- Scan speed: 500–1,000 mm/s (slower for pure copper to prevent warping).
Schritt 4: Post-Process the Part
Most copper 3D printed parts need post-processing to improve quality:
- Remove supports: Use pliers or a CNC machine to remove support structures.
- Reinigen Sie das Teil: Use compressed air or a brush to remove leftover powder.
- Sinter (zum Binderstrahlen): Heat the part in an oven at 800–900°C for 2–4 hours to fuse the copper particles.
- Beenden (optional): Polish the part with sandpaper or a buffing wheel to improve conductivity and appearance.
6. Yigu Technology’s View on Copper 3D Printing
Bei Yigu Technology, we see copper 3D printing as a transformative technology for industries moving toward miniaturization and high performance—especially electronics and EVs. As devices get smaller (z.B., 5G sensors) and EVs demand more efficient components, traditional copper manufacturing can’t keep up with the need for complex, individuelle Designs.
We’ve noticed that many clients initially worry about cost, but the material efficiency of 3D printing often offsets it—especially for high-value parts where waste is costly. We recommend starting with small, unkritische Teile (like custom connectors) to test the technology, then scaling up. We also predict that binder jetting will become more popular for copper alloys in the next 2–3 years, as machines get faster and denser, making it a viable alternative to SLM for more applications.
7. FAQ: Common Questions About Copper 3D Printing
Q1: Is copper 3D printing more expensive than traditional manufacturing?
It depends on the part. Für kleine, komplexe Teile (z.B., a custom heat sink), 3D printing is often cheaper because it reduces waste and avoids expensive tooling. Für Groß, einfache Teile (z.B., a copper pipe), traditional machining or casting is still cheaper.
Q2: Can copper 3D printed parts be as conductive as machined copper?
Yes—SLM-printed pure copper parts can reach 98–99% of the conductivity of machined copper (if printed with the right settings and post-processed). Binder jetting parts are slightly less conductive (90–95 %) but still suitable for many applications.
Q3: Is copper 3D printing safe?
Ja, if you follow safety guidelines. Wear a respirator when handling copper powder (to avoid inhalation), use a closed-loop system to prevent powder spread, and keep the printing area well-ventilated. The high temperatures of SLM machines also require proper safety guards.
Q4: How long does it take to 3D print a copper part?
It varies by size and technology. A small part (z.B., a 20mm x 20mm connector) takes 2–4 hours with SLM and 1–2 hours with binder jetting. A large part (z.B., a 100mm x 100mm heat exchanger) can take 12–24 hours with SLM.
Q5: Can I 3D print copper at home?
Probably not. Most home 3D printers (FDM) can’t handle copper, as it requires high temperatures. SLM and binder jetting machines are large, expensive (starting at $100,000+), and need professional operation. Instead, use a 3D printing service (z.B., Shapeways, Protolabs) to print copper parts.