If you’ve ever struggled with slow production times, inconsistent blade quality, or high manual error rates when manufacturing cutting tools—like turning cutters or milling bits—CNC insert roughing ist Ihre Lösung. This advanced machining method automates the initial shaping of inserts, Aber wie funktioniert es?? Which industries benefit most? And how can you overcome its unique challenges? This guide answers all these questions, helping you master CNC insert roughing für zuverlässige, Hochwertige Ergebnisse.
What Is CNC Insert Roughing?
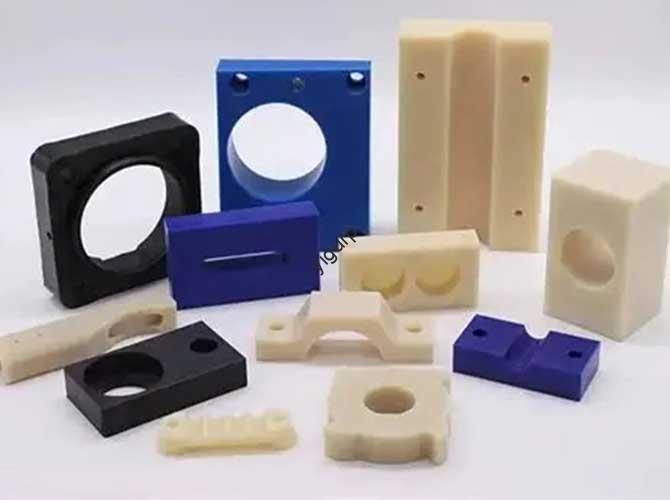
CNC insert roughing is an automated machining process that uses Computer Numerical Control (CNC) machines to shape raw material (wie Carbide, Hochgeschwindigkeitsstahl, oder Keramik) into the initial form of cutting tool inserts. Unlike manual roughing—where workers use hand tools to carve blanks, leading to inconsistencies—CNC insert roughing follows preprogrammed toolpaths to remove excess material quickly and precisely.
Think of it like a baker using a cookie cutter instead of a knife: the cookie cutter (CNC -Programm) ensures every cookie (einfügen) is the same shape and size, while a knife (manual work) leads to uneven, messy results. Für Hersteller, this means every insert meets design specs, reducing waste and improving the performance of final cutting tools.
The core goal of CNC insert roughing is to:
- Entfernen 70-90% of excess material from the raw blank.
- Create a near-finished shape that’s ready for final precision machining.
- Maintain consistency across hundreds or thousands of inserts.
Step-by-Step Workflow of CNC Insert Roughing
CNC insert roughing follows a linear, repeatable process that integrates design, Programmierung, und Bearbeitung. Unten finden Sie eine detaillierte Aufschlüsselung jedes Schritts:
- Design the Insert in CAD Software
Beginnen Sie mit CAD (Computergestütztes Design) Software (Z.B., Solidworks, Autocad) to create a 3D model of the insert. Define key features:
- Form (Z.B., square for milling cutters, triangular for turning tools).
- Größe (Z.B., 12mm x 12mm for a standard carbide insert).
- Grooves or notches (for chip evacuation in cutting).
Für die Spitze: Add a 0.2mm “machining allowance” to the model—this extra material lets you refine the insert in final machining.
- Generate Toolpaths with CAM Software
Export the CAD model to NOCKEN (Computergestützte Fertigung) Software (Z.B., Mastercam, Fusion 360). Hier, Du:
- Select the right cutting tools (Z.B., end mills for milling, drills for holes).
- Setzen Sie kritische Parameter: Spindelgeschwindigkeit (1,500-3,000 RPM for carbide), Futterrate (50-150 mm/min), und Tiefe des Schnitts (2-5mm pro Pass).
- Generate toolpaths that tell the CNC machine how to move to remove excess material.
- Prepare the CNC Machine & Rohstoff
- Mount the raw blank (Z.B., a carbide block) onto the machine’s worktable using clamps or a vice—ensure it’s secure to avoid movement during machining.
- Load the cutting tools into the machine’s tool changer and calibrate their positions (use a tool setter to ensure accuracy).
- Import the CAM-generated G-code (the numerical language CNC machines understand) into the machine’s control system.
- Run the Roughing Process
Start the CNC machine— it will automatically follow the toolpaths to rough the insert:
- The machine removes excess material in multiple passes (Langsamer, deeper passes for hard materials like carbide).
- Sensors on the machine monitor for errors (Z.B., tool wear or material movement) and pause if issues arise.
- Überprüfen & Prepare for Final Machining
After roughing, remove the insert and inspect it with calipers or a coordinate measuring machine (CMM) to check size and shape. If it meets specs, send it to final machining (Z.B., grinding for smooth surfaces); if not, adjust the CAM parameters and re-run the process.
CNC Insert Roughing: Material & Application Comparison
Not all materials or industries use CNC insert roughing the same way. Below is a table highlighting key use cases, Materialien, and considerations:
| Industrie | Common Insert Materials | Primary Use of Roughing | Wichtige Herausforderungen & Lösungen |
| Machinery Manufacturing | Hochgeschwindigkeitsstahl (HSS), Carbid | Producing turning cutters, milling bits for metalworking | Herausforderung: HSS heats up easily → Solution: Use coolant during roughing to prevent tool wear. |
| Luft- und Raumfahrt | Titanlegierung, Keramik | Creating high-performance inserts for aero engine blades | Herausforderung: Titanium is hard to cut → Solution: Slow spindle speed (1,200 Drehzahl) und geringe Schnitttiefe (1-2mm). |
| Automobil | Carbid, cermet | Making inserts for engine component machining (Z.B., Zylinderköpfe) | Herausforderung: High production volume → Solution: Use multi-spindle CNC machines to rough 4-6 inserts at once. |
| Woodworking | Hochgeschwindigkeitsstahl (HSS) | Producing inserts for wood routers, Sah Klingen | Herausforderung: Wood chips clog tools → Solution: Increase feed rate to clear chips faster. |
Vorteile & Challenges of CNC Insert Roughing
Wie bei jedem Herstellungsprozess, CNC insert roughing has strengths and limitations. Below is a balanced breakdown to help you set expectations:
Vorteile (Why It’s Worth Investing In)
- Schnellere Produktion: CNC roughing completes 5-10 inserts per hour—vs. 1-2 per hour with manual roughing—cutting lead times by 50% oder mehr.
- Better Consistency: Every insert matches the CAD model (± 0,01 mm Genauigkeit), so final cutting tools perform uniformly—no more “hit-or-miss” quality.
- Reduced Manual Labor: Operators only need to load materials and monitor the machine, freeing them to focus on other tasks (Z.B., Endinspektion).
- Handles Complex Shapes: CNC machines can rough inserts with intricate grooves or angles that are impossible to create manually (Z.B., 3D curved inserts for aerospace parts).
Herausforderungen (And How to Overcome Them)
- High Initial Cost: CNC machines and CAD/CAM software cost \(50,000-\)200,000— a barrier for small shops.
Lösung: Start with entry-level CNC machines (Z.B., benchtop models for \(10,000-\)20,000) or outsource roughing to specialized vendors.
- Tool Wear for Hard Materials: Schneidwerkzeuge (Z.B., Ende Mills) wear out fast when roughing carbide or titanium— increasing replacement costs.
Lösung: Verwenden Sie beschichtete Werkzeuge (Z.B., TiAlN-Beschichtung) dieser Widerstand Verschleiß; replace tools after 50-100 inserts to avoid poor quality.
- Need for Skilled Operators: Setting up CAM software and troubleshooting the machine requires training—untrained operators may cause errors.
Lösung: Investieren in 1-2 weeks of manufacturer training for operators; use user-friendly CAM software (Z.B., Fusion 360 with pre-set insert templates).
Fallstudie mit realer Welt: CNC Insert Roughing in Aerospace
A leading aerospace manufacturer needed to produce 500 ceramic inserts for aero engine blades. Anfänglich, they used manual roughing—this took 2 days per 50 Einsätze, mit 15% of inserts failing inspection (due to uneven shaping).
They switched to CNC insert roughing:
- Used Fusion 360 to design the insert and generate toolpaths.
- Ran a 3-axis CNC machine with TiAlN-coated end mills and coolant.
- The machine roughing 10 inserts per hour, with only 2% failing inspection.
Das Ergebnis? They completed the 500 inserts in 2.5 Tage (vs. 20 days manually) und gerettet $10,000 in Materialabfällen. The final inserts also performed better in engine tests—reducing blade wear by 20%.
Future Trends of CNC Insert Roughing
As CNC and material technology advance, CNC insert roughing will become even more efficient. Hier sind drei Trends zu sehen:
- AI-Powered Toolpath Optimization: AI will analyze material properties (Z.B., carbide hardness) and automatically adjust spindle speed, Futterrate, and depth of cut—reducing tool wear by 30% and cutting time by 15%.
- 5-Axis CNC Integration: 5-Achsenmaschinen (which move the tool in 5 Richtungen) will let manufacturers rough complex 3D inserts (Z.B., curved aerospace inserts) in one pass—eliminating the need for multiple setups.
- Nachhaltige Materialien: New eco-friendly insert materials (Z.B., recycled carbide) will work with CNC roughing—reducing environmental impact without sacrificing performance.
Yigu Technology’s Perspective on CNC Insert Roughing
Bei Yigu Technology, Wir sehen CNC insert roughing as a cornerstone of modern cutting tool manufacturing. Our 3-axis CNC machines (Z.B., Yigu Tech M3) come with pre-set “insert roughing modes” that optimize parameters for common materials (Carbid, HSS). We also offer a free CAM template library—with designs for turning cutters, milling bits—to save users time. Für kleine Geschäfte, we provide affordable outsourcing services for roughing, helping them avoid high machine costs. CNC insert roughing isn’t just about speed—it’s about creating inserts that make final cutting tools more reliable, effizient, und kostengünstig.
FAQ: Common Questions About CNC Insert Roughing
- Q: Can CNC insert roughing be used for small-batch production (Z.B., 10 Einsätze)?
A: Ja! While CNC is great for large batches, it works for small runs too. The setup time (1-2 Std.) is worth it for consistent quality—especially if the inserts have complex shapes. Für 10 Einsätze, expect total time (aufstellen + Rauen) to be 3-4 Std..
- Q: What’s the difference between CNC insert roughing and final machining?
A: Roughing removes most excess material (70-90%) to create a near-finished shape—its goal is speed and consistency. Final machining (Z.B., Schleifen, Polieren) refines the insert to exact specs (± 0,005 mm Genauigkeit) and creates smooth surfaces—its goal is precision.
- Q: Do I need to use coolant during CNC insert roughing?
A: Es hängt vom Material ab. Für weiche Materialien (Z.B., Holz, Aluminium), coolant isn’t necessary. Für hart, wärmeempfindliche Materialien (Z.B., Carbid, Titan), coolant is critical—it prevents tool overheating and extends tool life. Use water-based coolant for most metals; use oil-based coolant for titanium.