Sie haben eine tolle Produktidee und ein detailliertes 3D-Modell auf Ihrem Computer. Aber eine Computerdatei ist kein echtes Produkt. Der nächste wichtige Schritt besteht darin, diese Idee in etwas zu verwandeln, das Sie tatsächlich halten können, prüfen, und prüfen. Hier kommt das Kunststoff-Prototyping ins Spiel, and there are so many choices it can feel overwhelming. Picking the wrong plastic prototype service can cause expensive delays, parts that break easily, or models that don’t look like your final design.
This guide will help remove that confusion. We will give you a clear, step-by-step plan for engineers, Designer, and inventors to make the best choice for their project. Think of this as your roadmap. We will explore different manufacturing methods, from 3D printing to CNC machining. You will learn how to match these methods to what your project needs, whether you want a quick visual model or a strong working part.
We will also explain the important factors that show a service’s quality, like how long they take, how precise they are, and what finishing options they offer. By the end of this guide, you will know how to choose a plastic prototype service that fits your budget, Zeitleiste, and technical needs, turning your digital idea into something real.
Main Prototyping Methods
The first step in choosing a service is understanding the different manufacturing options available. Each method has its own profile of speed, kosten, material strength, and accuracy. Knowing these basics helps you have a smart conversation with a service provider and make a choice that helps your project succeed. Unten, we break down the three main types of plastic prototyping.
Additive Fertigung
Often called 3D printing, additive manufacturing builds parts layer by layer from a digital file. It’s known for its speed in making complex shapes directly from CAD data without needing special tools.
Modellierung der Schmelzablagerung (FDM)
FDM works by pushing melted plastic filament through a heated tip, placing it layer by layer to build the object. It’s the most common and often cheapest 3D printing method, making it a go-to choice for early development.
- Key Plastic Materials: PLA, ABS, PETG, ASA, and some flexible TPU.
- Am besten für: First concept models, basic shape and fit tests, and low-cost design changes where surface smoothness isn’t the main concern.
- Vorteile: Very fast delivery times, niedrige Kosten, wide range of basic materials.
- Nachteile: Sichtbare Schichtlinien, lower accuracy, and weaker between layers.
Stereolithographie (SLA)
SLA uses an ultraviolet (UV) laser to harden liquid plastic resin layer by layer. This process creates parts with amazing detail and a very smooth surface finish, similar to injection-molded parts.
- Key Plastic Materials: Standard Resins (für den allgemeinen Gebrauch), Tough Resins (ABS-like), Klare Harze, and High-Temp Resins.
- Am besten für: High-quality cosmetic models for marketing or user feedback, master patterns for vacuum casting, and parts needing fine features and smooth surfaces.
- Vorteile: Excellent surface finish, high detail and accuracy, ability to make clear parts.
- Nachteile: Parts can be brittle, may need post-curing, and can cost more than FDM.
Selektives Lasersintern (SLS)
SLS uses a powerful laser to melt powdered plastic particles together. Because the loose powder supports the part during building, SLS can create very complex, interlocking shapes without needing support structures.
- Key Plastic Materials: Nylon (PA 11, PA 12), glass-filled Nylon, and TPU (for flexible parts).
- Am besten für: Stark, working prototypes for mechanical testing, complex designs with internal channels or moving parts, and small production runs of final parts.
- Vorteile: Strong and durable parts, keine Notwendigkeit für Stützstrukturen, excellent for complex shapes.
- Nachteile: A slightly rough surface finish, longer delivery times than FDM/SLA, and fewer material choices focused on nylons.
Subtraktive Fertigung
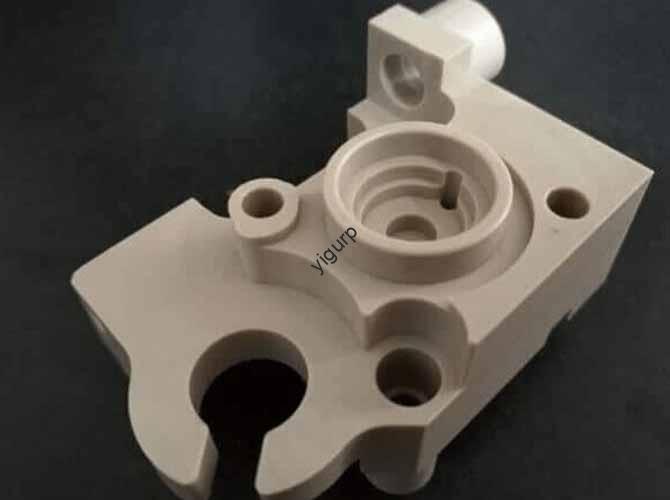
Unlike additive methods, subtractive manufacturing starts with a solid block of material and uses a cutting tool to remove material until the final shape is achieved. The most common method for prototypes is CNC (Computer-Numerische Steuerung) Bearbeitung. A computer-controlled cutter carves the part based on the 3D CAD file.
CNC machining is valued for its precision and its ability to use engineering-grade plastics that are identical to those used in mass production. This makes it the gold standard for working prototypes that need superior mechanical properties and tight tolerances. A typical CNC machine can hold tolerances of ±0.125 mm or even tighter, whereas a standard 3D printing process might be closer to ±0.5 mm.
- Key Plastic Materials: A huge selection, inklusive ABS, Polycarbonat (PC), Nylon, Delrin (POM), Acryl (PMMA), SPÄHEN, and Ultem.
- Am besten für: High-quality working prototypes, jigs and fixtures, and parts requiring the exact properties of a specific production plastic.
- Vorteile: Excellent accuracy and repeatability, überlegene Materialeigenschaften, great surface finish.
- Nachteile: Can be more expensive and slower for complex shapes, some design limitations (z.B., deep internal pockets, sharp internal corners).
Urethane Casting
Also known as vacuum casting, this process serves as a bridge between one-off prototyping and low-volume production. It starts with a high-quality master pattern, typically made using SLA or CNC machining. A silicone mold is then cast around this master. Once the mold is hardened, it is used to cast multiple copies of the part using a range of polyurethane resins that can copy the properties of production plastics.
- Key Plastic Materials: A wide variety of polyurethane resins that act like ABS, Gummi (elastomers), klarer PC, oder Nylon.
- Am besten für: Small batch runs (typischerweise 10-50 Einheiten) for market testing, pilot production, or when you need a small number of high-quality parts without investing in injection mold tooling.
- Vorteile: High-quality surface finish, cost-effective for small batches, wide range of material properties and colors.
- Nachteile: Higher initial cost due to master pattern and mold making, mold life is limited (around 20-25 copies).
| Technologie | Kosten pro Teil | Geschwindigkeit | Oberflächenbeschaffenheit | Materialauswahl | Best Use Case |
| FDM | Niedrig | Sehr schnell | Rough | Gut | Early-stage concept models |
| SLA | Medium | Schnell | Exzellent | Gut | Visual/Cosmetic models |
| SLS | Medium | Medium | Gut (Matt) | Beschränkt | Complex functional parts |
| CNC-Bearbeitung | Hoch | Langsam | Exzellent | Exzellent | High-precision functional parts |
| Urethane Casting | Med-Low (at scale) | Medium | Exzellent | Exzellent | Kleinserienfertigung (10-50) |
Matching Service to Project
Der “best” plastic prototype service doesn’t exist by itself. The ideal choice depends entirely on your project’s specific stage, Ziele, and limits. To make a confident decision, you must first figure out your own needs. By asking and answering a series of targeted questions, you can quickly narrow down the options and find the technology that offers the best balance of features for your application.
Project Assessment Framework
Use this framework to define your requirements. The answers will point you directly to the most suitable prototyping technology.
What is your prototype’s purpose?
The main function of your prototype is the single most important factor in your decision. Each technology excels at fulfilling a different purpose.
- Visual Concept/Look and Feel: If your goal is to check ergonomics, present a concept to stakeholders, or create a model for a photoshoot, surface finish is most important. This points directly to SLA, which produces smooth, good-looking parts. Urethane casting is also an excellent choice if multiple cosmetic units are needed.
- Form, Fit, and Assembly Testing: Here, the goal is to check that your part fits with other components. Accuracy is important, but a perfect surface is not. FDM is a cost-effective option for early fit tests. For more complex assemblies requiring higher accuracy, SLS or CNC machining are better choices.
- Functional and Strength Testing: If the prototype needs to handle mechanical stress, bear a load, or survive impact, material properties are essential. This is where CNC machining shines, as it uses real engineering-grade plastics. SLS, with its durable nylon materials, is also a strong option for functional testing of complex designs.
- Small Batch for Market Testing: To get your product into the hands of a small group of beta testers or for a pilot sales run, you’ll need more than just one part. Urethane casting is designed for this exact scenario, offering production-quality parts in batches of 10-50 units at a fraction of the cost of injection molding.
What finish and detail do you need?
Consider the level of quality required. Are you checking a rough shape, or do you need to see fine textures and crisp lettering? You can think of the options on a simple scale:
- Rough: FDM produces visible layer lines and is best for low-quality needs.
- Gut: SLS offers a uniform matte finish that hides layers but has a slightly rough texture.
- Exzellent: SLA and Urethane Casting produce very smooth surfaces, ideal for cosmetic parts.
- As-Machined: CNC Machining provides an excellent finish with faint, visible tool marks, which can be further improved with post-processing.
What material properties are critical?
Matching the prototype’s material to the final production material is crucial for meaningful functional testing. Using the wrong material can lead to misleading test results and costly design flaws discovered too late. We’ve seen projects fail in functional testing because an FDM PLA prototype was used to test a part that would later be injection molded from Polycarbonate. The prototype simply wasn’t strong enough to validate the design’s mechanical strength under real-world-like conditions. If properties like tensile strength, Hitzebeständigkeit, or chemical resistance are critical, you must choose a process that supports a suitable material. CNC machining offers the widest range of true production plastics, while SLS (Nylon) and certain SLA resins (Tough/ABS-like) provide good functional alternatives.
How many units do you need?
Quantity has a direct and significant impact on the cost-effectiveness of each technology.
- 1-5 Einheiten: For single parts or a very small number of iterations, 3D-Druck (FDM, SLA, SLS) and CNC machining are the most logical choices. The best option depends on the other factors of function and finish.
- 10-50 Einheiten: In this range, the economics change dramatically. Urethane casting becomes the most cost-effective solution. While the initial setup cost is higher than for a single 3D print, the per-part cost drops significantly with each copy.
- 50+ Einheiten: Once you exceed 50-100 Einheiten, it’s time to investigate other options like “bridge tooling” or low-volume injection molding, which are more suitable for early production.
What is your budget and timeline?
Endlich, consider the practical limits of time and money. There is always a trade-off between speed, kosten, und Qualität. FDM is the fastest and cheapest, but it sacrifices finish and strength. CNC machining delivers the highest quality but comes with a higher price tag and longer delivery times. Your task is to find the “sweet spot” that meets your non-negotiable technical requirements within your budget and deadline.
Key Service Factors
Once you have used the framework to narrow down your technology choice, the next step is to evaluate specific service providers. Not all services are created equal, even if they offer the same technology. The key differences often lie in the details: their stated delivery times, the precision they can guarantee, and the range of finishing options they provide. Understanding these factors is essential for accurately comparing quotes and knowing exactly what you are paying for.
Understanding Lead Times
In der Fertigung, “Vorlaufzeit” refers to the total time from when you submit your order to when you have the physical part in your hands. It is a critical factor for any project on a tight schedule. This timeframe is influenced by several variables:
- Technology Choice: As shown in the table below, some processes are naturally faster than others.
- Part Complexity and Size: Larger, more complex parts simply take longer to print or machine.
- Quantity: Ordering multiple parts will increase the production time.
- Provider Capacity: A service provider’s current workload can affect how quickly they can start your job.
- Nachbearbeitung: Any finishing steps like painting or sanding will add to the total lead time.
Always confirm whether a quoted lead time is for production only or if it includes shipping time.
The Importance of Tolerances
“Toleranz” is the acceptable range of deviation for a given dimension of your part. Zum Beispiel, a hole specified as 10 mm with a tolerance of ±0.1 mm means the final manufactured hole can be anywhere from 9.9 mm bis 10.1 mm and still be considered “in spec.”
Tolerances are absolutely critical for parts that must fit or assemble with other components. If the tolerances are too loose, your parts may not fit together. If they are unnecessarily tight, you will pay extra for precision you do not need. When requesting a quote, only specify tight tolerances on critical features where fit is essential.
| Technologie | Typical Standard Lead Time | Typical Tolerances |
| FDM | 1-3 Werktage | ±0.5% (with a lower limit of ±0.5 mm) |
| SLA | 2-4 Werktage | ±0.5% (with a lower limit of ±0.15 mm) |
| SLS | 3-5 Werktage | ±0.3% (with a lower limit of ±0.3 mm) |
| CNC-Bearbeitung | 5-10 Werktage | ±0.125 mm (can be much tighter) |
| Urethane Casting | 10-15 Werktage | ±0.3% (with a lower limit of ±0.3 mm) |
A Guide to Post-Processing
Der “as-printed” oder “as-machined” part is often just the starting point. Post-processing and finishing options can elevate a basic prototype into a presentation-ready or fully functional component. When evaluating a plastic prototype service, check which of these common options they offer:
- Support Removal and Sanding: This is the most basic finishing step for FDM and SLA prints to remove support structures and smooth surfaces.
- Bead Blasting: Often used on SLS and CNC parts, this process uses fine media to create a clean, uniform matte surface finish, hiding tool marks or layer lines.
- Painting and Clear Coating: For achieving specific brand colors, a high-gloss finish, or creating a final “A-surface” for cosmetic models.
- Dampfglättung: A chemical process used on certain plastics (like ABS or ASA) to achieve a surface that is nearly as smooth as an injection-molded part.
- Tapping and Threading: Machining operations to add functional screw threads into a part, either by cutting threads directly or by installing threaded inserts.
How to Order Prototypes
With a clear understanding of technologies and your project requirements, you are ready to work with a service. Following a structured process will help you avoid common mistakes and ensure you receive parts that meet your expectations. This final, practical guide removes confusion and gives you a confident path forward.
The 5-Step Process for Success
1. #### Finalize Your 3D CAD File
Your prototype will only be as good as your digital design. Before exporting, ensure your 3D model is “watertight,” meaning it has no holes or open surfaces that would make it impossible to manufacture. Most CAD software has tools to check for this. When you are ready to export, use universal file formats for maximum compatibility.
- .STL: This is the standard for most 3D printing technologies. It describes the surface geometry of the model.
- .SCHRITT: This is the preferred format for CNC Machining. It contains more complete geometric data than an STL, which is necessary for programming the toolpaths.
- Pro Tip: Before exporting, double-check your model’s scale and units. We often receive files designed in inches that were intended to be millimeters, or vice-versa. This simple mistake leads to incorrect quotes and significant delays. Always confirm your units before you export.
- Pro Tip 2: Check your design’s minimum wall thickness. Every manufacturing process has a limit to how thin a feature it can produce. Attempting to create a wall that is too thin will result in a failed or fragile part. As a general rule, aim for a minimum wall thickness of 1 mm for SLS and SLA, Und 1.5 mm for FDM.
2. #### Create a Requirements Document
Simply sending a 3D file is not enough to get an accurate quote. A good plastic prototype service needs more context. Create a simple document or add notes to your request that specify:
- Material: Be specific (z.B., “ABS, Schwarz” oder “Clear Polycarbonate”).
- Quantity: The number of units you require.
- Desired Finish: Specify if you need a basic finish, bead blasting, Malerei, usw.
- Critical Dimensions: If certain features have tight tolerances, call them out on a simple 2D drawing or screenshot.
- Nachbearbeitung: Note any requirements for tapped holes, threaded inserts, or other secondary operations.
3. #### Research Potential Service Providers
Look for a service partner, not just a vendor. A good provider will have a portfolio that showcases clear examples of their work across multiple technologies. Look for customer reviews, Fallstudien, and testimonials that speak to their quality and reliability. Consider the difference between fully automated online platforms, which are great for speed and simplicity, and more consultative services, which can provide valuable design for manufacturability (DFM) feedback.
4. #### Request Quotes and Compare
Submit your CAD file and requirements document to a few selected providers to get a Request for Quote (RFQ). When you receive the quotes, look beyond just the price. A thorough quote should clearly state:
- The total price and any setup fees.
- The confirmed lead time.
- The exact technology and material they have quoted.
- Any comments or feedback from their engineers. This DFM feedback is incredibly valuable, as it can identify potential issues before production begins.
5. #### Place Your Order and Inspect
Once you have selected a provider, confirm the order and payment details. When the package arrives, the job is not quite done. Before putting the prototype into service, perform a quick inspection. Check it against your initial requirements document. Do the critical dimensions fall within the specified tolerances? Is the finish as requested? Is the material correct? If there are any discrepancies, contact the service provider immediately.
Conclusion
The journey from a digital design to a physical product is one of the most exciting stages of innovation. Choosing the right plastic prototype service is a strategic decision that can significantly impact the speed and success of that journey. It is not about finding a single “best” option, but about making an informed choice that aligns technology, Material, and cost with your specific project goals.
By first understanding the core manufacturing technologies, then using a structured framework to assess your project’s unique needs—from function and finish to quantity and budget—you can navigate the selection process with clarity and purpose. By paying attention to critical details like lead times, Toleranzen, und Nachbearbeitung, and by following a clear step-by-step process for ordering, you empower yourself to get the right part, on time. Prototyping is an investment in reducing risk and building a better product. With this guide, you are now equipped to make that investment wisely.