If you’ve ever struggled with loose fits, broken threads, or post-machining delays when adding threaded connections to 3D prints, 3D printing threaded holes ist die Lösung, die Sie brauchen. This technology lets you create functional threads directly during printing—no drilling or tapping required—but how do you ensure precision? Which materials work best? And how can you fix common thread flaws? This guide answers all these questions, helping you master 3D printed threaded holes for reliable part assembly.
What Are 3D Printed Threaded Holes?
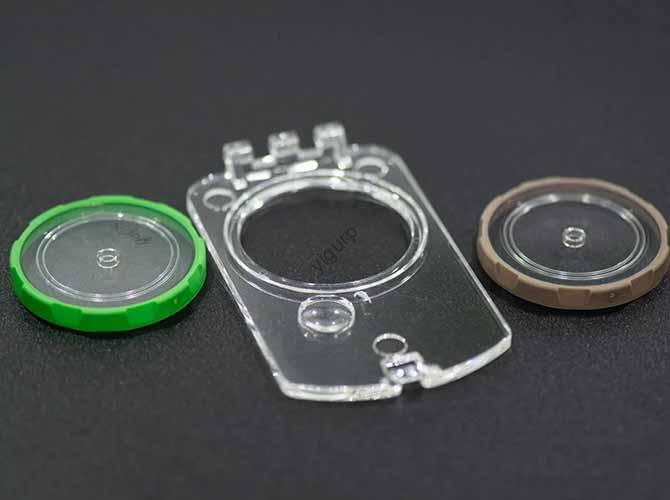
3D printed threaded holes are internal or external thread features built directly into 3D printed parts during the additive manufacturing process. Unlike traditional methods—where you print a plain hole first, then drill and tap threads later—this technology integrates threads into the 3D model, so the printer creates them layer by layer.
Think of it like baking a cake with pre-cut grooves for frosting: instead of cutting the grooves after baking (which risks breaking the cake), you shape the pan to include the grooves—resulting in a seamless, ready-to-use feature. For 3D prints, this means parts are assembly-ready as soon as they come off the printer, saving time and reducing errors.
These threaded holes are ideal for parts that need repeated assembly and disassembly, wie zum Beispiel:
- Electronic device housings (Z.B., Smartphone -Hüllen, computer brackets)
- Mechanische Baugruppen (Z.B., Robotergelenke, Maschinenteile)
- Prototypes for product testing (Z.B., furniture hardware prototypes)
Step-by-Step Process for 3D Printing Threaded Holes
Creating high-quality 3D printed threaded holes isn’t random—it follows a linear, Wiederholbarer Workflow. Unten finden Sie eine detaillierte Aufschlüsselung jedes Schritts, vom Design bis zur Nachbearbeitung:
- Design the Threaded Feature in CAD Software
Beginnen Sie mit CAD (Computergestütztes Design) Software (Z.B., Solidworks, Fusion 360). Hier, you define critical thread parameters:
- Thread type: Metrisch (Z.B., M3, M5) or imperial (Z.B., 1/4-20 UNC)
- Größe: Durchmesser (Z.B., 3mm for M3) and pitch (Z.B., 0.5mm for M3)
- Tiefe: How far the thread extends into the part (Z.B., 10mm for a secure fit)
Für die Spitze: Add a small “chamfer” (45° Winkel) an der Lochöffnung – dadurch werden die Befestigungselemente in das Gewinde geführt, Verhinderung von Querfädeln.
- Optimieren Sie das 3D-Modell für den Druck
Passen Sie das Modell an, um häufige Thread-Fehler zu vermeiden:
- Für FDM -Drucker: Erhöhen Sie die Wandstärke des Gewindes um 0,2 mm (FDM-Kunststoff schrumpft leicht, So verhindert die zusätzliche Dicke, dass es dünn wird, spröde Fäden).
- Für Harzdrucker: Verwenden Sie einen „Stützblocker“, um Stützen innerhalb des Gewindes zu vermeiden (Stützen hinterlassen raue Oberflächen, die den Sitz beeinträchtigen).
- Schneiden Sie das Modell mit Thread-freundlichen Einstellungen auf
Importieren Sie das CAD-Modell in die Slicing-Software (Z.B., Prusaslicer, Behandlung) und passen Sie diese Einstellungen an:
- Schichthöhe: 0.1-0.15mm (thinner layers create smoother thread walls, improving fit).
- Infill density: 80-100% for the thread area (higher infill makes threads stronger—avoid 50% or lower, which causes thread stripping).
- Druckgeschwindigkeit: 40-50mm/s (slower speed reduces vibration, which can warp thread shapes).
- Print the Part
Laden Sie die geschnittene Datei in Ihren 3D -Drucker und starten Sie den Druck. Für FDM, use a 0.4mm nozzle (smaller nozzles, like 0.25mm, create finer threads but take longer). For resin, use a “high-detail” resin (Z.B., Anycubic ABS-Like Resin) that resists cracking.
- Nachbearbeitung (Bei Bedarf)
Most 3D printed threaded holes work without post-processing, but these steps improve durability:
- Polieren: Use a 400-grit sandpaper to gently smooth thread walls (avoids rough spots that scratch fasteners).
- Wärmebehandlung (für ABS/PC): Bake the part at 80°C for 1 Stunde (this reduces plastic stress, making threads more resistant to wear).
3D Printed Threaded Holes: Material & Printer Comparison
Not all materials or printers perform equally for threaded holes. Below is a table comparing the best options, so you can choose based on your project’s needs:
| Materialtyp | Best Printer Tech | Thread Strength | Idealer Anwendungsfall | Häufige Herausforderungen & Korrekturen |
| PLA | FDM | Niedrigmedium (good for prototypes) | Non-load-bearing parts (Z.B., Dekorative Klammern) | Brittle in cold temperatures → Solution: Use “tough PLA” (Z.B., eSun Tough PLA) for better flexibility. |
| ABS | FDM | Mittelhoch (widersetzt sich) | Tragende Teile (Z.B., Kfz -Klammern) | Shrinks 3-5% → Solution: Compensate by increasing thread diameter by 0.3mm in CAD. |
| Petg | FDM | Hoch (flexibel & stark) | Outdoor or wet environments (Z.B., Gartenwerkzeugteile) | Sticks to printer beds → Solution: Use a PEI bed or hairspray to prevent warping. |
| Harz (ABS-Like) | SLA/MSLA | Hoch (glatt & präzise) | Klein, detaillierte Teile (Z.B., Schmuckverschlüsse, Komponenten für medizinische Geräte) | Brittle under impact → Solution: Apply a thin layer of resin-based clear coat to add flexibility. |
Real-World Applications of 3D Printed Threaded Holes
3D printed threaded holes solve unique problems across industries. Below are specific examples showing their impact:
1. Elektronikindustrie
A startup building a portable speaker needed a case that could be opened for repairs. Sie benutzten 3D printed threaded holes (M3 threads, PETG material) in the case’s edges. The threads let them attach the top and bottom halves with screws—no glue required. Diese Schnittmontagezeit von 50% (vs. traditional tapped holes) and let customers replace batteries easily.
2. Automobilindustrie
A car parts manufacturer tested a prototype engine mount using ABS 3D printed threaded holes (M5 threads). The threads secured the mount to the car’s frame, and the team could quickly disassemble the prototype to adjust the design. Mit traditioneller Bearbeitung, each design iteration would take 3 Tage; mit 3D -Druck, it took 8 Std..
3. Möbeldesign
A furniture designer created a modular bookshelf prototype with 3D printed threaded holes (1/4-20 imperial threads) in the shelf brackets. The threads let users assemble the bookshelf without tools (using hand-tightened screws) and reconfigure it later. Customer testing showed 90% preferred the 3D printed design over traditional bolt-and-nut assemblies, as it was lighter and easier to use.
Common 3D Printed Thread Problems & Lösungen
Auch bei sorgfältiger Gestaltung, thread issues can happen. Nachfolgend finden Sie drei häufige Probleme und schrittweise Lösungen:
Problem 1: Fasteners Don’t Fit (Too Tight/Too Loose)
Ursache: Incorrect thread size in CAD (Z.B., designing an M3 hole but printing an M2.8 hole due to shrinkage).
Lösung:
- Messen Sie das gedruckte Loch mit einem Messschieber (check the inner diameter).
- If too tight: Increase the thread diameter by 0.1mm in CAD and reprint.
- If too loose: Decrease the diameter by 0.1mm (für FDM) or 0.05mm (for resin).
Problem 2: Threads Strip When Fasteners Are Tightened
Ursache: Low infill density (Themen sind schwach) or thin wall thickness (threads break under pressure).
Lösung:
- In slicer software, set infill density to 100% for the thread area (use a “mesh edit” tool to select only the thread region).
- In CAD, increase the thread’s wall thickness by 0.3mm (für FDM) or 0.1mm (for resin).
Problem 3: Threads Are Rough or Uneven
Ursache: Thick layer height (0.2mm oder mehr) or printer vibration (warped thread walls).
Lösung:
- Reduce layer height to 0.1mm in the slicer.
- Place the printer on a stable surface (Z.B., a concrete floor) und ziehen Sie die losen Schrauben am Druckerrahmen fest (reduziert Vibrationen).
Future Trends of 3D Printed Threaded Holes
Als 3D -Drucktechnologie Fortschritte, Gewindelöcher werden noch vielseitiger. Hier sind drei Trends zu sehen:
- Multimaterialfäden: Bald werden Drucker Fäden aus zwei Materialien bedrucken – z.B., ein flexibler TPU-Faden in einem starren PLA-Teil. Dadurch entstehen „selbstdichtende“ Gewinde, die für wasserdichte Anwendungen geeignet sind (Z.B., Wasserflaschenverschlüsse).
- KI-gestütztes Design: KI-Tools optimieren die Thread-Parameter automatisch (Größe, Tiefe, Füllung) basierend auf der Verwendung des Teils. Zum Beispiel, wenn Sie einen Fahrradlenker entwerfen, AI schlägt M6-Gewinde mit vor 100% Füllung (für Stärke) vs. M3-Gewinde für ein dekoratives Teil.
- Metal 3D Printed Threads: Metal printers (Z.B., Slm) will become more affordable, letting manufacturers print high-strength metal threads (Z.B., Titan) for aerospace and medical parts. These threads will match the strength of traditionally machined threads but with faster production times.
Yigu Technology’s Perspective on 3D Printing Threaded Holes
Bei Yigu Technology, Wir sehen 3D printing threaded holes as a key enabler of fast, flexible manufacturing. Unsere FDM-Drucker (Z.B., Yigu Tech F4) come with pre-set “thread modes” that optimize slicer settings (Schichthöhe, Füllung) for perfect fits. We also offer a free CAD template library—with pre-designed M3-M10 threads—to save users design time. Für Industriekunden, we’ve helped reduce thread failure rates by 60% using our high-precision nozzles (0.3mm) and tough PETG filament. 3D printed threaded holes aren’t just a convenience—they’re a way to turn prototypes into functional products faster than ever.
FAQ: Common Questions About 3D Printing Threaded Holes
- Q: Can I 3D print external threads (Z.B., a bolt) as well as internal holes?
A: Ja! The process is similar—design the external thread in CAD, verwenden 100% Füllung, and print at 40mm/s. Für FDM, avoid external threads smaller than M3 (they’re too thin and break easily); resin printers can handle M2 external threads with high detail.
- Q: How many times can I assemble/disassemble a 3D printed threaded hole before it fails?
A: Es hängt vom Material ab: PLA threads last 10-15 Zyklen, PETG lasts 50-100 Zyklen, and resin (ABS-Like) dauert 80-120 Zyklen. For frequent use (Z.B., a tool that’s opened daily), use a metal insert (pressed into the 3D printed hole) to extend life to 1,000+ Zyklen.
- Q: Do I need a special CAD tool to design 3D printed threaded holes?
A: No—most standard CAD software (Solidworks, Fusion 360) has built-in “thread generators” that let you add threads with one click. Für Anfänger, free tools like Tinkercad have pre-made thread shapes you can drag-and-drop into your model.