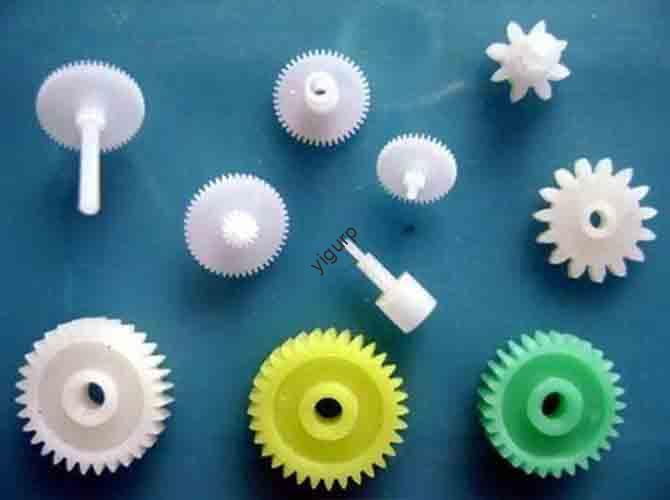
Zahnräder sind die unbesungenen Helden mechanischer Systeme – sie treiben alles an, vom Roboter bis zum Automodell, indem sie Bewegung und Drehmoment übertragen. Sondern traditionelle Getriebefertigung (wie CNC-Bearbeitung oder Spritzguss) hat oft Probleme mit kundenspezifischen Designs, komplexe Geometrien, und Kleinserienfertigung. Enter 3D printed gears– ein flexibler, kostengünstige Lösung, die es Ingenieuren ermöglicht, Bastler, and manufacturers create gears tailored to their exact needs. Whether you’re building a small robot for a school project or prototyping a new mechanical device, 3D printing gears solves core pain points: it enables rapid customization, handles intricate designs, and cuts lead times for small batches. Unten, we break down everything you need to know—from material selection to printing processes, Vorteile, and real-world applications—to help you create high-performance 3D printed gears.
1. Material Selection for 3D Printed Gears
The right material makes or breaks a 3D printed gear—determining its strength, Verschleißfestigkeit, and suitability for different environments. Not all 3D printing materials work for gears; you need options that balance durability and printability. Below are the top materials, ihre wichtigsten Eigenschaften, und ideale Anwendungsfälle.
3D Printing Gear Materials Comparison
| Material | Schlüsseleigenschaften | Ideale Anwendungen | Vorteile & Nachteile |
|---|---|---|---|
| Nylon (PA) | – Zugfestigkeit: 50–80 MPa- Verschleißfestigkeit: Exzellent- Schlagfestigkeit: Gut (Izod: 2–5 kJ/m²)- Temperaturbeständigkeit: -40°C to 100°C | Durable gears for long-term use (z.B., robot joints, industrial conveyors) | ✅ Best overall for functional gears; ✖️ Absorbs moisture (needs drying before printing) |
| PLA+ (Polylactic Acid Plus) | – Zugfestigkeit: 40–60 MPa- Verschleißfestigkeit: Mäßig- Schlagfestigkeit: Gerecht (Izod: 1–3 kJ/m²)- Temperaturbeständigkeit: 50°C to 70°C | Low-load, short-term gears (z.B., Spielzeugautos, Bildungsmodelle) | ✅ Easy to print; niedrige Kosten; ✖️ Brittle under stress; melts in high heat |
| ABS (Acrylnitril-Butadien-Styrol) | – Zugfestigkeit: 40–50 MPa- Verschleißfestigkeit: Mäßig- Schlagfestigkeit: Gut (Izod: 2–4 kJ/m²)- Temperaturbeständigkeit: -20°C to 90°C | Medium-load gears (z.B., small appliance parts, hobby robots) | ✅ More flexible than PLA+; ✖️ Emits fumes (needs ventilation); warps easily |
| Nylon-CF (Nylon + Kohlefaser) | – Zugfestigkeit: 80–120 MPa- Verschleißfestigkeit: Vorgesetzter- Schlagfestigkeit: Exzellent (Izod: 4–7 kJ/m²)- Temperaturbeständigkeit: -40°C bis 120 °C | High-load, Industriegetriebe (z.B., drone motors, machine tooling) | ✅ Strongest 3D printed gear material; ✖️ Expensive; wears down nozzles quickly |
Real-World Example: A hobbyist building a small robot needed gears for its drive train (Drehmoment: 0.5 N·m). They first tried PLA+ gears—they worked for 2 hours but cracked when the robot climbed a ramp. Switching to nylon gears solved the problem: the gears lasted 50+ hours of use, even under stress. For functional gears, nylon is the gold standard—balance strength and durability without the high cost of nylon-CF.
2. Designvorbereitung: Steps to Perfect 3D Printed Gears
A great 3D printed gear starts with a great design. Poorly prepared designs lead to gears that skip teeth, bind, or fail prematurely. Follow these two core steps to ensure your gear design is print-ready.
Schritt 1: 3D Modeling for Accurate Gears
3D modeling turns your gear specifications (Anzahl der Zähne, pitch diameter, pressure angle) into a digital model the printer can understand. Precision here is critical—even a 0.1mm error in tooth size can make gears incompatible.
Key Modeling Tips:
- Use Gear-Specific Software: Tools like Fusion 360 (free for hobbyists), SolidWorks, or Gear Generator (online tool) let you input gear parameters (z.B., 20 teeth, 20° pressure angle, 10mm pitch diameter) and auto-generate accurate models—no manual drawing needed.
- Add Clearances: Include a 0.1–0.2mm gap between gear teeth (Spiel) to prevent binding. A team designing a gear pair for a conveyor belt forgot backlash—their 3D printed gears locked up as soon as they started moving. Adding 0.15mm clearance fixed the issue.
- Simplify Where Possible: Avoid overcomplicating the design—add holes for weight reduction (but not too close to teeth, which weakens them) and skip unnecessary details (z.B., decorative grooves) that slow printing.
Schritt 2: File Optimization for Better Prints
After modeling, optimize the file (usually STL or 3MF) to improve print quality and efficiency. This step fixes common issues like poor layer adhesion and support structure failures.
File Optimization Checklist:
- Repair Mesh Errors: Use free tools like Meshmixer or Netfabb to fix holes, non-manifold edges, or overlapping faces in the STL file. A gear model with a tiny hole in one tooth caused the printer to skip that section—resulting in a broken tooth.
- Adjust Wall Thickness: Set wall thickness to 1.2–2.0mm (multiple of your nozzle diameter, z.B., 0.4mm nozzle = 3–5 walls). Too thin (≤0.8mm) = weak gears; zu dick (≥2.5mm) = wasted material.
- Remove Unnecessary Supports: Supports inside gear teeth or between gear pairs are hard to remove and ruin accuracy. Design gears with self-supporting angles (≤45°) to avoid supports. Für komplexe Getriebe (z.B., Kegelräder), use soluble supports (PVA) that wash away after printing.
Pro Tip: Export your model as a 3MF file instead of STL—3MF stores more detail (like material settings) and reduces mesh errors, leading to smoother prints.
3. 3D Printing Processes for Gears
Not all 3D printing processes are equal for gears—some excel at precision, while others are better for speed or cost. The two most common processes for 3D printed gears are FDM and SLA; each has strengths and ideal use cases.
FDM (Modellierung der Schmelzablagerung): The Go-To for Functional Gears
FDM works by extruding melted plastic layer by layer—affordable, zugänglich, and perfect for functional gears.
FDM Printing Settings for Gears
| Setting | Recommended Value | Why It Matters |
|---|---|---|
| Düsentemperatur | Nylon: 240–260°C; PLA+: 190–210°C; ABS: 220–240°C | Ensures material melts fully for strong layer adhesion. |
| Betttemperatur | Nylon: 70–90°C; PLA+: 50–60°C; ABS: 90–110°C | Verhindert Verformungen (critical for gear flatness). |
| Schichthöhe | 0.15–0,2 mm | Thinner layers = smoother tooth surfaces; thicker layers = faster printing. |
| Fülldichte | 50–80 % | Higher infill = stronger gears; 80% is ideal for high-load gears. |
| Druckgeschwindigkeit | 40–60 mm/s | Slower speed = more precise tooth details. |
| Perimeter Shells | 3–5 | Multiple shells add strength to gear walls (avoids tooth breakage). |
SLA (Stereolithographie): For High-Precision, Low-Load Gears
SLA uses a laser to cure liquid resin layer by layer—delivers ultra-smooth surfaces and tight tolerances, but resin gears are brittle under high load.
When to Use SLA for Gears:
- High-Precision Applications: Gears for small devices (z.B., watch mechanisms) where tooth smoothness matters.
- Aesthetic Gears: Display models or educational tools where appearance is key.
- Low-Torque Uses: Gears that transfer motion but not heavy loads (z.B., a model train’s wheel gears).
Vergleich: A team making gears for a micro-robot (Drehmoment: 0.1 N·m) used SLA for the gear pair—they had smooth teeth and fit perfectly, ideal for the robot’s low-load needs. For a lawnmower’s drive gear (Drehmoment: 5 N·m), FDM nylon gears were better—SLA resin gears cracked immediately under stress.
4. Advantages of 3D Printed Gears
3D printed gears offer unique benefits that traditional manufacturing can’t match—making them perfect for customization, Prototyping, und Kleinserienfertigung.
Hauptvorteile
A. Personalized Customization: Make Gears for Any Need
Traditional gears are limited to standard sizes (z.B., 20 teeth, 10mm pitch diameter). 3D printing lets you createcustom gears—any number of teeth, Tonhöhe, or shape—without expensive tooling.
- Beispiel: A researcher needed a non-standard gear (17 teeth, 8mm pitch diameter) for a lab experiment. Traditional manufacturers quoted $500 for a single gear (needing custom tooling). Using 3D printing, they made the gear for $5 in PLA+—and tested three different designs in a week.
B. Complex Structures: Print Gears Traditional Methods Can’t
3D printing handles complex geometries that CNC machining or injection molding can’t—like internal lubrication channels, leichte Gitterstrukturen, or integrated hubs.
- Fallstudie: An engineer designed a gear with internal channels to hold lubricant (reducing wear). Traditional machining couldn’t create the channels without splitting the gear (adding assembly time and weak points). 3D printing made the gear in one piece—with the channels fully integrated. The gear lasted 3x longer than a traditional gear (thanks to constant lubrication).
C. Schnelles Prototyping: Test and Iterate in Days
Traditional gear prototyping takes weeks (waiting for custom tooling). 3D printing lets you go from design to functional gear in1–2 Tage—critical for rapid product development.
- Real-World Impact: A startup developing a new electric bike needed to test 5 different gear designs for its motor. Using 3D printing, they made one gear design per day—testing, tweaking, and finalizing the best design in a week. Traditional prototyping would have taken 4–6 weeks—delaying their product launch by months.
5. Applications of 3D Printed Gears
3D printed gears are used across industries—from hobby projects to education and even light industrial use. Nachfolgend finden Sie die häufigsten Anwendungen, with examples of how they solve problems.
Application Breakdown
| Industry/Use Case | Example Gears | Why 3D Printing Works |
|---|---|---|
| Mechanical Projects | Robot joints, drone motors, Förderbänder, small appliance parts. | Customization for non-standard sizes; fast iteration for prototype testing. |
| Ausbildung & Forschung | Gear models for physics classes, lab experiment gears, mechanical engineering demos. | Niedrige Kosten (affordable for schools); ability to print cutaway gears (shows internal working). |
| Hobby & DIY | Spielzeugautos, model trains, RC planes, 3D printed clocks. | Accessible (home FDM printers work); easy to replace broken gears (no need to buy entire kits). |
| Light Industrial | Tooling jigs (gears that position parts), low-volume machine parts, prototype production lines. | Cost-effective for small batches (1–50 gears); schnelle Lieferzeiten. |
Fun Example: A high school physics teacher printed 30 gear sets (each with 3 gears of different sizes) for a lesson on mechanical advantage. The students assembled the gears and tested how changing gear size affected speed—something they couldn’t do with static textbook diagrams. The 3D printed gears cost $2 per set (vs. $20 for traditional plastic gear kits)—saving the school $540.
6. Development Trends of 3D Printed Gears
3D printed gears are evolving fast—new materials and technologies are expanding their capabilities, making them suitable for more high-performance applications.
Key Trends
- New High-Performance Materials: Companies are developing gear-specific materials like Nylon 6/6 (higher wear resistance than standard nylon) and TPU-nylon blends (flexible yet strong). These materials let 3D printed gears compete with traditional metal gears in light industrial use.
- Hybride Fertigung: Combining 3D printing with CNC machining—3D print the gear’s base, then CNC-machine the teeth for ultra-smooth surfaces and tight tolerances. This balances 3D printing’s customization with CNC’s precision.
- Application Expansion: 3D printed gears are moving into aerospace (lightweight gears for drones) und medizinische Geräte (custom gears for prosthetic limbs). As materials improve, they’ll soon be used in heavy industrial equipment (z.B., factory conveyors).
Die Perspektive von Yigu Technology
Bei Yigu Technology, we’ve helped 100+ clients—from hobbyists to small manufacturers—optimize 3D printed gears. For functional gears, we recommend FDM with nylon (best balance of cost and performance) Und 80% infill for strength. For high-precision needs, we pair SLA with tough resin (resistant to brittleness). We also use gear-specific modeling tools to ensure accuracy—avoiding common issues like binding or tooth breakage. 3D printed gears aren’t just a hobbyist tool; they’re a cost-effective solution for low-volume, custom gear needs. As materials advance, we’ll see them replace traditional gears in more industrial applications—offering flexibility no other method can match.
FAQ
- How long do 3D printed gears last?It depends on material and load: Nylon gears last 50–100+ hours (hohe Belastung: 0.5–1 N·m); PLA+ gears last 1–10 hours (low load: <0.1 N·m); Nylon-CF gears last 200+ Std. (hohe Belastung: 1–2 N·m). For light use (z.B., a model train), PLA+ gears can last months.
- Can 3D printed gears replace metal gears?For low-to-medium loads (≤2 N·m), yes—nylon-CF gears are strong enough. For high loads (≥5 N·m) or high temperatures (≥150°C), metal gears are still better. 3D printed metal gears (using SLM) work but are expensive ($50–$200 per gear).
- How do I prevent 3D printed gears from wearing out quickly?
- Use wear-resistant materials (nylon or nylon-CF).
- Add lubrication (silicone grease works for most gears; avoid oil for PLA+).
- Print gears with the tooth grain direction aligned with load (print layers parallel to tooth contact surfaces).
- Keep infill density ≥50% (adds strength to gear teeth).