In the world of product development, turning a concept into a tangible reality requires a crucial step that bridges imagination and production: prototype making. Whether you’re an aspiring inventor, a product designer, or a manufacturing professional, understanding what prototype making entails is essential for creating successful products. This guide will walk you through everything you need to know about prototype making, from its definition and importance to its step-by-step process and key considerations.
Defining Prototype Making: From Concept to Tangible Model
في جوهرها, prototype making is the process of transforming raw materials into functional or visual models based on design drawings, 3D models, or specific physical requirements. These prototypes serve as physical representations of a product idea, allowing designers, المهندسون, and stakeholders to visualize, test, and refine the concept before moving to mass production.
Unlike the final product, which is manufactured in large quantities, a prototype is typically a one-of-a-kind or small-batch model created to validate the feasibility and practicality of a design. It helps answer critical questions: Does the design work as intended? Is the structure stable? Does the appearance meet customer expectations? By addressing these questions early, prototype making saves time, مال, and frustration in later stages of product development.
Prototype making isn’t limited to a single industry or product type. It’s used across various fields, including consumer electronics, السيارات, الأجهزة الطبية, الفضاء, and even furniture design. From a simple plastic casing for a new gadget to a complex mechanical component for an industrial machine, prototype making brings all kinds of designs to life.
The Importance of Prototype Making in Product Development
You might wonder why prototype making is such a vital step in product development. After all, with advanced computer simulations and 3D modeling software, can’t we just skip straight to production? الحقيقة, while digital tools are invaluable, nothing replaces the insights gained from holding a physical prototype in your hands.
First and foremost, prototype making allows for التحقق من صحة التصميم. A 3D model on a screen might look perfect, but a physical prototype can reveal flaws that digital simulations miss—like unexpected weight distribution, poor ergonomics, or parts that don’t fit together properly. على سبيل المثال, a prototype of a new kitchen tool can help designers realize that the handle is uncomfortable to grip, a problem that might not be obvious in a digital model.
Second, prototypes facilitate اختبار وظيفي. They let engineers and designers test how the product performs under real-world conditions. Will a new medical device withstand repeated sterilization? Does a new toy meet safety standards when dropped? These questions can only be answered by testing a physical prototype.
Third, prototype making enables stakeholder communication. Whether you’re presenting your idea to investors, العملاء, or team members, a physical prototype makes the concept tangible and easier to understand. It sparks more productive feedback and helps build confidence in the design.
أخيراً, prototype making helps reduce production risks. By identifying and fixing issues early, you avoid costly mistakes in mass production. Imagine investing in expensive molds for injection molding only to discover a design flaw—this could set your project back months and cost thousands of dollars. Prototype making helps you catch these issues upfront.
خطوة بخطوة: The Prototype Making Process
Prototype making is a structured process that involves several key steps, each building on the previous one to ensure the final prototype meets all requirements. Let’s break down the process step by step.
خطوة 1: Prepare Design Drawings and Define Requirements
The first step in prototype making is to create detailed design drawings and clearly define the prototype’s requirements. This phase lays the foundation for the entire process, so attention to detail is crucial.
Design drawings should include precise dimensions, مواصفات المواد, structural details, and any special features or functions the prototype needs to have. These drawings can be created using CAD (تصميم بمساعدة الكمبيوتر) برمجة, which allows for accurate measurements and easy modifications. Popular CAD tools include AutoCAD, Solidworks, and Fusion 360.
In addition to drawings, you’ll need to define the prototype’s purpose. Is it a visual prototype meant to showcase the product’s appearance? أ functional prototype to test how it works? Or a engineering prototype to validate structural integrity? The purpose will influence everything from material choice to manufacturing method.
It’s also important to involve all stakeholders in this step. Engineers, المصممون, marketing teams, and even potential users can provide valuable input to ensure the requirements are clear and comprehensive.
خطوة 2: Choose the Right Materials for Your Prototype
Once the design and requirements are finalized, the next step is selecting the right materials. The choice of material depends on several factors, including the prototype’s purpose, expected use, and budget.
Common materials used in prototype making include:
- البلاستيك: القيمة المطلقة, جيش التحرير الشعبى الصينى, PVC, and nylon are popular choices due to their affordability, ease of machining, and versatility. القيمة المطلقة, على سبيل المثال, is impact-resistant and often used for consumer product prototypes. جيش التحرير الشعبى الصينى, a biodegradable plastic, is ideal for visual prototypes created with 3D printing.
- المعادن: الألومنيوم, فُولاَذ, النحاس, and titanium are used for prototypes that require strength, متانة, or heat resistance. Aluminum is lightweight and easy to machine, making it a good choice for aerospace or automotive prototypes. Steel is stronger but heavier, suitable for industrial components.
- Wood: Plywood and hardwoods are sometimes used for early-stage prototypes, especially for furniture or large structural components, due to their low cost and ease of manipulation.
- Composites: Materials like carbon fiber or fiberglass composites offer a balance of strength and lightweight properties, making them suitable for high-performance prototypes in industries like sports equipment or aerospace.
When choosing materials, consider not only the prototype’s function but also how it will be manufactured. Some materials are easier to machine with CNC tools, while others are better suited for 3D printing or laser cutting.
| نوع المواد | الأفضل ل | Manufacturing Methods | المزايا الرئيسية |
| ABS البلاستيك | النماذج الأولية الوظيفية, consumer products | تصنيع CNC, 3د الطباعة | مقاوم التأثير, سهل الجهاز, cost-effective |
| PLA Plastic | النماذج البصرية, concept models | 3د الطباعة | Biodegradable, تكلفة منخفضة, smooth finish |
| الألومنيوم | Structural prototypes, أجزاء الفضاء | تصنيع CNC, laser cutting | خفيف الوزن, قوي, good heat conductivity |
| Steel | Industrial components, high-strength parts | تصنيع CNC, اللحام | High durability, ارتداء المقاومة |
| Wood | النماذج الأولية المرحلة المبكرة, furniture | Laser cutting, hand tools | تكلفة منخفضة, easy to modify |
خطوة 3: Modeling and Design Refinement
With materials selected, it’s time to move on to modeling and design refinement. This step involves creating a detailed digital model or physical mockup of the prototype and making adjustments to ensure it meets all requirements.
For digital modeling, CAD software is essential. Designers use CAD to create precise 3D models that include all dimensions and features. These models can be tested virtually for things like structural integrity using finite element analysis (FEA) برمجة, which simulates how the prototype will behave under different conditions.
If you’re creating a physical mockup, you might start with a rough version using inexpensive materials like foam or cardboard to get a sense of size and shape. This is especially useful for ergonomic designs, where 手感 (hand feel) is important.
During this step, it’s common to make several iterations of the model. على سبيل المثال, you might adjust the thickness of a part to improve strength or modify the shape to enhance ergonomics. The goal is to refine the design until it’s ready for manufacturing.
خطوة 4: Processing and Assembly
بمجرد الانتهاء من التصميم, it’s time to manufacture the prototype. This step involves using various tools and equipment to shape the raw materials into the desired form, then assembling the components.
The manufacturing method depends on the material, design complexity, and prototype purpose. Common methods include:
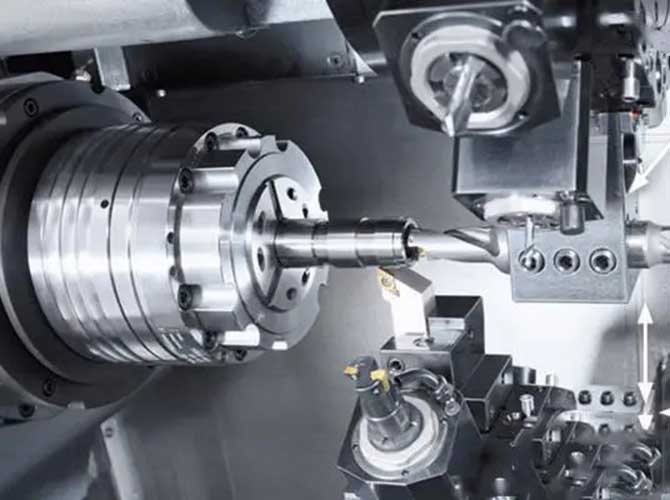
- تصنيع CNC: Uses computer-controlled machines to cut, drill, and shape materials with high precision. Ideal for metal and plastic prototypes with complex geometries.
- 3د الطباعة: Builds the prototype layer by layer using materials like PLA or ABS. Great for complex designs and quick turnaround times.
- Laser Cutting: Uses a high-powered laser to cut materials like wood, البلاستيك, or metal with precision. Suitable for flat or simple 3D shapes.
- Manual Fabrication: Involves hand tools like saws, تدريبات, and sanders for simple prototypes or when specialized equipment isn’t available.
After individual parts are manufactured, they’re assembled to create the final prototype. This might involve using screws, adhesives, or other fasteners. During assembly, designers often discover issues like parts that don’t fit together properly, which can be addressed before final testing.
خطوة 5: Testing and Acceptance
The final step in prototype making is testing and acceptance. This is where you verify that the prototype meets all design requirements and functions as intended.
Testing can include several types:
- Dimensional Testing: Using tools like calipers, ميكرومتر, or coordinate measuring machines (CMMS) to ensure the prototype matches the design drawings’ dimensions.
- اختبار وظيفي: Testing how well the prototype performs its intended function. على سبيل المثال, a prototype of a new door lock would be tested for ease of use, security, والمتانة.
- Structural Testing: Checking the prototype’s strength and stability, which might involve stress testing or impact testing.
- User Testing: Having potential users interact with the prototype to gather feedback on usability, comfort, والمظهر.
Based on the test results, you might need to make final adjustments to the prototype. Once all issues are resolved and the prototype meets all requirements, it’s accepted, and you can move forward with the next stages of product development, whether that’s creating a more refined prototype or proceeding to mass production.
Key Considerations in Prototype Making
While following the step-by-step process is important, there are several key considerations that can make or break your prototype making project.
أولاً, define your goals clearly. What do you want to achieve with the prototype? Are you testing functionality, مظهر, or both? Having clear goals helps you choose the right materials, manufacturing methods, and testing criteria.
Second, balance quality and cost. Prototype making can range from inexpensive (using 3D printing or cardboard) to costly (using high-end metals and CNC machining). While it’s important to create a prototype that accurately represents the final product, you don’t want to overspend on features that aren’t necessary for testing.
Third, consider manufacturing scalability. If your goal is to eventually mass-produce the product, your prototype should take into account the limitations and capabilities of your chosen production method. على سبيل المثال, a prototype made with 3D printing might have features that are difficult to replicate with injection molding.
Fourth, involve the right people. Prototype making is a collaborative process. Engineers, المصممون, manufacturers, and end-users all have valuable insights to contribute. By involving them early and often, you ensure that the prototype meets everyone’s needs.
أخيراً, embrace iteration. Very few prototypes are perfect on the first try. Expect to make changes based on testing and feedback. Each iteration brings you closer to a design that works well and meets all requirements.
Prototype Making vs. التصنيع التقليدي: What’s the Difference?
It’s important to understand how prototype making differs from traditional manufacturing, as they serve different purposes and use different approaches.
Traditional manufacturing is focused on producing large quantities of a final product efficiently and cost-effectively. It often involves expensive tooling, قوالب, or dies that are designed for long production runs. The setup time is longer, and making changes to the design is costly once production has started.
Prototype making, على الجانب الآخر, is focused on creating a small number of models to test and refine a design. It uses more flexible manufacturing methods that allow for quick changes and adjustments. While prototype making might be more expensive per unit than traditional manufacturing, it’s much cheaper for small quantities and allows for experimentation.
Another key difference is the level of precision and finish. Traditional manufacturing aims for consistent, high-quality finishes across all units. Prototype making might prioritize functionality over a perfect finish, especially in early stages. على سبيل المثال, an early-stage prototype might have visible tool marks, but that’s acceptable if the goal is just to test how the parts fit together.
Yigu Technology’s View on Prototype Making
Yigu Technology sees prototype making as the backbone of successful product development. It transforms abstract ideas into testable models, uncovering design flaws early and ensuring products meet real-world needs. By bridging digital designs and physical reality, prototype making reduces risks, accelerates innovation, and helps turn creative concepts into market-ready products across industries.
الأسئلة المتداولة (التعليمات)
- How long does prototype making take?
The time depends on design complexity, مادة, and manufacturing method. Simple prototypes can take a few days, while complex ones with multiple parts may take 2 – 4 أسابيع.
- What’s the difference between a prototype and a final product?
A prototype is a test model used to validate design and functionality, often with simpler materials. A final product is mass – produced with optimized materials and finishes for market use.
- Can prototypes be made using the same materials as the final product?
نعم, prototypes can use the same materials as the final product, especially for functional testing. لكن, early – stage prototypes may use cheaper alternatives to save costs.
